メインコンテンツにスキップ

Sony ICF-C1iPMK2 Speaker Replacement

必要な工具と部品

  1. Sony ICF-C1iPMK2 Speaker Replacement, Speaker: 手順 1、 2の画像 1 Sony ICF-C1iPMK2 Speaker Replacement, Speaker: 手順 1、 2の画像 2
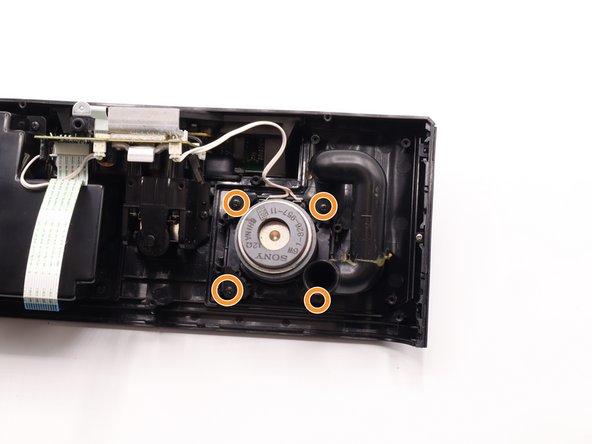
    • Unscrew the 1 cm Phillips #00 screws.

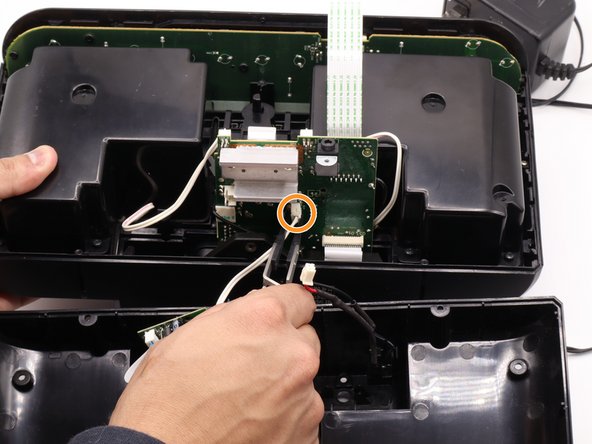
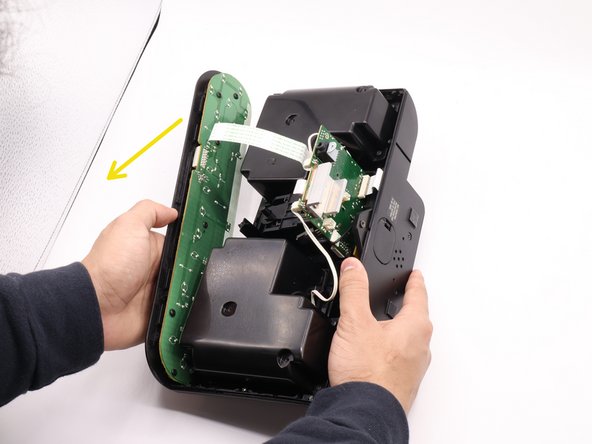
    • Use spudger to loosen the back panel of the device.

  2. Sony ICF-C1iPMK2 Speaker Replacement: 手順 2、 3の画像 1 Sony ICF-C1iPMK2 Speaker Replacement: 手順 2、 3の画像 2 Sony ICF-C1iPMK2 Speaker Replacement: 手順 2、 3の画像 3
    • This step contains ribbon cables. Be careful to not bend or rip these fragile cables, to protect your device.

    • Slowly pull the back panel off until it separated from the main panel.

    • Carefully unplug all of the ribbon cables connecting the back panel to the main panel.

  3. Sony ICF-C1iPMK2 Speaker Replacement: 手順 3、 3の画像 1 Sony ICF-C1iPMK2 Speaker Replacement: 手順 3、 3の画像 2 Sony ICF-C1iPMK2 Speaker Replacement: 手順 3、 3の画像 3
    この手順で使用する道具:
    Tweezers
    $4.99
    購入する
    • Remove the power connector with a pair of ESD safe tweezers.

    • Remove the Aux port connector with a pair of ESD safe tweezers.

    • Slide the button panels out of the chassis.

  4. Sony ICF-C1iPMK2 Speaker Replacement: 手順 4、 3の画像 1 Sony ICF-C1iPMK2 Speaker Replacement: 手順 4、 3の画像 2 Sony ICF-C1iPMK2 Speaker Replacement: 手順 4、 3の画像 3
    • Unscrew the four 1 cm Phillips #00 screws and remove the speaker cover.

    • Unscrew the 1 cm Phillips #00 screws holding the speaker in place.

    • Remove the old speaker and insert the new one.

終わりに

To reassemble your device, follow these instructions in reverse order.

作成者

5人の作成者と共同で作成されました。

KyndleGabel

メンバー登録日: 09/15/23

530 ポイント

3のガイドは作成済み

チーム

University of North Texas, Team 6-5, Kilpatrick Fall 2023 University of North Texas, Team 6-5, Kilpatrick Fall 2023人のメンバー

UNT-KILPATRICK-F23S6G5

5 メンバー

5のガイドは作成済み

0 件のコメント

コメントを追加

統計データ:

過去 24時間: 0

過去 7 日: 0

過去 30 日: 7

今までの合計 75