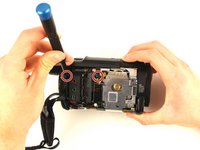
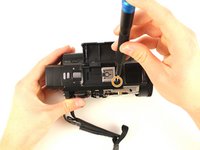
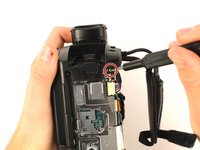
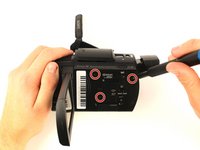
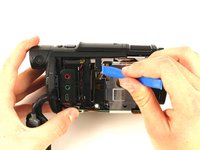
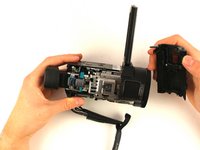
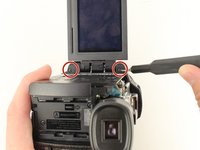
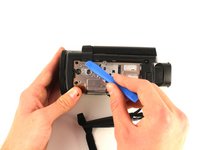
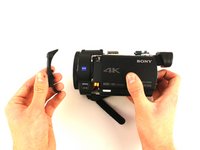
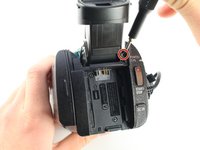
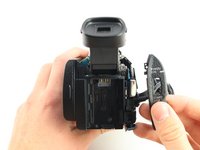
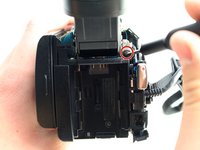
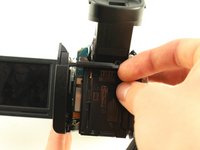
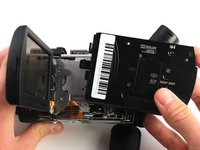
メインコンテンツにスキップ

Sony Handycam FDR-AX33 Panel Replacement

必要な工具と部品

  1. Sony Handycam FDR-AX33 Panel Replacement, Panel: 手順 1、 2の画像 1 Sony Handycam FDR-AX33 Panel Replacement, Panel: 手順 1、 2の画像 2
    • Remove the battery by pushing the latch towards the body of the camera. Push the battery down and pull it out.

    • Remove the six black 4 mm Phillips #00 screws from the bottom panel of the camera.

    • Pull off the bottom panel. It may be difficult, but tugging on it shouldn't cause harm to yourself or the device.

    • Be sure to un-velcro the handle strap.

  2. Sony Handycam FDR-AX33 Panel Replacement: 手順 2、 3の画像 1 Sony Handycam FDR-AX33 Panel Replacement: 手順 2、 3の画像 2 Sony Handycam FDR-AX33 Panel Replacement: 手順 2、 3の画像 3
    • Remove the 3 mm Phillips #00 screw from the bottom of the camera.

    • Remove the 4 mm Phillips #00 screw from the right panel.

    • Pull the right panel off. Again, it might be difficult, but pulling hard shouldn't harm you or the camera.

    • You may have to use the opening tool to remove this panel.

  3. Sony Handycam FDR-AX33 Panel Replacement: 手順 3、 2の画像 1 Sony Handycam FDR-AX33 Panel Replacement: 手順 3、 2の画像 2
    • Remove the two 4 mm Phillips #00 screws from the top right corner of the camera.

    • Remove the 4 mm Phillips #00 screw from in front of the flash mount.

  4. Sony Handycam FDR-AX33 Panel Replacement: 手順 4、 2の画像 1 Sony Handycam FDR-AX33 Panel Replacement: 手順 4、 2の画像 2
    • Remove the 3 mm Phillips #00 screw from below the right side of the battery slot.

    • Remove the black 5 mm Phillips #00 screw from the top of the battery slot.

  5. Sony Handycam FDR-AX33 Panel Replacement: 手順 5、 3の画像 1 Sony Handycam FDR-AX33 Panel Replacement: 手順 5、 3の画像 2 Sony Handycam FDR-AX33 Panel Replacement: 手順 5、 3の画像 3
    • Remove the three 4 mm Phillips #00 screws from the left panel underneath the display screen.

    • You’ll need to extend the eyepiece by pulling it out from the body of the camera.

    • Pull the top panel off of the device with the iFixit opening tool.

  6. Sony Handycam FDR-AX33 Panel Replacement: 手順 6、 3の画像 1 Sony Handycam FDR-AX33 Panel Replacement: 手順 6、 3の画像 2 Sony Handycam FDR-AX33 Panel Replacement: 手順 6、 3の画像 3
    • Remove the top and bottom 4 mm Phillips #00 screws from the display screen hinge.

    • Use the iFixit opening tool to remove the screen hinge.

  7. Sony Handycam FDR-AX33 Panel Replacement: 手順 7、 2の画像 1 Sony Handycam FDR-AX33 Panel Replacement: 手順 7、 2の画像 2
    • Remove the 3 mm Phillips #00 screw from between the eyepiece and the panel directly to the right of the battery slot.

    • Angle the eyepiece up to reach the screw with the screwdriver.

    • Take the panel directly to the right of the battery slot off of the camera.

  8. Sony Handycam FDR-AX33 Panel Replacement: 手順 8、 3の画像 1 Sony Handycam FDR-AX33 Panel Replacement: 手順 8、 3の画像 2 Sony Handycam FDR-AX33 Panel Replacement: 手順 8、 3の画像 3
    • Remove the 4 mm Phillips #00 screw above and to the right of the battery slot.

    • Pry the left panel out at an angle by pushing the plastic slat between the battery slot and the eyepiece.

    • Wiggle the left panel and pull it out gently.

    • The left panel can be hard to remove so make sure to apply a good amount of force, but be cautious to not harm yourself or the device.

終わりに

To reassemble your device, follow these instructions in reverse order.

2 の人々がこのガイドを完成させました。

作成者

3人の作成者と共同で作成されました。

Jacob Andreatta

メンバー登録日: 01/24/19

542 ポイント

3のガイドは作成済み

チーム

Cal Poly, Team S18-G2, White Winter 2019 Cal Poly, Team S18-G2, White Winter 2019人のメンバー

CPSU-WHITE-W19S18G2

4 メンバー

12のガイドは作成済み

コメント 1 件

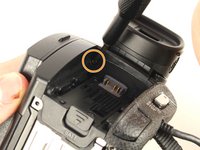
Remember to close the LCD monitor before removing the screen hinge cover in step 6

peter cail - 返信

コメントを追加

統計データ:

過去 24時間: 0

過去 7 日: 5

過去 30 日: 18

今までの合計 967