メインコンテンツにスキップ

Sony Handycam DCR-SR68 SD Card Slot Replacement

必要な工具と部品

  1. Sony Handycam DCR-SR68 SD Card Slot Replacement, HDD: 手順 1、 1の画像 1
    この手順で使用する道具:
    Anti-Static Wrist Strap
    $7.95
    購入する
    • Wash and dry your hands, then put on a properly grounded anti-static wrist strap, before handling internal electronic components. To ground the wrist strap, attach it to the metal chassis of a plugged-in three prong power supply, of a computer for example.

    • Unfasten the hand strap.

    • Remove the battery.

  2. Sony Handycam DCR-SR68 SD Card Slot Replacement: 手順 2、 2の画像 1 Sony Handycam DCR-SR68 SD Card Slot Replacement: 手順 2、 2の画像 2
    • Place device on left side with front lens facing right.

    • Using a JIS size #00 precision Phillips screwdriver, unscrew the left middle 3mm Phillips screw.

    • Open the "DC IN" plastic tab (Second 3mm Phillips screw is revealed).

    • Unscrew the second 3mm Phillips screw.

  3. Sony Handycam DCR-SR68 SD Card Slot Replacement: 手順 3、 1の画像 1
    • Turn device over onto its top with the front lens facing right.

    • Unscrew the top left and top right 3mm Philips screws.

    • The right side case panel is now unfastened (the case panel facing up in the photo).

  4. Sony Handycam DCR-SR68 SD Card Slot Replacement: 手順 4、 2の画像 1 Sony Handycam DCR-SR68 SD Card Slot Replacement: 手順 4、 2の画像 2
    • Remove the right side case panel by pulling up.

    • The Hard Drive (HDD) is now revealed.

  5. Sony Handycam DCR-SR68 SD Card Slot Replacement: 手順 5、 3の画像 1 Sony Handycam DCR-SR68 SD Card Slot Replacement: 手順 5、 3の画像 2 Sony Handycam DCR-SR68 SD Card Slot Replacement: 手順 5、 3の画像 3
    • Using your fingers, lift the HDD from its right end, pivoting on its left end.

    • The HDD ribbon wire is now exposed.

  6. Sony Handycam DCR-SR68 SD Card Slot Replacement: 手順 6、 2の画像 1 Sony Handycam DCR-SR68 SD Card Slot Replacement: 手順 6、 2の画像 2
    • While securely holding the HDD in your left hand, use the soft pad of your right hand fingers to gently pull the ribbon wire out of its socket, toward your right.

    • The HDD is now free from the device.

    • Replace HDD.

  7. Sony Handycam DCR-SR68 SD Card Slot Replacement, SD Card Slot: 手順 7、 1の画像 1
    • Follow steps on HDD removal/Edits are unnecessary for this step.

  8. Sony Handycam DCR-SR68 SD Card Slot Replacement: 手順 8、 2の画像 1 Sony Handycam DCR-SR68 SD Card Slot Replacement: 手順 8、 2の画像 2
    • Use your fingers to remove the A/V tab./Edits are unnecessary for this step.

  9. Sony Handycam DCR-SR68 SD Card Slot Replacement: 手順 9、 3の画像 1 Sony Handycam DCR-SR68 SD Card Slot Replacement: 手順 9、 3の画像 2 Sony Handycam DCR-SR68 SD Card Slot Replacement: 手順 9、 3の画像 3
    • On the bottom of the device, use a JIS size #00 precision Phillips screwdriver to remove the 3mm Philips screws on the right side and middle bottom of the bottom case panel.

    • Remove the bottom case panel.

  10. Sony Handycam DCR-SR68 SD Card Slot Replacement: 手順 10、 2の画像 1 Sony Handycam DCR-SR68 SD Card Slot Replacement: 手順 10、 2の画像 2
    • Lay the device on it's left side, with the front lens facing left (first photo).

    • Remove the three visible 3mm Philips screws with the Phillips precision screwdriver (see 2nd photo).

  11. Sony Handycam DCR-SR68 SD Card Slot Replacement: 手順 11、 2の画像 1 Sony Handycam DCR-SR68 SD Card Slot Replacement: 手順 11、 2の画像 2
    • Hold the device securely in your left hand with the front lens facing right.

    • Remove the two black 3mm Philips screws with the screwdriver.

    • The grey HDD tray, on the right side of the Handycam, is now free.

    • Remove the grey tray by carefully lifting it out.

  12. Sony Handycam DCR-SR68 SD Card Slot Replacement: 手順 12、 2の画像 1 Sony Handycam DCR-SR68 SD Card Slot Replacement: 手順 12、 2の画像 2
    • Using the pointed black spudger, carefully open the little black clasp on the large ribbon wire port.

    • These claps are known to be fragile.

    • On reassembly, this wire and clasp can be troublesome to reinstall.

  13. Sony Handycam DCR-SR68 SD Card Slot Replacement: 手順 13、 3の画像 1 Sony Handycam DCR-SR68 SD Card Slot Replacement: 手順 13、 3の画像 2 Sony Handycam DCR-SR68 SD Card Slot Replacement: 手順 13、 3の画像 3
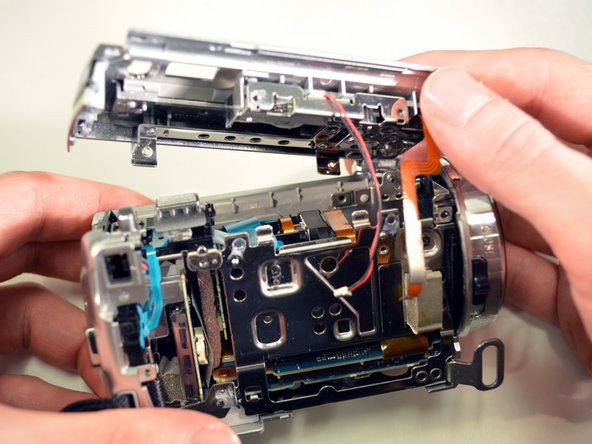
    • Use the blunt tweezers to unplug the red and black wire by pulling out and away./Provide a better close up of the picture.

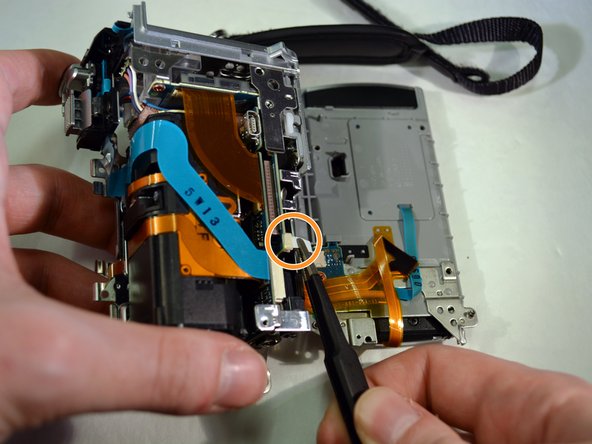
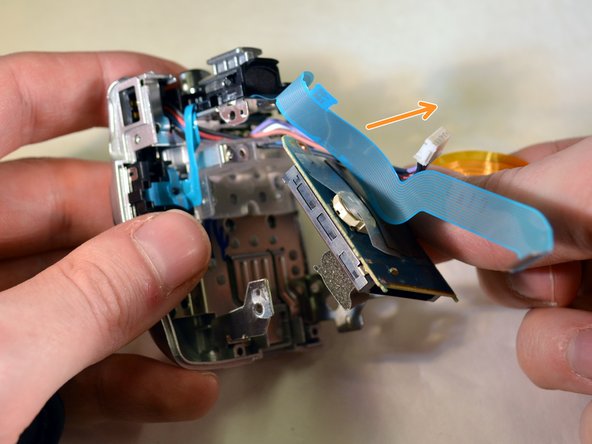
    • Gently unplug the small ribbon wire./Provide a better close up of the picture.

    • Unscrew the top three 3mm Philips screws with the Phillips precision screwdriver. /Unscrew the top three 3mm Phillips screws with the Phillips precision screwdriver./Provide a better close up for this picture.

  14. Sony Handycam DCR-SR68 SD Card Slot Replacement: 手順 14、 1の画像 1
    • On the back of the device, remove the top black 3mm Philips screw with the Phillips precision screwdriver./On the back of the device, remove the top black 3mm Philips screw with the Phillips precision screwdriver.

    • The top of the device is now free./Make this a note and make it a different color from the step above.

  15. Sony Handycam DCR-SR68 SD Card Slot Replacement: 手順 15、 2の画像 1 Sony Handycam DCR-SR68 SD Card Slot Replacement: 手順 15、 2の画像 2
    • Remove the top case panel of the device by lifting up and away./Edits are unnecessary for this step.

    • Set the top case panel aside./Set the device aside.

  16. Sony Handycam DCR-SR68 SD Card Slot Replacement: 手順 16、 2の画像 1 Sony Handycam DCR-SR68 SD Card Slot Replacement: 手順 16、 2の画像 2
    • On the top of the device, unscrew the right 3mm Philips screw with the Phillips precision screwdriver/Get a close up of the screw in this picture.

    • On the left side of the device, unscrew the bottom left 3mm Philips screw wit the screwdriver./Same thing with this picture. A close of the screw would help readers.

  17. Sony Handycam DCR-SR68 SD Card Slot Replacement: 手順 17、 2の画像 1 Sony Handycam DCR-SR68 SD Card Slot Replacement: 手順 17、 2の画像 2
    • Set the device facing forward, with its bottom down.

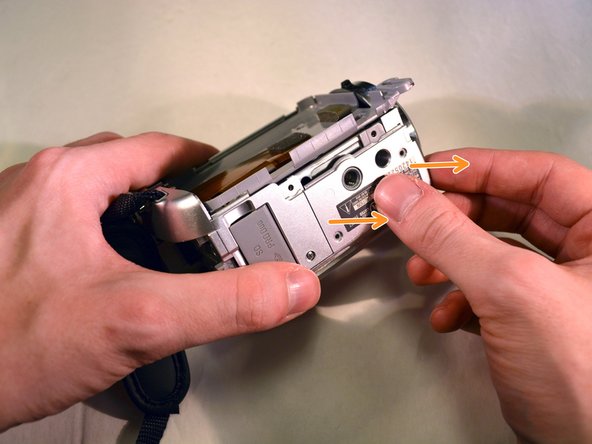
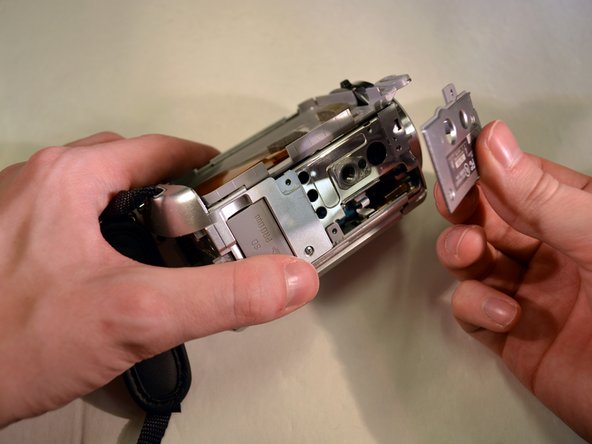
    • While securing the device with your left hand, use gentle rightward pressure with a plastic opening tool to pop off the shutter assembly. To do this, position the plastic opening tool in the slot labeled in photo one. A close up of the shutter assembly in the picture might help also.

  18. Sony Handycam DCR-SR68 SD Card Slot Replacement: 手順 18、 3の画像 1 Sony Handycam DCR-SR68 SD Card Slot Replacement: 手順 18、 3の画像 2 Sony Handycam DCR-SR68 SD Card Slot Replacement: 手順 18、 3の画像 3
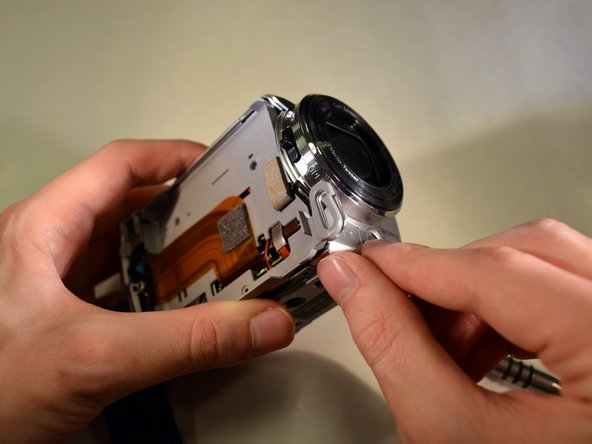
    • On the left side of the device (with the front lens facing left), unscrew the left middle 3mm Philips screw with the screwdriver./A close up of the screw in the picture would be better.

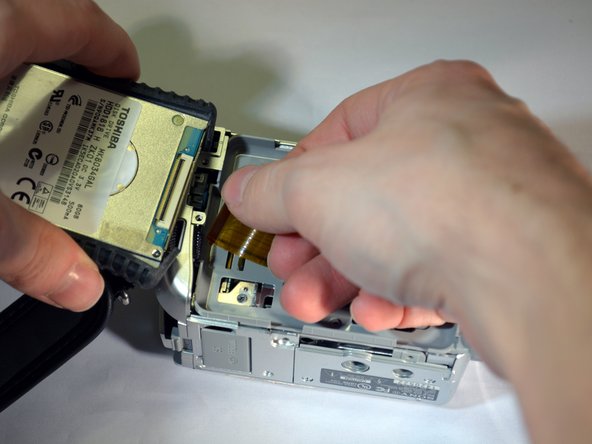
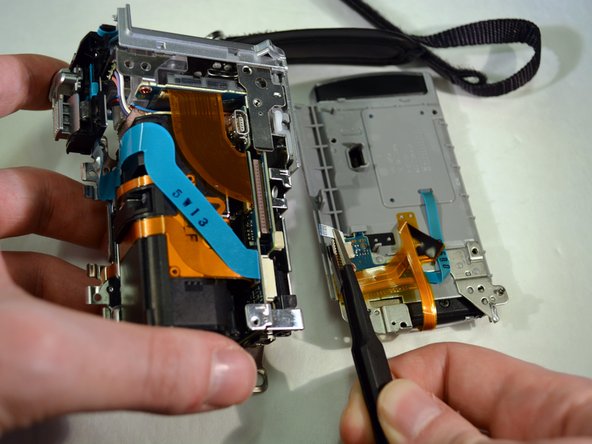
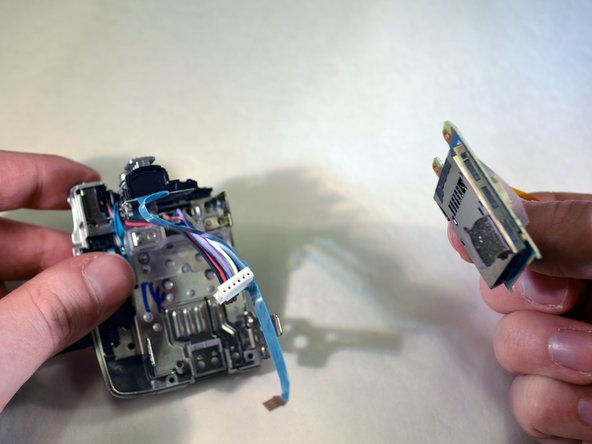
    • Carefully pivot the dismantled piece of the device until the ribbon wires are fully exposed./Carefully pivot the dismantled piece of the device until the ribbon wires are fully exposed.

  19. Sony Handycam DCR-SR68 SD Card Slot Replacement: 手順 19、 3の画像 1 Sony Handycam DCR-SR68 SD Card Slot Replacement: 手順 19、 3の画像 2 Sony Handycam DCR-SR68 SD Card Slot Replacement: 手順 19、 3の画像 3
    • Use the blunt tweezers to unplug the small orange ribbon wire./No edits necessary.

    • Use the same tweezers to unplug the small white ribbon wire./Make a close up of the small white ribbon wire in this picture.

    • The left side of the device is now free./Make this a note/Note: The left side of the device is now free

    • Set the left side of the device in a secure place.

  20. Sony Handycam DCR-SR68 SD Card Slot Replacement: 手順 20、 3の画像 1 Sony Handycam DCR-SR68 SD Card Slot Replacement: 手順 20、 3の画像 2 Sony Handycam DCR-SR68 SD Card Slot Replacement: 手順 20、 3の画像 3
    • Use the blunt tweezers to unplug the blue ribbon wire./No edits necessary.

    • Unplug the orange ribbon wire./no edits necessary.

  21. Sony Handycam DCR-SR68 SD Card Slot Replacement: 手順 21、 1の画像 1
    • Follow steps 1-14 for the Lens replacement./Follow steps 1-14 for the lens replacement.

    • Remove the bottom left 3mm Philips screw./Make a close up of the screw for this picture.

  22. Sony Handycam DCR-SR68 SD Card Slot Replacement: 手順 22、 2の画像 1 Sony Handycam DCR-SR68 SD Card Slot Replacement: 手順 22、 2の画像 2
    • On the bottom of the device, remove the last 3mm Philips screw on the last panel./Make a close up of the screw for this picture.

    • Remove the panel./No edits necessary.

  23. Sony Handycam DCR-SR68 SD Card Slot Replacement: 手順 23、 3の画像 1 Sony Handycam DCR-SR68 SD Card Slot Replacement: 手順 23、 3の画像 2 Sony Handycam DCR-SR68 SD Card Slot Replacement: 手順 23、 3の画像 3
    • Use a pointed metal spudger to pop the plug out of the socket./Make a close up of this plug in this picture.

    • Maintain careful control of the pointed metal spudger. Be aware that the point is sharp and can cause injury.

    • To separate the two pieces of the device, apply force downwards on the right piece to separate them.

  24. Sony Handycam DCR-SR68 SD Card Slot Replacement: 手順 24、 3の画像 1 Sony Handycam DCR-SR68 SD Card Slot Replacement: 手順 24、 3の画像 2 Sony Handycam DCR-SR68 SD Card Slot Replacement: 手順 24、 3の画像 3
    • Unscrew the two brass 3mm Philips screws with the screwdriver. /Make this picture a close up.

    • Carefully remove the SD card slot, once it's unfastened.

    • The SD card slot is now removed as shown in photo three.

終わりに

To reassemble your device, follow these instructions in reverse order in addition to the Lens Replacement Guide.

作成者

9人の作成者と共同で作成されました。

alejandro zuniga

メンバー登録日: 01/06/16

736 ポイント

4のガイドは作成済み

チーム

Eastern Washington University, Team 2-5, Andersen Winter 2016 Eastern Washington University, Team 2-5, Andersen Winter 2016人のメンバー

EWU-ANDERSEN-W16S2G5

5 メンバー

12のガイドは作成済み

コメント 1 件

Hello everyone,

First, sorry for my bad english.

I would like to replace the memory slot in my DCR-SX34 camera because it doesn't recognize any card, even formatted ones, but I can't find it, where to buy it?

Please

thank you

Ricardo Gonçalves - 返信

コメントを追加

統計データ:

過去 24時間: 0

過去 7 日: 3

過去 30 日: 13

今までの合計 1,262