メインコンテンツにスキップ

Sony Handycam DCR-DVD650 LCD Touchscreen Replacement

アーカイブされたガイド
このガイドは将来的な使用のためにのみ保存されてます。ご自身の修理作業には更新バージョンをご利用ください。

必要な工具と部品

  1. Sony Handycam DCR-DVD650 LCD Touchscreen  Replacement, LCD Touchscreen: 手順 1、 2の画像 1 Sony Handycam DCR-DVD650 LCD Touchscreen  Replacement, LCD Touchscreen: 手順 1、 2の画像 2
    • Remove the first screw located on the bottom of the LCD screen by using a cross tip screwdriver.

  2. Sony Handycam DCR-DVD650 LCD Touchscreen  Replacement: 手順 2、 1の画像 1
    • Turn the LCD screen either clockwise or counterclockwise for a better view of the screw.

    • Remove the second screw.

  3. Sony Handycam DCR-DVD650 LCD Touchscreen  Replacement: 手順 3、 2の画像 1 Sony Handycam DCR-DVD650 LCD Touchscreen  Replacement: 手順 3、 2の画像 2
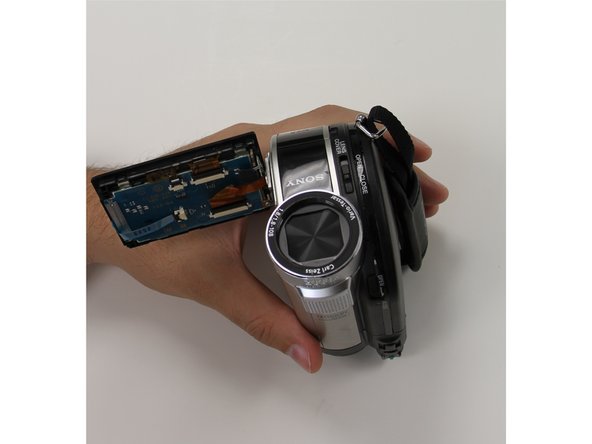
    • Place a plastic opening tool along the outside of the touchscreen.

    • Follow the path to remove the panel.

  4. Sony Handycam DCR-DVD650 LCD Touchscreen  Replacement: 手順 4、 2の画像 1 Sony Handycam DCR-DVD650 LCD Touchscreen  Replacement: 手順 4、 2の画像 2
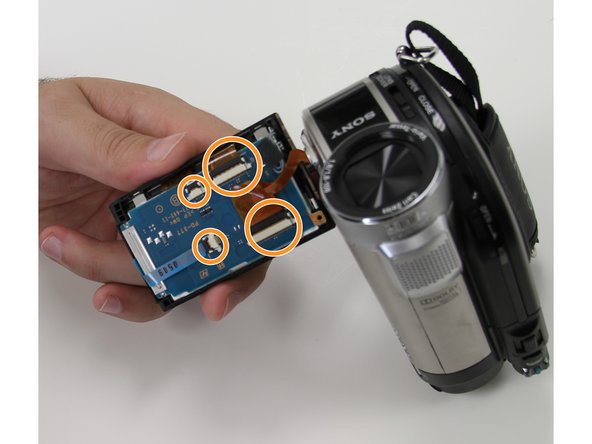
    • Remove each of the ribbon cables off by lifting up on the black tab.

    • Remove all ribbon cables before continuing unto the next step.

  5. Sony Handycam DCR-DVD650 LCD Touchscreen  Replacement: 手順 5、 2の画像 1 Sony Handycam DCR-DVD650 LCD Touchscreen  Replacement: 手順 5、 2の画像 2
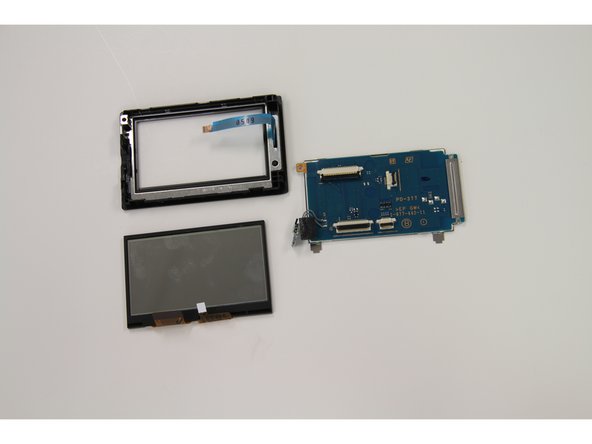
    • Unscrew the final screw located on the top left corner.

    • Remove the screen.

終わりに

To reassemble your device, follow these instructions in reverse order.

ある他の人がこのガイドを完成しました。

作成者

3人の作成者と共同で作成されました。

santos guitron

メンバー登録日: 09/24/15

144 ポイント

1ガイドが承認済み

チーム

Texas Tech, Team 22-1, Rauch Fall 2015 Texas Tech, Team 22-1, Rauch Fall 2015人のメンバー

TTU-RAUCH-F15S22G1

3 メンバー

1のガイドは作成済み

0 件のコメント

コメントを追加

統計データ:

過去 24時間: 0

過去 7 日: 1

過去 30 日: 2

今までの合計 153