メインコンテンツにスキップ

Sony Ericsson xPeria Active Speaker Replacement

必要な工具と部品

  1. Sony Ericsson xPeria Active Speaker Replacement, Remove the back cover.: 手順 1、 3の画像 1 Sony Ericsson xPeria Active Speaker Replacement, Remove the back cover.: 手順 1、 3の画像 2 Sony Ericsson xPeria Active Speaker Replacement, Remove the back cover.: 手順 1、 3の画像 3
    • Open the flaps and remove the back cover using the plastic opening device.

  2. Sony Ericsson xPeria Active Speaker Replacement, Remove inside plastic battery cover.: 手順 2、 2の画像 1 Sony Ericsson xPeria Active Speaker Replacement, Remove inside plastic battery cover.: 手順 2、 2の画像 2
    • Remove the battery shield with the plastic opening device.

  3. Sony Ericsson xPeria Active Speaker Replacement, Remove the battery: 手順 3、 2の画像 1 Sony Ericsson xPeria Active Speaker Replacement, Remove the battery: 手順 3、 2の画像 2
    • Remove the battery.

  4. Sony Ericsson xPeria Active Speaker Replacement, Unfastening The Motherboard Cover: 手順 4、 1の画像 1
    • Unscrew the 5mm screws with the T5 head.

    • Unscrew the 6mm screw with the T6 head.

  5. Sony Ericsson xPeria Active Speaker Replacement, Removing The Motherboard Cover: 手順 5、 2の画像 1 Sony Ericsson xPeria Active Speaker Replacement, Removing The Motherboard Cover: 手順 5、 2の画像 2
    • Remove the black cover with the plastic opening tool.

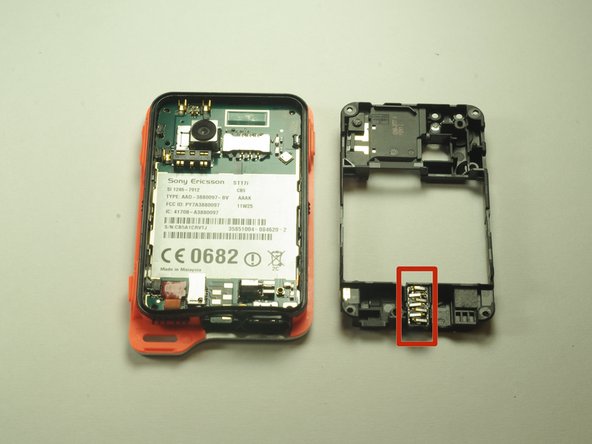
    • Remove the headphone jack from its slot.

  6. Sony Ericsson xPeria Active Speaker Replacement, Speaker: 手順 6、 2の画像 1 Sony Ericsson xPeria Active Speaker Replacement, Speaker: 手順 6、 2の画像 2
    • Carefully pry the power cable away from the motherboard.

  7. Sony Ericsson xPeria Active Speaker Replacement: 手順 7、 1の画像 1
    • Pry the motherboard out of the case.

  8. Sony Ericsson xPeria Active Speaker Replacement: 手順 8、 1の画像 1
    • Remove the power cable from the backside of the motherboard.

  9. Sony Ericsson xPeria Active Speaker Replacement: 手順 9、 1の画像 1
    • The speaker can be seen in the top middle area on the reverse of the screen.

  10. Sony Ericsson xPeria Active Speaker Replacement: 手順 10、 1の画像 1
    • Use the plastic opening tool to carefully pry the speaker away from the phone.

終わりに

To reassemble your device, follow these instructions in reverse order.

2 の人々がこのガイドを完成させました。

作成者

1人の作成者と共同作成されました。

Daniel

メンバー登録日: 10/13/14

437 ポイント

2のガイドは作成済み

チーム

USF Tampa, Team 14-5, Leahy Fall 2014 USF Tampa, Team 14-5, Leahy Fall 2014人のメンバー

USFT-LEAHY-F14S14G5

3 メンバー

5のガイドは作成済み

0 件のコメント

コメントを追加

統計データ:

過去 24時間: 0

過去 7 日: 0

過去 30 日: 1

今までの合計 852