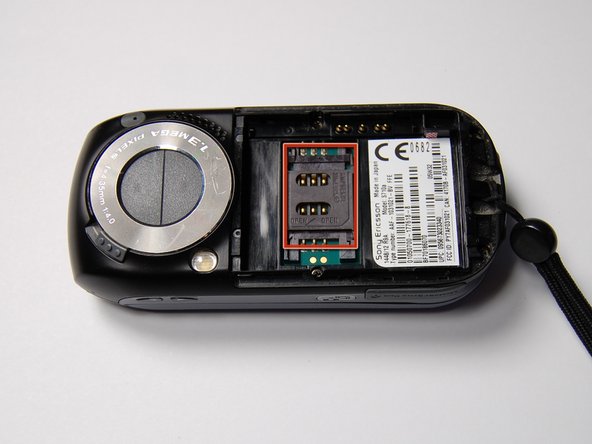
メインコンテンツにスキップ

Sony Ericsson s710a SIM Card Replacement

  1. Sony Ericsson s710a SIM Card Replacement, SIM Card: 手順 1、 1の画像 1
    • Slide the battery cover off by pushing it away from the camera side of the device.

    • This may require a good amount of force.

  2. Sony Ericsson s710a SIM Card Replacement: 手順 2、 1の画像 1
    • Next remove the battery

    • Lift it out of the phone using the tab on the battery (marked in the image)

  3. Sony Ericsson s710a SIM Card Replacement: 手順 3、 1の画像 1
    • The SIM card holder is now exposed (marked in image).

    • This will likely already have an existing SIM card in it if the phone has been previously used.

    • To open this, slide the holder upward (assuming the same orientation as in the image)

  4. Sony Ericsson s710a SIM Card Replacement: 手順 4、 1の画像 1
    • The holder will then hinge open.

    • You are now able to insert a new SIM card.

  5. Sony Ericsson s710a SIM Card Replacement: 手順 5、 1の画像 1
    • Insert the new SIM card in the orientation shown.

    • This is important, as the phone will not work if the metal contacts on the card are not properly aligned with the contacts on the phone.

  6. Sony Ericsson s710a SIM Card Replacement: 手順 6、 1の画像 1
    • Now hinge the SIM card holder down so that it lays flat in the phone.

    • Slide the plastic holder downwards to lock it in place.

    • Now the battery and cover can be put back in place.

終わりに

To reassemble your device, follow these instructions in reverse order.

ある他の人がこのガイドを完成しました。

作成者

2人の作成者と共同で作成されました。

Alexander

メンバー登録日: 10/29/11

75 ポイント

4のガイドは作成済み

チーム

University of Maryland, Team 1-1, Calloway Fall 2011 University of Maryland, Team 1-1, Calloway Fall 2011人のメンバー

UMD-CALLOWAY-F11S1G1

3 メンバー

14のガイドは作成済み

0 件のコメント

コメントを追加

統計データ:

過去 24時間: 0

過去 7 日: 0

過去 30 日: 4

今までの合計 1,835