メインコンテンツにスキップ

このバージョンは誤った内容を含んでいる可能性があります。最新の承認済みスナップショットに切り替えてください。

必要な工具と部品

  1. この手順は未翻訳です。 翻訳を手伝う。

    : 手順 1、 3の画像 1 : 手順 1、 3の画像 2 : 手順 1、 3の画像 3
    • Remove the back cover by pulling it down, and then take out the battery.

    • Using a T6 Torx screwdriver, remove the 4 screws.

    • Keep the phone open with the back cover facing you.

  2. この手順は未翻訳です。 翻訳を手伝う。

    : 手順 2、 1の画像 1
    • Use the plastic opening tool and run it between the case and the body of the device to loosen the keyboard

    • There are 2 clamps that lock the keyboard to the case (1 on each side)

  3. この手順は未翻訳です。 翻訳を手伝う。

    : 手順 3、 1の画像 1
    • Flip the phone over and lift straight up on the key pad to remove it.

    • Be sure to hold the phone flat (parallel to the table) so that no loose parts fall out.

  4. この手順は未翻訳です。 翻訳を手伝う。

    : 手順 4、 2の画像 1 : 手順 4、 2の画像 2
    • Use the opening tool to remove the 2 ribbon wires (boxed in the photo) from the logic board.

    • Gently lift the back of the logic board and then pull outwards. Be careful not to rip the ribbon wire.

  5. この手順は未翻訳です。 翻訳を手伝う。

    : 手順 5、 2の画像 1 : 手順 5、 2の画像 2
    • Remove the black sim card reader and green vibrator before continuing to ensure they do not fall out.

  6. この手順は未翻訳です。 翻訳を手伝う。

    : 手順 6、 2の画像 1 : 手順 6、 2の画像 2
    • Close the phone, flip it over, grab the remaining gray covering of the phone and pull it straight up to remove it.

    • Be careful when pulling upward to ensure that you do not break the piece below it.

    • Once the cover is removed, remove the black piece underneath.

  7. この手順は未翻訳です。 翻訳を手伝う。

    : 手順 7、 2の画像 1 : 手順 7、 2の画像 2
    • Remove the face of the phone by sliding it down.

    • Unscrew the 4 screws connecting the screen to the base using a T6 Torx Screwdriver.

  8. この手順は未翻訳です。 翻訳を手伝う。

    : 手順 8、 2の画像 1 : 手順 8、 2の画像 2
    • Use the opening tool to pry up the edge of the remaining silver hinge cover. Once it is loose, pull it off the rest of the way

  9. この手順は未翻訳です。 翻訳を手伝う。

    : 手順 9、 2の画像 1 : 手順 9、 2の画像 2
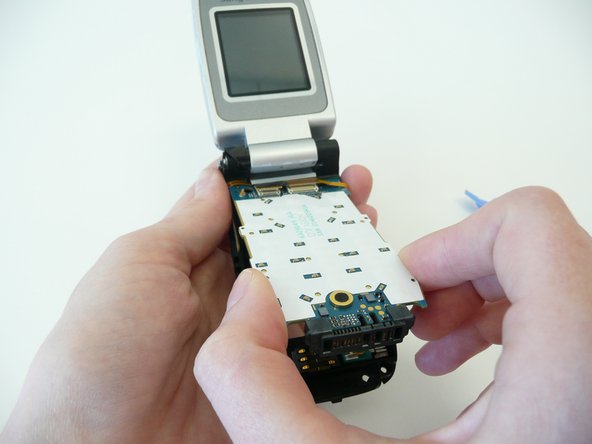
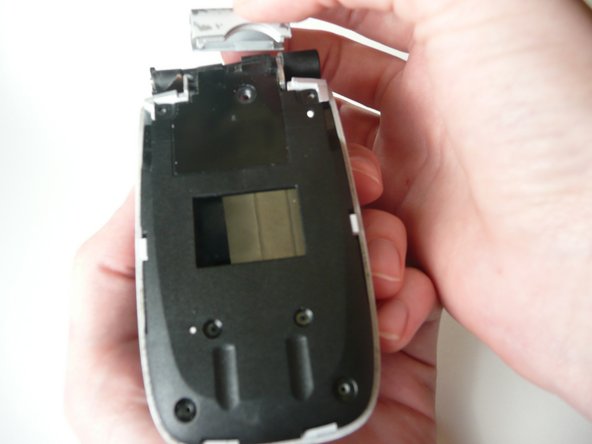
    • To remove the plastic cover on the screen, run the opening tool along the sides between the cover and the body of the phone (like you did for the keyboard) and gently pry upward until it is loose.

    • Like the keyboard there is one clamp on each side.

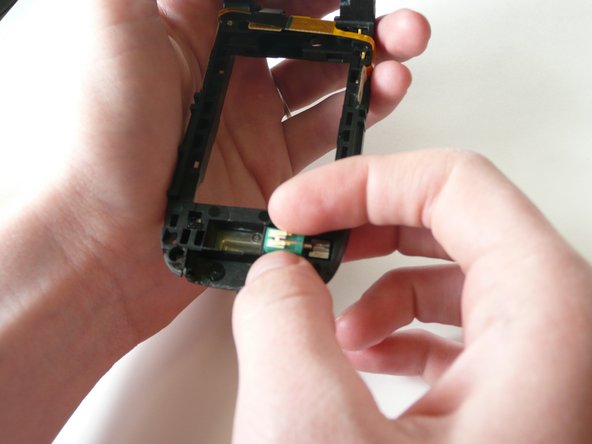
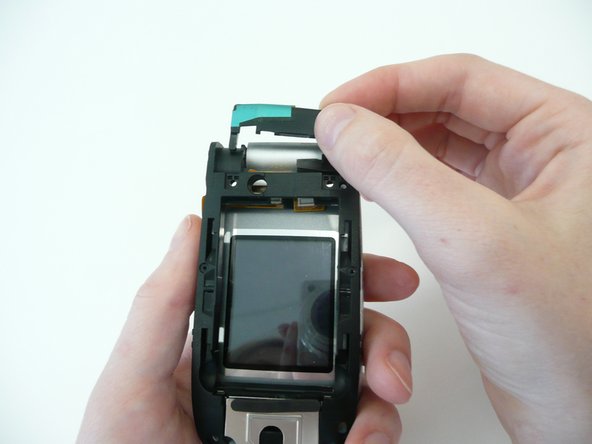
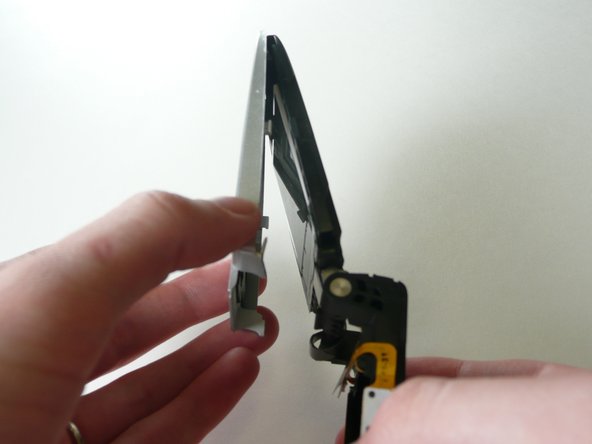
    • Grab the cover at the bottom of the screen (near the hinge) and pull outward while leaving the top (near the speaker) connected.

  10. この手順は未翻訳です。 翻訳を手伝う。

    : 手順 10、 1の画像 1
    • Remove the tape on the bottom of the screen so that the screen will be able to come out.

    • There is a finger notch on the top of the screen, gently pull out halfway.

    • Caution: the back of the screen is connected to the base of the phone. So do not pull out or the connection will be broken.

  11. この手順は未翻訳です。 翻訳を手伝う。

    : 手順 11、 1の画像 1
    • Use the opening device to remove the ribbon wire where it connects to the screen.

ゴール

作成者

8人の作成者と共同で作成されました。

Morgan

メンバー登録日: 04/16/10

13 ポイント

1ガイドが承認済み

チーム

Cal Poly, Team 7-12, Maness Spring 2010 Cal Poly, Team 7-12, Maness Spring 2010人のメンバー

CPSU-MANESS-S10S7G12

4 メンバー

10のガイドは作成済み

0 件のコメント

コメントを追加

統計データ:

過去 24時間: 1

過去 7 日: 10

過去 30 日: 12

今までの合計 2,000