メインコンテンツにスキップ

Sony Ericsson Xperia Pro MK16A Camera Replacement

必要な工具と部品

  1. Sony Ericsson Xperia Pro MK16A Camera Replacement, Taking the Back Off: 手順 1、 3の画像 1 Sony Ericsson Xperia Pro MK16A Camera Replacement, Taking the Back Off: 手順 1、 3の画像 2 Sony Ericsson Xperia Pro MK16A Camera Replacement, Taking the Back Off: 手順 1、 3の画像 3
    • Use a plastic opening tool to get the back cover off your phone.

    • The plastic opener will work on any side, but be careful and pry gently.

  2. Sony Ericsson Xperia Pro MK16A Camera Replacement, Removing the Battery: 手順 2、 1の画像 1
    • Locate the battery in your phone.

    • Find the divot below the battery.

    • Use your thumb to lift the battery out of the phone.

  3. Sony Ericsson Xperia Pro MK16A Camera Replacement, Remove Screws: 手順 3、 3の画像 1 Sony Ericsson Xperia Pro MK16A Camera Replacement, Remove Screws: 手順 3、 3の画像 2 Sony Ericsson Xperia Pro MK16A Camera Replacement, Remove Screws: 手順 3、 3の画像 3
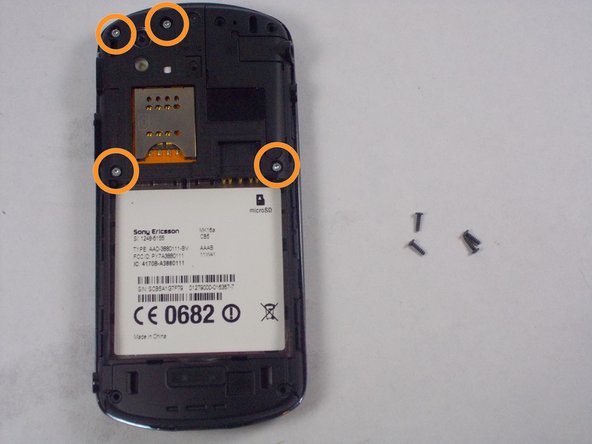
    • Remove the 4 black screws with the Phillips screwdriver.

    • Remove the 4 silver screws with the Torx screwdriver.

  4. Sony Ericsson Xperia Pro MK16A Camera Replacement, Remove Back Case: 手順 4、 1の画像 1
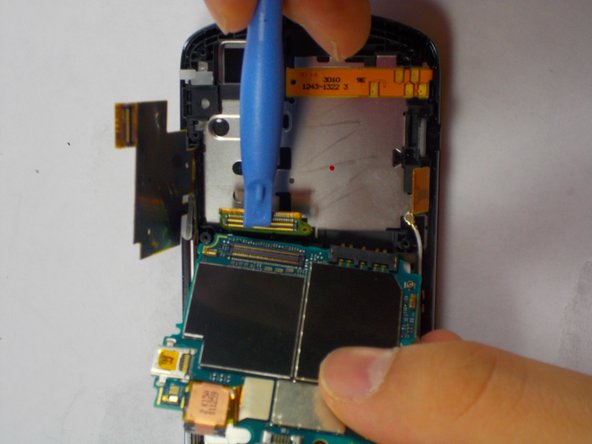
    • Insert the plastic opening tool in between the two halves of the case. Pry around the phone to detach the back case.

  5. Sony Ericsson Xperia Pro MK16A Camera Replacement, Access the Logic Board: 手順 5、 3の画像 1 Sony Ericsson Xperia Pro MK16A Camera Replacement, Access the Logic Board: 手順 5、 3の画像 2 Sony Ericsson Xperia Pro MK16A Camera Replacement, Access the Logic Board: 手順 5、 3の画像 3
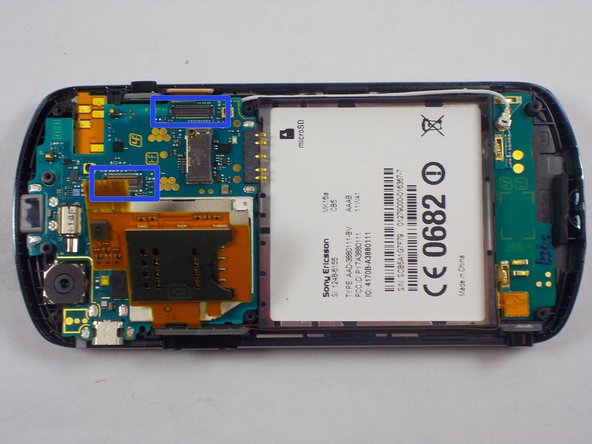
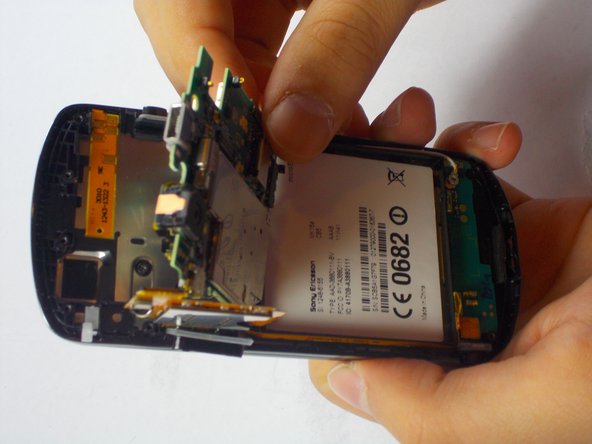
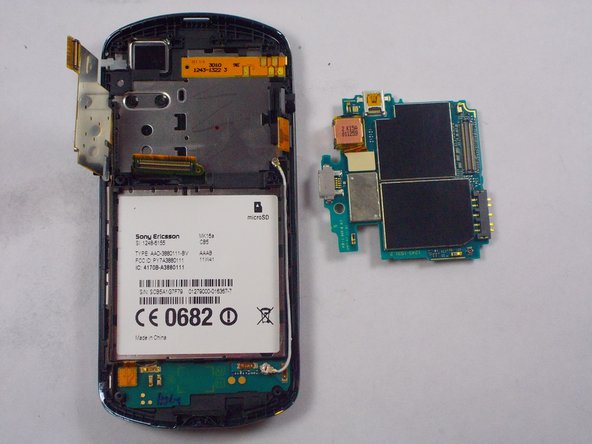
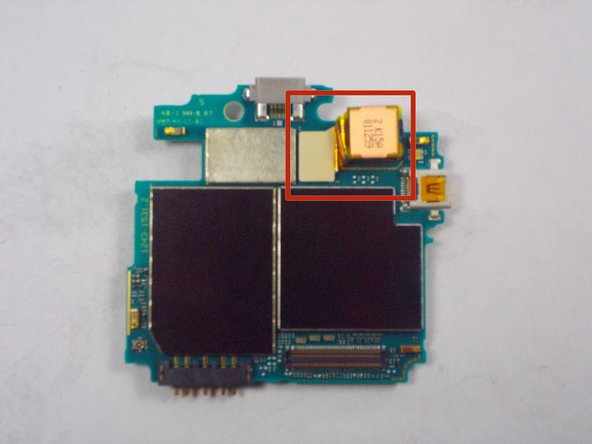
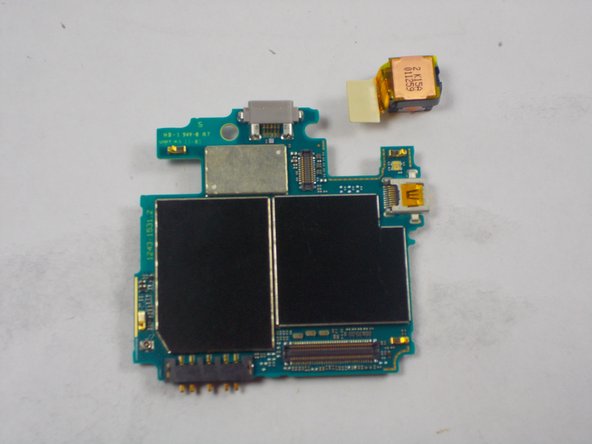
    • Remove the last screw that is connecting the logic board using the Phillips screwdriver.

    • Undo the two ribbons.

  6. Sony Ericsson Xperia Pro MK16A Camera Replacement, Remove the Logic Board: 手順 6、 3の画像 1 Sony Ericsson Xperia Pro MK16A Camera Replacement, Remove the Logic Board: 手順 6、 3の画像 2 Sony Ericsson Xperia Pro MK16A Camera Replacement, Remove the Logic Board: 手順 6、 3の画像 3
    • Undo that last connector.

  7. Sony Ericsson Xperia Pro MK16A Camera Replacement, Remove Camera: 手順 7、 2の画像 1 Sony Ericsson Xperia Pro MK16A Camera Replacement, Remove Camera: 手順 7、 2の画像 2
    • Lift the camera off of its connector on the logic board.

終わりに

To reassemble your device, follow these instructions in reverse order.

2 の人々がこのガイドを完成させました。

作成者

2人の作成者と共同で作成されました。

Sean Gallagher

メンバー登録日: 10/16/14

66 ポイント

1ガイドが承認済み

チーム

UMass Dartmouth, Team 6-5, Vijaybhaskar Fall 2014 UMass Dartmouth, Team 6-5, Vijaybhaskar Fall 2014人のメンバー

UMASSD-VIJAYBHASKAR-F14S6G5

3 メンバー

4のガイドは作成済み

コメント 1 件

Hi,

my Sony Ericsson Xperia Pro MK16i fell onto the stone floor and now the auto focus of the camera does not work anymore. It takes photos, but they are mostly blurred. Do you know if changing the camera part would fix this problem or is the auto focus function set in some other part than the camera itself? Thank you.

Andrea - 返信

コメントを追加

統計データ:

過去 24時間: 0

過去 7 日: 0

過去 30 日: 0

今までの合計 945