メインコンテンツにスキップ

Sony Ericsson W200i LCD Screen Replacement

必要な工具と部品

  1. Sony Ericsson W200i LCD Screen Replacement, Disassembling Sony Ericsson W200i Battery: 手順 1、 2の画像 1 Sony Ericsson W200i LCD Screen Replacement, Disassembling Sony Ericsson W200i Battery: 手順 1、 2の画像 2
    • Slide the battery cover up and off the phone.

  2. Sony Ericsson W200i LCD Screen Replacement: 手順 2、 2の画像 1 Sony Ericsson W200i LCD Screen Replacement: 手順 2、 2の画像 2
    • Pop the battery out of its slot by lifting it up.

  3. Sony Ericsson W200i LCD Screen Replacement, Front Case: 手順 3、 3の画像 1 Sony Ericsson W200i LCD Screen Replacement, Front Case: 手順 3、 3の画像 2 Sony Ericsson W200i LCD Screen Replacement, Front Case: 手順 3、 3の画像 3
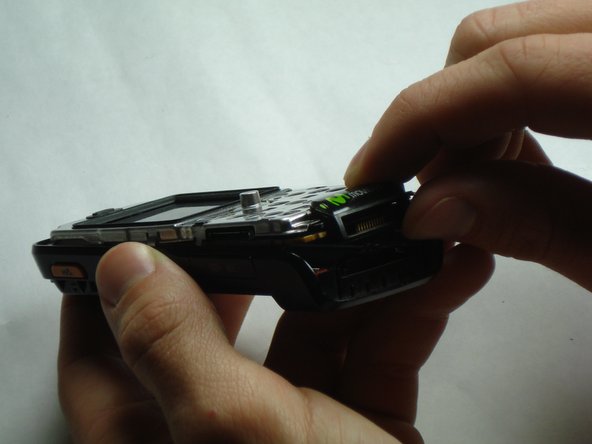
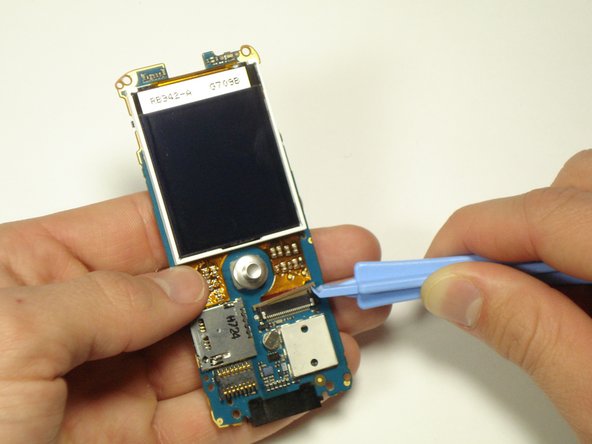
    • Insert the plastic opening tool in between the front case and the back case.

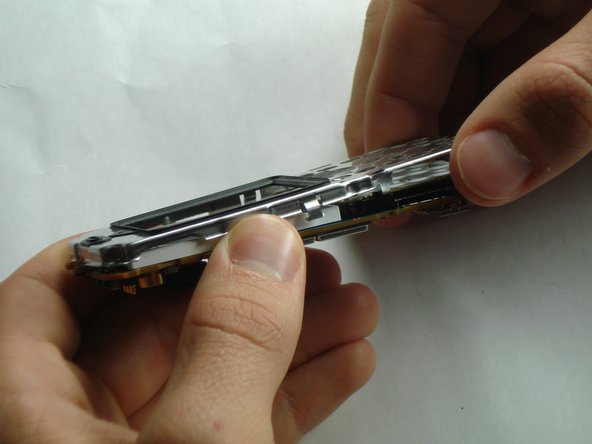
    • Apply downward pressure to make the case lift upwards, thus popping the front case off.

    • Use caution when removing the front case. It may seem stuck but just ease it out.

  4. Sony Ericsson W200i LCD Screen Replacement, Core: 手順 4、 2の画像 1 Sony Ericsson W200i LCD Screen Replacement, Core: 手順 4、 2の画像 2
    • Remove the 4 screws in the corners of the front of the phone using a T6 screwdriver.

    • Note that the top 2 screws are silver and the bottom 2 screws are black.

  5. Sony Ericsson W200i LCD Screen Replacement: 手順 5、 3の画像 1 Sony Ericsson W200i LCD Screen Replacement: 手順 5、 3の画像 2 Sony Ericsson W200i LCD Screen Replacement: 手順 5、 3の画像 3
    • There is a black tab in the top left corner holding the core in place.

    • Remove the core by pulling straight up to prevent breaking the tab.

  6. Sony Ericsson W200i LCD Screen Replacement, LCD Screen: 手順 6、 3の画像 1 Sony Ericsson W200i LCD Screen Replacement, LCD Screen: 手順 6、 3の画像 2 Sony Ericsson W200i LCD Screen Replacement, LCD Screen: 手順 6、 3の画像 3
    • Undo the metal clip on each side of the core using the plastic opening tool.

    • Do not bend clips past 2mm or they could break.

  7. Sony Ericsson W200i LCD Screen Replacement: 手順 7、 3の画像 1 Sony Ericsson W200i LCD Screen Replacement: 手順 7、 3の画像 2 Sony Ericsson W200i LCD Screen Replacement: 手順 7、 3の画像 3
    • Gently pull the white keyboard and charging port away from the motherboard and off the phone.

  8. Sony Ericsson W200i LCD Screen Replacement: 手順 8、 3の画像 1 Sony Ericsson W200i LCD Screen Replacement: 手順 8、 3の画像 2 Sony Ericsson W200i LCD Screen Replacement: 手順 8、 3の画像 3
    • Undo the grey clip that holds the LCD ribbon in place by loosening one side of the clip with the plastic opening tool, then gently separate the other side of the clip from the holder.

    • The copper end of the ribbon should slide out of the housing as you pull the LCD up and away from the motherboard.

    • Using too much force may bend the copper ribbon.

終わりに

To reassemble your device, follow these instructions in reverse order.

2 の人々がこのガイドを完成させました。

作成者

6人の作成者と共同で作成されました。

Austin Cade

メンバー登録日: 01/11/11

198 ポイント

1ガイドが承認済み

チーム

Cal Poly, Team 14-10, Forte Winter 2011 Cal Poly, Team 14-10, Forte Winter 2011人のメンバー

CPSU-FORTE-W11S14G10

5 メンバー

16のガイドは作成済み

0 件のコメント

コメントを追加

統計データ:

過去 24時間: 0

過去 7 日: 2

過去 30 日: 4

今までの合計 8,113