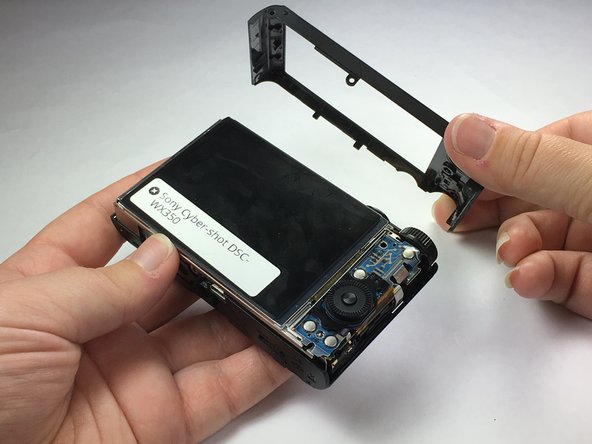
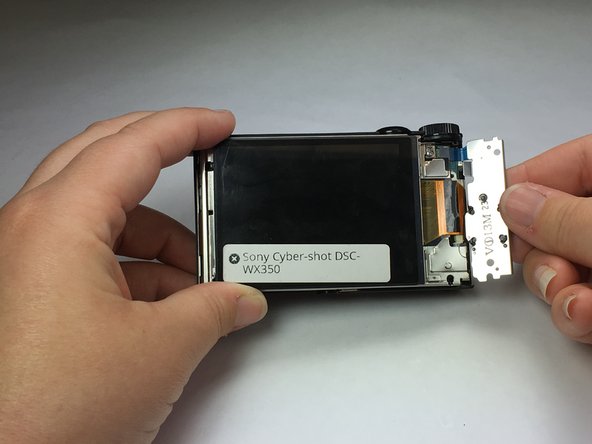
メインコンテンツにスキップ

Sony Cyber-shot DSC-WX350 Control Wheel Replacement

必要な工具と部品

  1. Sony Cyber-shot DSC-WX350 Control Wheel Replacement, Control Wheel: 手順 1、 3の画像 1 Sony Cyber-shot DSC-WX350 Control Wheel Replacement, Control Wheel: 手順 1、 3の画像 2 Sony Cyber-shot DSC-WX350 Control Wheel Replacement, Control Wheel: 手順 1、 3の画像 3
    • Begin with the battery cover closed.

    • Remove 6 black Phillips 4 mm screws using the Ph000 head screwdriver tip from the bottom covering.

  2. Sony Cyber-shot DSC-WX350 Control Wheel Replacement: 手順 2、 2の画像 1 Sony Cyber-shot DSC-WX350 Control Wheel Replacement: 手順 2、 2の画像 2
    • Using the plastic opening tool, carefully insert it between the camera cover and the bottom cover. Pull it apart.

    • Using a plastic tool will prevent the device from being permanently damaged. Avoid using metal tools for this device.

    • The bottom covering is attached by a hinge. Removing this part will also require a small amount of force to separate.

  3. Sony Cyber-shot DSC-WX350 Control Wheel Replacement: 手順 3、 2の画像 1 Sony Cyber-shot DSC-WX350 Control Wheel Replacement: 手順 3、 2の画像 2
    • Once the part is separated, move it toward the battery slot.

    • Push the piece towards the camera to separate it from the hinge.

    • Do not pull up otherwise you will break the piece off.

  4. Sony Cyber-shot DSC-WX350 Control Wheel Replacement: 手順 4、 1の画像 1
    • Remove 1 black Phillps 4 mm screw using a Ph000 screwdriver tip from under battery cover.

  5. Sony Cyber-shot DSC-WX350 Control Wheel Replacement: 手順 5、 3の画像 1 Sony Cyber-shot DSC-WX350 Control Wheel Replacement: 手順 5、 3の画像 2 Sony Cyber-shot DSC-WX350 Control Wheel Replacement: 手順 5、 3の画像 3
    • Separate the back of the camera frame from the body by taking apart the bottom and the sides of the camera.

    • This will require a little force. You will feel tension and hear clicking noises. That is normal.

  6. Sony Cyber-shot DSC-WX350 Control Wheel Replacement: 手順 6、 2の画像 1 Sony Cyber-shot DSC-WX350 Control Wheel Replacement: 手順 6、 2の画像 2
    • To remove the control wheel from its position, grab the bottom of the part and pivot to the side and away from the camera.

    • After the part is fully away from the camera, move the part downward and out. It should now be fully extended and able to bend at the band that is attached to the body.

  7. Sony Cyber-shot DSC-WX350 Control Wheel Replacement: 手順 7、 2の画像 1 Sony Cyber-shot DSC-WX350 Control Wheel Replacement: 手順 7、 2の画像 2
    • Pull blue band holding the control wheel away from the camera body.

終わりに

To reassemble your device, follow these instructions in reverse order.

ある他の人がこのガイドを完成しました。

作成者

2人の作成者と共同で作成されました。

Jenna Newman

メンバー登録日: 10/05/16

34 ポイント

1ガイドが承認済み

チーム

USF Tampa, Team 1-2, Lacy Fall 2016 USF Tampa, Team 1-2, Lacy Fall 2016人のメンバー

USFT-LACY-F16S1G2

5 メンバー

3のガイドは作成済み

0 件のコメント

コメントを追加

統計データ:

過去 24時間: 2

過去 7 日: 3

過去 30 日: 26

今までの合計 1,870