メインコンテンツにスキップ

Sony Cyber-shot DSC-W730 Mother Board Replacement

必要な工具と部品

  1. Sony Cyber-shot DSC-W730 Mother Board Replacement, Removing the Case: 手順 1、 3の画像 1 Sony Cyber-shot DSC-W730 Mother Board Replacement, Removing the Case: 手順 1、 3の画像 2 Sony Cyber-shot DSC-W730 Mother Board Replacement, Removing the Case: 手順 1、 3の画像 3
    • Open the battery/memory card door and remove the 6 screws (.35cm) with a Philips 000 screwdriver. There will be two screws on the left and right sides, and two on the bottom.

  2. Sony Cyber-shot DSC-W730 Mother Board Replacement: 手順 2、 3の画像 1 Sony Cyber-shot DSC-W730 Mother Board Replacement: 手順 2、 3の画像 2 Sony Cyber-shot DSC-W730 Mother Board Replacement: 手順 2、 3の画像 3
    • Take off the front part of the case with a plastic opening tool.

  3. Sony Cyber-shot DSC-W730 Mother Board Replacement: 手順 3、 2の画像 1 Sony Cyber-shot DSC-W730 Mother Board Replacement: 手順 3、 2の画像 2
    • Pull off the two silver side pieces on the left and right sides.

  4. Sony Cyber-shot DSC-W730 Mother Board Replacement: 手順 4、 2の画像 1 Sony Cyber-shot DSC-W730 Mother Board Replacement: 手順 4、 2の画像 2
    • Remove the main back piece. It should easily lift off.

  5. Sony Cyber-shot DSC-W730 Mother Board Replacement: 手順 5、 3の画像 1 Sony Cyber-shot DSC-W730 Mother Board Replacement: 手順 5、 3の画像 2 Sony Cyber-shot DSC-W730 Mother Board Replacement: 手順 5、 3の画像 3
    • Unscrew the .45cm screw located on the upper right corner on the back of the camera. Once the screw is off, use the spudger and unclip the piece holding the top down on the upper left on the front of the camera. It should lift off with ease.

  6. Sony Cyber-shot DSC-W730 Mother Board Replacement, LCD Control Board: 手順 6、 2の画像 1 Sony Cyber-shot DSC-W730 Mother Board Replacement, LCD Control Board: 手順 6、 2の画像 2
    • Flip over the control board then use tweezers to pull out the ribbon connecting the circuit board to the motherboard.

  7. Sony Cyber-shot DSC-W730 Mother Board Replacement, LCD Screen: 手順 7、 2の画像 1 Sony Cyber-shot DSC-W730 Mother Board Replacement, LCD Screen: 手順 7、 2の画像 2
    • Use tweezers to remove the ribbon that is connected from the LCD screen to the camera by pulling the part that is folded under, out.

  8. Sony Cyber-shot DSC-W730 Mother Board Replacement: 手順 8、 2の画像 1 Sony Cyber-shot DSC-W730 Mother Board Replacement: 手順 8、 2の画像 2
    • Slide the right side of the LCD screen clockwise, which will push it off the camera. The rest of the screen should come off with it with ease.

  9. Sony Cyber-shot DSC-W730 Mother Board Replacement, Mother Board: 手順 9、 3の画像 1 Sony Cyber-shot DSC-W730 Mother Board Replacement, Mother Board: 手順 9、 3の画像 2 Sony Cyber-shot DSC-W730 Mother Board Replacement, Mother Board: 手順 9、 3の画像 3
    • After the screen is off, work the spudger under three clips to remove the metal plate.

  10. Sony Cyber-shot DSC-W730 Mother Board Replacement: 手順 10、 2の画像 1 Sony Cyber-shot DSC-W730 Mother Board Replacement: 手順 10、 2の画像 2
    • After the clips are disengaged, lift off the metal cover.

  11. Sony Cyber-shot DSC-W730 Mother Board Replacement: 手順 11、 3の画像 1 Sony Cyber-shot DSC-W730 Mother Board Replacement: 手順 11、 3の画像 2 Sony Cyber-shot DSC-W730 Mother Board Replacement: 手順 11、 3の画像 3
    • Use the spudger and disengage the black plastic clip located on the bottom right of the camera facing the lens.

  12. Sony Cyber-shot DSC-W730 Mother Board Replacement: 手順 12、 3の画像 1 Sony Cyber-shot DSC-W730 Mother Board Replacement: 手順 12、 3の画像 2 Sony Cyber-shot DSC-W730 Mother Board Replacement: 手順 12、 3の画像 3
    • Flip the camera over, facing the bottom of the camera towards you. Then use the spudger to detach the plastic clip on the right, near where the LCD control board was.

  13. Sony Cyber-shot DSC-W730 Mother Board Replacement: 手順 13、 1の画像 1
    • Use the spudger and slide the plastic case over the mini USB port.

  14. Sony Cyber-shot DSC-W730 Mother Board Replacement: 手順 14、 3の画像 1 Sony Cyber-shot DSC-W730 Mother Board Replacement: 手順 14、 3の画像 2 Sony Cyber-shot DSC-W730 Mother Board Replacement: 手順 14、 3の画像 3
    • Use the spudger to disengage the plastic clip on the top of the camera.

  15. Sony Cyber-shot DSC-W730 Mother Board Replacement: 手順 15、 3の画像 1 Sony Cyber-shot DSC-W730 Mother Board Replacement: 手順 15、 3の画像 2 Sony Cyber-shot DSC-W730 Mother Board Replacement: 手順 15、 3の画像 3
    • Use the spudger and seperate each end of the metal piece. Once the speaker is free you can lift off the plastic frame.

  16. Sony Cyber-shot DSC-W730 Mother Board Replacement: 手順 16、 2の画像 1 Sony Cyber-shot DSC-W730 Mother Board Replacement: 手順 16、 2の画像 2
    • Use tweezers to disconnect the ribbon located under the motherboard near the bottom of the camera.

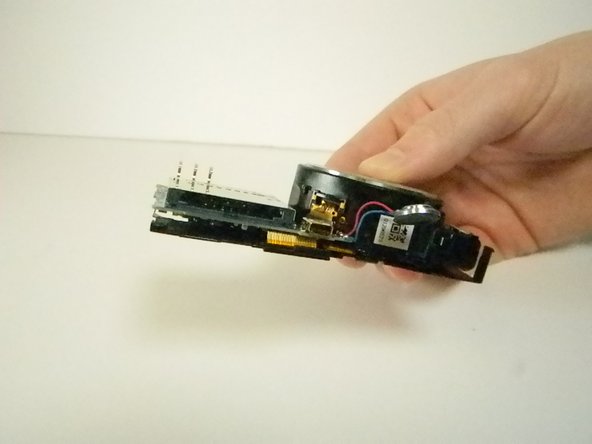
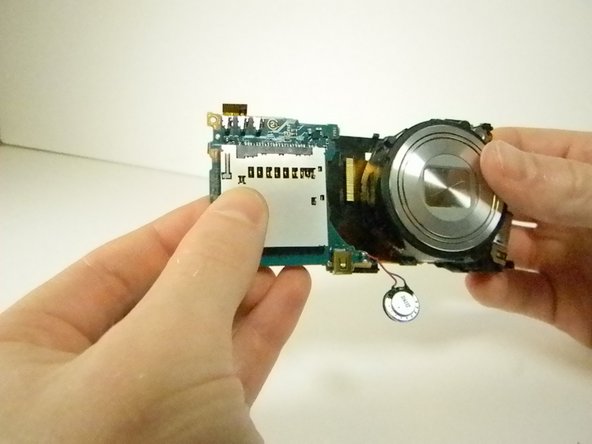
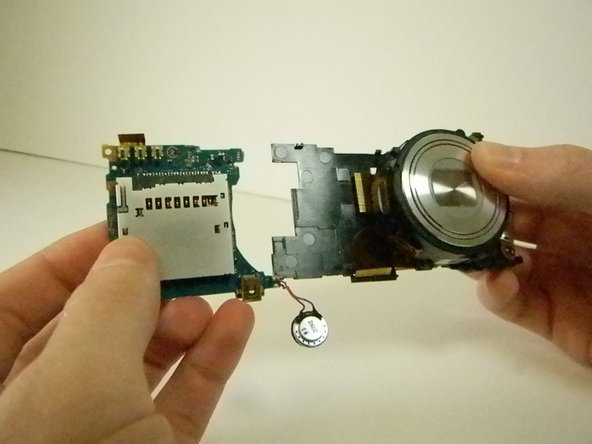
  17. Sony Cyber-shot DSC-W730 Mother Board Replacement: 手順 17、 3の画像 1 Sony Cyber-shot DSC-W730 Mother Board Replacement: 手順 17、 3の画像 2 Sony Cyber-shot DSC-W730 Mother Board Replacement: 手順 17、 3の画像 3
    • Now with one hand located on the plastic skeleton and the other on the motherboard pull the motherboard to the left to disconnect the last ribbon.

終わりに

To reassemble your device, follow these instructions in reverse order.

ある他の人がこのガイドを完成しました。

作成者

2人の作成者と共同で作成されました。

Douglas Howe

メンバー登録日: 01/08/15

510 ポイント

4のガイドは作成済み

チーム

USF Tampa, Team 9-4, Blackwell Winter 2015 USF Tampa, Team 9-4, Blackwell Winter 2015人のメンバー

USFT-BLACKWELL-W15S9G4

3 メンバー

12のガイドは作成済み

0 件のコメント

コメントを追加

統計データ:

過去 24時間: 1

過去 7 日: 8

過去 30 日: 18

今までの合計 1,074