-
-
-
Remove the single visible screw from both sides of the camera.
-
Remove the two screws that are adjacent to the warning label, which is on the underside of the camera.
-
Do NOT remove all four screws from the bottom.
-
-
Gently remove the back cover from the camera.
-
The first time the case is removed, it will be stiff. Be patient and gently rock the cover back and forth until it slides free.
-
-
-
-
Detach the orange cable from the board.
-
Use a thin object, like a paperclip, to gently pry the cable off the connector.
-
-
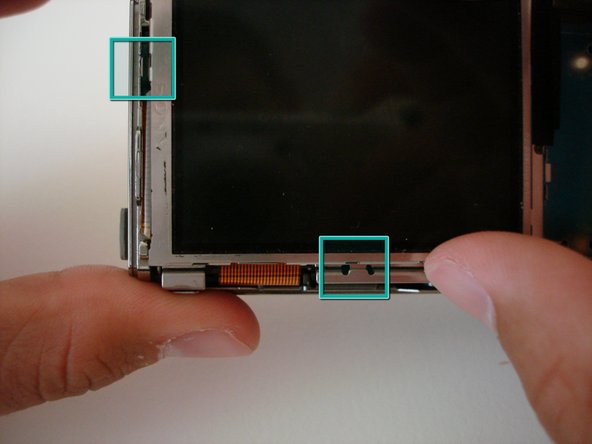
The LCD screen sits in two slots; one on the bottom, and one on the left edge.
-
Slide LCD screen from the two slots.
-
Do not attempt to completely remove the screen, as it is still attached to the camera.
-
-
To remove the LCD screen, detach the orange cable from the board.
-
If needed, replace the LCD screen.
このガイドを埋め込む
サイズを選択し、以下のコードをコピーして、このガイドを小さなウィジェットとしてサイト/フォーラムに埋め込みます。
プレビュー