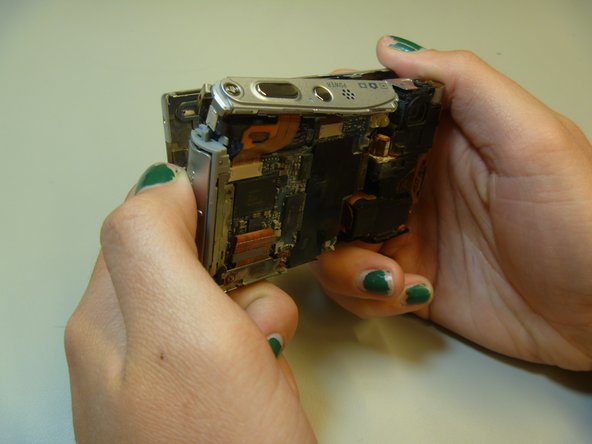
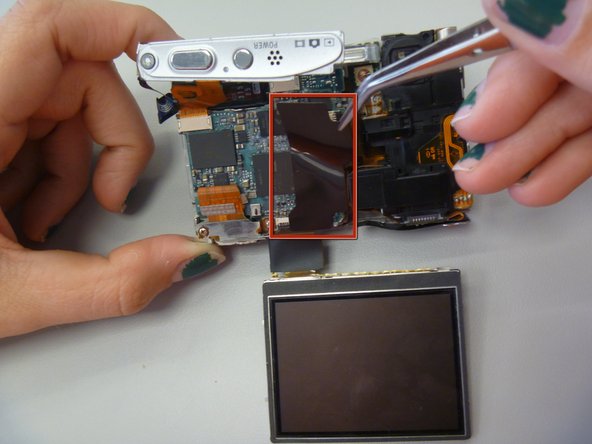
メインコンテンツにスキップ

Sony Cyber-shot DSC-T9 Motherboard Replacement

必要な工具と部品

  1. Sony Cyber-shot DSC-T9 Motherboard Replacement, Battery: 手順 1、 1の画像 1
    • The battery cover is located on the right side of the camera.

    • Slide the cover to expose the battery.

  2. Sony Cyber-shot DSC-T9 Motherboard Replacement: 手順 2、 1の画像 1
    • Ensure that the battery lines up properly with the slot in the camera.

    • Slide battery in.

    • Slide cover closed.

    • Battery not shown

  3. Sony Cyber-shot DSC-T9 Motherboard Replacement, Front Cover: 手順 3、 3の画像 1 Sony Cyber-shot DSC-T9 Motherboard Replacement, Front Cover: 手順 3、 3の画像 2 Sony Cyber-shot DSC-T9 Motherboard Replacement, Front Cover: 手順 3、 3の画像 3
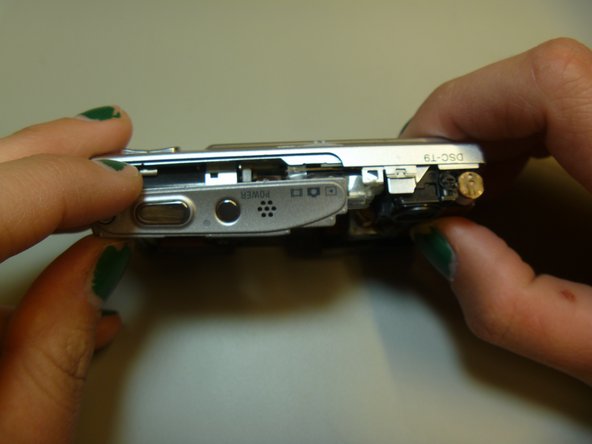
    • Remove screws from outside of camera. There are 6 screws total.

    • 3 screws on underside.

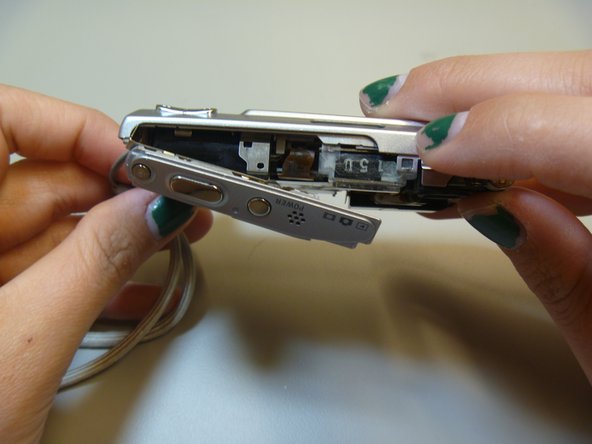
    • 1 screw on right side, near battery cover.

    • 2 screws on left side.

  4. Sony Cyber-shot DSC-T9 Motherboard Replacement: 手順 4、 1の画像 1
    • Use screwdriver to remove screws.

  5. Sony Cyber-shot DSC-T9 Motherboard Replacement: 手順 5、 1の画像 1
    • Gently pull the front cover off of the main camera.

    • All of the inner parts of the camera are attached to the back screen.

  6. Sony Cyber-shot DSC-T9 Motherboard Replacement: 手順 6、 1の画像 1
    • The front cover is now removed from the camera and the internal hardware is now exposed.

  7. Sony Cyber-shot DSC-T9 Motherboard Replacement, Back Cover: 手順 7、 1の画像 1
    • This is the camera without the front cover.

  8. Sony Cyber-shot DSC-T9 Motherboard Replacement: 手順 8、 1の画像 1
    • Remove tripod piece located at the bottom of the camera. This piece should slide out with ease.

  9. Sony Cyber-shot DSC-T9 Motherboard Replacement: 手順 9、 3の画像 1 Sony Cyber-shot DSC-T9 Motherboard Replacement: 手順 9、 3の画像 2 Sony Cyber-shot DSC-T9 Motherboard Replacement: 手順 9、 3の画像 3
    • Slide open the top panel. This is located on the top of the camera, where the power button and shutter button are.

  10. Sony Cyber-shot DSC-T9 Motherboard Replacement: 手順 10、 3の画像 1 Sony Cyber-shot DSC-T9 Motherboard Replacement: 手順 10、 3の画像 2 Sony Cyber-shot DSC-T9 Motherboard Replacement: 手順 10、 3の画像 3
    • Pull apart the inner hardware from the back case by prying on the left side.

  11. Sony Cyber-shot DSC-T9 Motherboard Replacement: 手順 11、 1の画像 1
    • Remove the back cover.

  12. Sony Cyber-shot DSC-T9 Motherboard Replacement: 手順 12、 1の画像 1
    • The back cover is now removed from the internal hardware.

  13. Sony Cyber-shot DSC-T9 Motherboard Replacement, LCD: 手順 13、 1の画像 1
    • Use the spudger to pry the LCD from the camera.

  14. Sony Cyber-shot DSC-T9 Motherboard Replacement: 手順 14、 1の画像 1
    • The LCD is now removed from the camera, although attached by a ribbon at the bottom of the camera.

  15. Sony Cyber-shot DSC-T9 Motherboard Replacement: 手順 15、 2の画像 1 Sony Cyber-shot DSC-T9 Motherboard Replacement: 手順 15、 2の画像 2
    • Flip camera to other side.

    • Use tweezers to peel off black sticker, located in middle of the motherboard.

  16. Sony Cyber-shot DSC-T9 Motherboard Replacement: 手順 16、 2の画像 1 Sony Cyber-shot DSC-T9 Motherboard Replacement: 手順 16、 2の画像 2
    • Use pry stick to pop out LCD connector ribbon, also called the ZIF connector.

  17. Sony Cyber-shot DSC-T9 Motherboard Replacement: 手順 17、 1の画像 1
    • The LCD is now removed from the camera.

  18. Sony Cyber-shot DSC-T9 Motherboard Replacement, CCD Module: 手順 18、 1の画像 1
    • This is the CCD module.

  19. Sony Cyber-shot DSC-T9 Motherboard Replacement: 手順 19、 1の画像 1
    • Use plastic opening tool pop open the two ribbons attaching to the CCD module.

    • These are the two ribbons.

  20. Sony Cyber-shot DSC-T9 Motherboard Replacement: 手順 20、 1の画像 1
    • Remove CCD module.

    • You may have to tug on the ribbons to remove the CCD module.

  21. Sony Cyber-shot DSC-T9 Motherboard Replacement: 手順 21、 1の画像 1
    • The CCD module is now removed from the camera.

  22. Sony Cyber-shot DSC-T9 Motherboard Replacement, AV Port: 手順 22、 2の画像 1 Sony Cyber-shot DSC-T9 Motherboard Replacement, AV Port: 手順 22、 2の画像 2
    • These two screws hold in the AV port.

    • Use Phillips screwdriver to remove screws.

  23. Sony Cyber-shot DSC-T9 Motherboard Replacement: 手順 23、 1の画像 1
    • Remove metal screw plate.

  24. Sony Cyber-shot DSC-T9 Motherboard Replacement: 手順 24、 1の画像 1
    • Use pry stick to pop off ribbon.

  25. Sony Cyber-shot DSC-T9 Motherboard Replacement: 手順 25、 1の画像 1
    • Remove AV port from camera.

  26. Sony Cyber-shot DSC-T9 Motherboard Replacement, Motherboard: 手順 26、 2の画像 1 Sony Cyber-shot DSC-T9 Motherboard Replacement, Motherboard: 手順 26、 2の画像 2
    • The battery cover is located here.

    • Pull away from camera to remove.

  27. Sony Cyber-shot DSC-T9 Motherboard Replacement: 手順 27、 2の画像 1 Sony Cyber-shot DSC-T9 Motherboard Replacement: 手順 27、 2の画像 2
    • Grip on the top and bottom.

    • Pull up and out to remove motherboard and attached parts.

  28. Sony Cyber-shot DSC-T9 Motherboard Replacement: 手順 28、 3の画像 1 Sony Cyber-shot DSC-T9 Motherboard Replacement: 手順 28、 3の画像 2 Sony Cyber-shot DSC-T9 Motherboard Replacement: 手順 28、 3の画像 3
    • Flip motherboard parts to position shown.

    • There are three ribbons still attached to the motherboard.

    • Pull these three ribbons to remove remaining parts from motherboard.

  29. Sony Cyber-shot DSC-T9 Motherboard Replacement: 手順 29、 1の画像 1
    • The motherboard is now removed from the camera.

終わりに

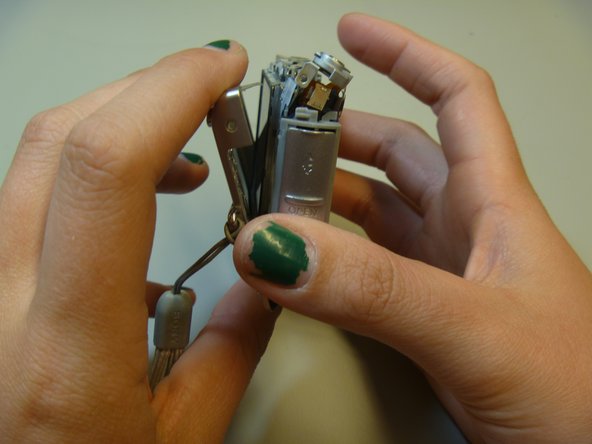
To reassemble your device, follow these instructions in reverse order.

3 の人々がこのガイドを完成させました。

作成者

2人の作成者と共同で作成されました。

Stephannie Allen

メンバー登録日: 03/11/13

255 ポイント

10のガイドは作成済み

チーム

Clemson, Team 13-1, Benson Spring 2013 Clemson, Team 13-1, Benson Spring 2013人のメンバー

CLEM-BENSON-S13S13G1

4 メンバー

20のガイドは作成済み

コメント 1 件

Superb,thank you very much !!!

Vedrasco Victor Vasili - 返信

コメントを追加

統計データ:

過去 24時間: 0

過去 7 日: 1

過去 30 日: 4

今までの合計 638