メインコンテンツにスキップ
リペアコミュニティに参加 - アカウントの作成

Sony Cyber-shot DSC-T1 LCD screen Replacement

必要な工具と部品

    1. Sony Cyber-shot DSC-T1 LCD screen Replacement, Battery: 手順 1、 1の画像 1
      • Locate the cover on the bottom of the camera.

      • Slide the cover towards the back of the camera.

      • Be careful—the battery can slide out on its own.

      FixBotに聞いてみる

      コメントを追加

    2. Sony Cyber-shot DSC-T1 LCD screen Replacement: 手順 2、 1の画像 1
      • Carefully remove the exposed battery.

      • If it is difficult to remove, flip over the camera and the battery will slide out.

      FixBotに聞いてみる

      コメントを追加

    1. Sony Cyber-shot DSC-T1 LCD screen Replacement, Flash: 手順 3、 3の画像 1 Sony Cyber-shot DSC-T1 LCD screen Replacement, Flash: 手順 3、 3の画像 2 Sony Cyber-shot DSC-T1 LCD screen Replacement, Flash: 手順 3、 3の画像 3
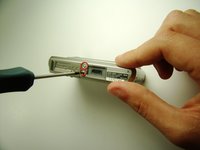
      • Locate and remove the 3mm screws on the top and sides of the camera with the size 00 screwdriver.

      FixBotに聞いてみる

      コメントを追加

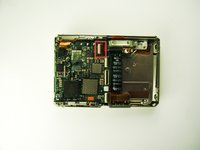
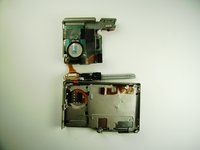
    2. Sony Cyber-shot DSC-T1 LCD screen Replacement: 手順 4、 1の画像 1
      • Pull the two halves of the camera apart.

      • Place the two halves down with the insides facing you.

      FixBotに聞いてみる

      コメントを追加

    3. Sony Cyber-shot DSC-T1 LCD screen Replacement: 手順 5、 1の画像 1
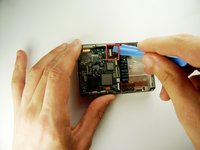
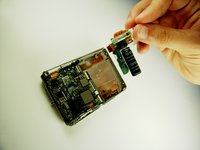
      • Find the two clips holding the motherboard to the black lens box.

      • Slide the plastic opening tool in between the ribbon and the black part of the clip, then flip it. (If difficult, your fingernail can also be used)

      FixBotに聞いてみる

      コメントを追加

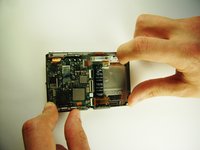
    4. Sony Cyber-shot DSC-T1 LCD screen Replacement: 手順 6、 1の画像 1
      • After releasing the clips, pull out black lens box.

      FixBotに聞いてみる

      コメントを追加

    5. Sony Cyber-shot DSC-T1 LCD screen Replacement: 手順 7、 2の画像 1 Sony Cyber-shot DSC-T1 LCD screen Replacement: 手順 7、 2の画像 2
      • Use the plastic opening tool to flip the clip.

      FixBotに聞いてみる

      コメントを追加

    6. Sony Cyber-shot DSC-T1 LCD screen Replacement: 手順 8、 2の画像 1 Sony Cyber-shot DSC-T1 LCD screen Replacement: 手順 8、 2の画像 2
      • Grab the white part and slide it to the right until it clicks.

      • This may require some force.

      • Pull out the flash.

      FixBotに聞いてみる

      コメントを追加

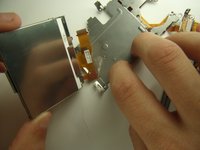
    1. Sony Cyber-shot DSC-T1 LCD screen Replacement, LCD screen: 手順 9、 1の画像 1
      • Use the plastic opening tool to flip the top clip that holds the ribbon to the motherboard unit.

      FixBotに聞いてみる

      コメントを追加

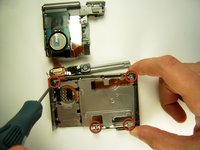
    2. Sony Cyber-shot DSC-T1 LCD screen Replacement: 手順 10、 2の画像 1 Sony Cyber-shot DSC-T1 LCD screen Replacement: 手順 10、 2の画像 2
      • Flip the motherboard unit up to expose the metal plate beneath it.

      • Remove the four 3mm screws shown using the 00 screwdriver.

      FixBotに聞いてみる

      コメントを追加

    3. Sony Cyber-shot DSC-T1 LCD screen Replacement: 手順 11、 1の画像 1
      • Lift and remove the metal plate covering the LCD screen from the camera.

      FixBotに聞いてみる

      コメントを追加

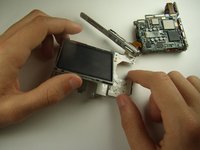
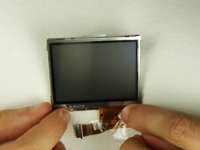
    4. Sony Cyber-shot DSC-T1 LCD screen Replacement: 手順 12、 3の画像 1 Sony Cyber-shot DSC-T1 LCD screen Replacement: 手順 12、 3の画像 2 Sony Cyber-shot DSC-T1 LCD screen Replacement: 手順 12、 3の画像 3
      • Flip the LCD over to the other side of the camera.

      • Peel the tape connecting the LCD to the camera.

      • Remove LCD screen

      FixBotに聞いてみる

      コメントを追加

終わりに

To reassemble your device, follow these instructions in reverse order.

キャンセル: このガイドを終了できませんでした。

2 の人々がこのガイドを完成させました。

作成者

6人の作成者と共同で作成されました。

Paul Elrich

メンバー登録日: 04/12/12

48 ポイント

2のガイドは作成済み

チーム

Cal Poly, Team 7-35, Maness Spring 2012 Cal Poly, Team 7-35, Maness Spring 2012人のメンバー

CPSU-MANESS-S12S7G35

4 メンバー

3のガイドは作成済み

0件のガイドコメント

コメントを追加

統計データ:

過去 24時間: 1

過去 7 日: 24

過去 30 日: 82

今までの合計 4,863