はじめに
If your frontal lens is broken or malfunctioning follow this guide to replace lens. The tools required for this guide are a PH000 screwdriver, plastic opening tool, metal spudgers and a magnetic mat or plastic bag.
必要な工具と部品
-
-
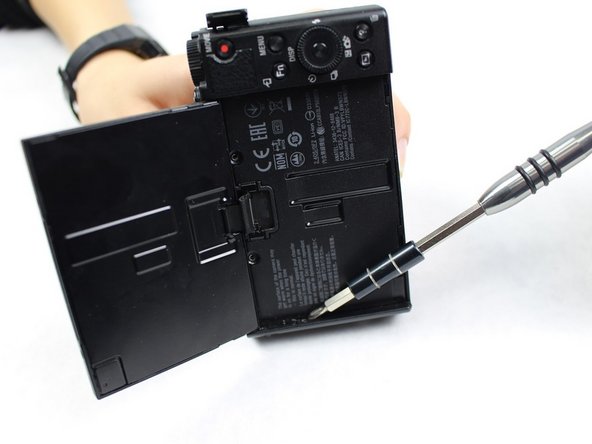
Place the camera upside down and remove the screws located at the bottom of the camera using the PH000 head screwdriver.
-
At the end of this step, there will be a total of five 0.4mm Phillips screws. Place screws on a magnetic mat or plastic bag.
-
Leave the two screws holding the LCD screen in place.
-
-
-
-
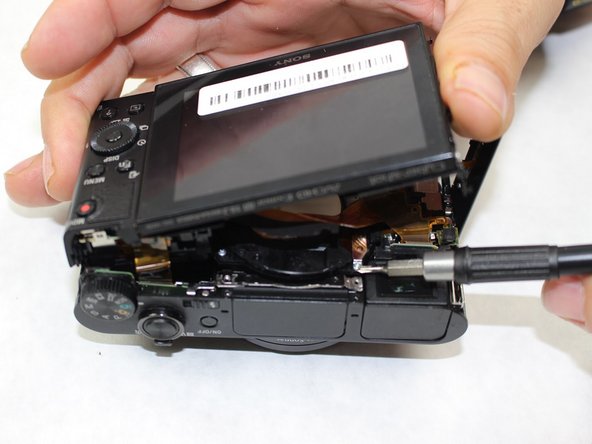
Use the plastic opening tools included in the iFixit tool kit first. If the shell/parts do not detach from each other, use metal spudgers as a last resort to loosen/separate the plastic shell of the camera. Keep in mind that there may be more screws holding parts together. Work delicately and separate sides evenly.
-
-
-
Locate the thin silver plate with a golden plastic ribbon attached. This ribbon holds the lens and the rest of the camera together.
-
Find the two 0.3 mm silver Phillips screws on the silver place. Remove them with a PH000 Phillips head screwdriver. Place the two screws on a magnetic mat or plastic bag.
-


To reassemble your device, follow these instructions in reverse order.
To reassemble your device, follow these instructions in reverse order.
3 の人々がこのガイドを完成させました。
チーム

Sam Houston State, Team S11-G1, Blackburne Fall 2018 Sam Houston State, Team S11-G1, Blackburne Fall 2018人のメンバー
SHSU-BLACKBURNE-F18S11G1
4 メンバー
11のガイドは作成済み
5 件のコメント
Excellent guide, but I could not get plastic part off without likely damage, so had to abandon access to sensor dirt.
Follow-up to my earlier comment under Step 10:
A closer look (zoomed in) at the photo illustration for Step 10 provides a helpful view of the back side of the detached lens assembly, which would normally be positioned directly in front of the camera's sensor.
The interface point between these two component parts (lens assembly / sensor) suggests the possibility that a gap could form between them if/when the camera gets bumped, struck, dropped, etc, and thus provide a potential entry point for random dust / lint to migrate inside, which I suspect is what happened to my own HX80 camera. I bought it 4 years ago (2018) and it's served me well until just a few days ago, when the blur-spot issue arose.
The insight into the camera's internal construction shown in Step 10's illustrative photo gives me hope that the dust spec likely causing the blurred spot on my camera's photos and videos is located between the lens assembly & sensor and can be blown away using compressed air, once I manage to open up the camera.
I’m stuck on step 7. The plastic covers on the left side (viewing the camera as you would hold it to take a picture) and on the bottom are separating from the rest of the camera; the left side cover is attached by a thin wire. But I cannot separate the back with the LCD panel from the front with the lens.
Chris Wood - 返信
It’s unclear whether the battery compartment is supposed to stay with the front of the back of the camera. It appears to stay with the front on the left side (from the photographer’s point of view) and move with the back on the right side.
Chris Wood - 返信
I appreciate that there is a HX80 Lens replacement posting on ifixit.com, but unfortunately, this one is not very useful, and may lull folks into thinking it's enough information to do the job, which it is definitely not. Biggest problem starts in step 8, which omits the fact that you need to detach the display supporting frame with 2 black screws on the edges and one that's hidden underneath the keypad board, after popping out this board. Then, you need to detach the display flex-cable connector, the viewfinder's flex-cable connector, and the lens unit's flex-cable connector. You do not want to remove the screws indicated in step 8, as they are part of the lens unit you're replacing. Removing and attaching the flex-cable connectors involves moving the plastic retainer clip at the back of the fixed connector, using a soft tool like a toothpick. Sorry, I don't have pictures to add. Look at the YouTube video for HX50 lens replacement to get an idea. Oh, and you'll need to carefully move the CCD sensor from the old lens unit to the new one - 3 screws, and yet another flex-cable to detach and re-attach. DON'T touch the CCD side of the unit or the lens on the replacement lens unit!