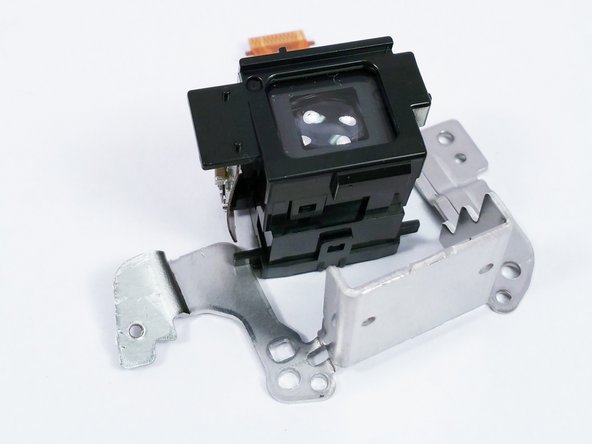
メインコンテンツにスキップ

Sony Cyber-shot DSC-HX300 View Finder Replacement

必要な工具と部品

  1. Sony Cyber-shot DSC-HX300 View Finder Replacement, Battery: 手順 1、 1の画像 1
    • Make sure the camera is powered off

    • Turn the camera upside down. This is a view of the bottom of the camera.

  2. Sony Cyber-shot DSC-HX300 View Finder Replacement: 手順 2、 1の画像 1
    • Push battery cover away from the camera.

  3. Sony Cyber-shot DSC-HX300 View Finder Replacement: 手順 3、 1の画像 1
    • Push the blue tab that secures the battery. The battery will then spring out.

  4. Sony Cyber-shot DSC-HX300 View Finder Replacement: 手順 4、 2の画像 1 Sony Cyber-shot DSC-HX300 View Finder Replacement: 手順 4、 2の画像 2
    • Remove the battery.

  5. Sony Cyber-shot DSC-HX300 View Finder Replacement, View Finder: 手順 5、 3の画像 1 Sony Cyber-shot DSC-HX300 View Finder Replacement, View Finder: 手順 5、 3の画像 2 Sony Cyber-shot DSC-HX300 View Finder Replacement, View Finder: 手順 5、 3の画像 3
    • Make sure to remove the battery before disassembly to prevent electrocution.

    • Remove the 3 (4 cm) Philips head screws holding the plastic camera housing together. They are located on the back of the camera.

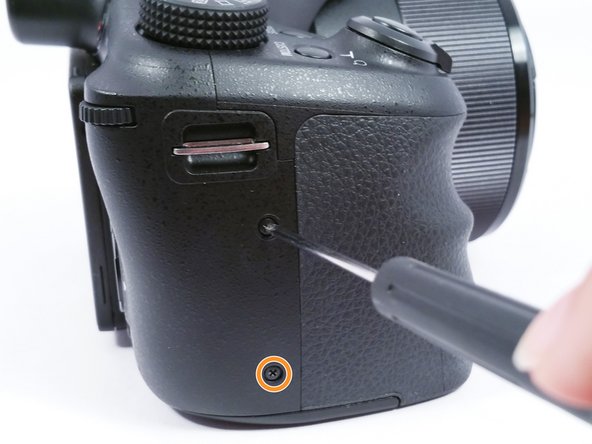
    • Remove the 2 (4 cm) Phillips head screws on the right side of the camera.

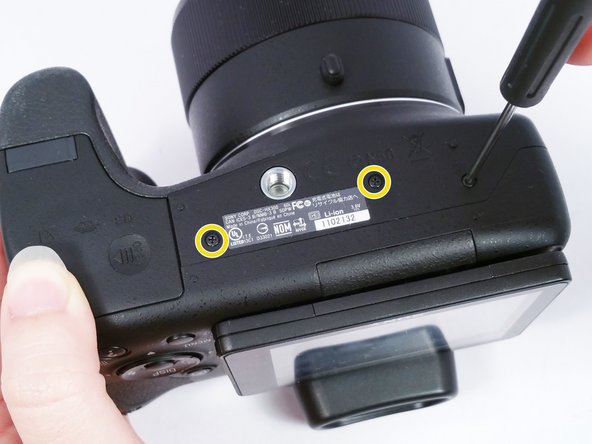
    • Turn the camera upside down and remove the remaining 3 (4 cm) Phillips head screws holding the plastic housing together.

  6. Sony Cyber-shot DSC-HX300 View Finder Replacement: 手順 6、 2の画像 1 Sony Cyber-shot DSC-HX300 View Finder Replacement: 手順 6、 2の画像 2
    • Using a plastic opening tool, separate the plastic camera housing.

  7. Sony Cyber-shot DSC-HX300 View Finder Replacement: 手順 7、 1の画像 1
    • Disconnect the ribbon wire attaching the screen to the camera.

  8. Sony Cyber-shot DSC-HX300 View Finder Replacement: 手順 8、 2の画像 1 Sony Cyber-shot DSC-HX300 View Finder Replacement: 手順 8、 2の画像 2
    • Remove the 1 (2 cm) Phillips head screw

    • Remove the 2 (5 cm) Phillips head screws that mount the View Finder to the camera.

    • Carefully disconnect the ribbon wire that connects the View Finder to the Motherboard.

  9. Sony Cyber-shot DSC-HX300 View Finder Replacement: 手順 9、 2の画像 1 Sony Cyber-shot DSC-HX300 View Finder Replacement: 手順 9、 2の画像 2
    • Gently pull the plastic View Finder off of the metal mounting bracket.

  10. Sony Cyber-shot DSC-HX300 View Finder Replacement: 手順 10、 1の画像 1
    • The replacement View Finder can now be installed.

終わりに

To reassemble your device, follow these instructions in reverse order.

ある他の人がこのガイドを完成しました。

作成者

3人の作成者と共同で作成されました。

Elizabeth Surface

メンバー登録日: 08/26/15

1,465 ポイント

9のガイドは作成済み

チーム

USF Tampa, Team 4-6, Meier Fall 2015 USF Tampa, Team 4-6, Meier Fall 2015人のメンバー

USFT-MEIER-F15S4G6

4 メンバー

18のガイドは作成済み

0 件のコメント

コメントを追加

統計データ:

過去 24時間: 1

過去 7 日: 4

過去 30 日: 10

今までの合計 1,163