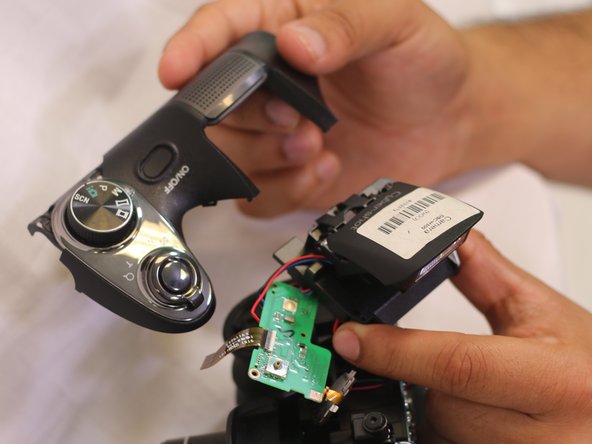
メインコンテンツにスキップ

Sony Cyber-shot DSC-H300 Flash Replacement

必要な工具と部品

  1. Sony Cyber-shot DSC-H300 Flash Replacement, Rear Case: 手順 1、 3の画像 1 Sony Cyber-shot DSC-H300 Flash Replacement, Rear Case: 手順 1、 3の画像 2 Sony Cyber-shot DSC-H300 Flash Replacement, Rear Case: 手順 1、 3の画像 3
    • Remove the 6mm Phillips #000 screws.

  2. Sony Cyber-shot DSC-H300 Flash Replacement: 手順 2、 3の画像 1 Sony Cyber-shot DSC-H300 Flash Replacement: 手順 2、 3の画像 2 Sony Cyber-shot DSC-H300 Flash Replacement: 手順 2、 3の画像 3
    • Remove the five 6mm Phillips #000 screws.

    • Remove the four 3mm Phillips #000 screws.

  3. Sony Cyber-shot DSC-H300 Flash Replacement: 手順 3、 1の画像 1
    • Use the flat end of a plastic spudger to pry apart the rear cover from the body of the camera.

  4. Sony Cyber-shot DSC-H300 Flash Replacement, Screen: 手順 4、 1の画像 1
    • Remove the two 6mm Phillips #000 screws.

  5. Sony Cyber-shot DSC-H300 Flash Replacement: 手順 5、 1の画像 1
    • The screen will be loose so remove it.

  6. Sony Cyber-shot DSC-H300 Flash Replacement, Flash: 手順 6、 2の画像 1 Sony Cyber-shot DSC-H300 Flash Replacement, Flash: 手順 6、 2の画像 2
    • Remove the four 6mm Phillips #000 screws from the upper case of the camera.

    • Remove the upper case.

  7. Sony Cyber-shot DSC-H300 Flash Replacement: 手順 7、 2の画像 1 Sony Cyber-shot DSC-H300 Flash Replacement: 手順 7、 2の画像 2
    • Remove the four 6mm Phillips #000 screws from the bottom of the case.

  8. Sony Cyber-shot DSC-H300 Flash Replacement: 手順 8、 2の画像 1 Sony Cyber-shot DSC-H300 Flash Replacement: 手順 8、 2の画像 2
    • Slide the flash out and away from the camera to remove.

終わりに

To reassemble your device, follow these instructions in reverse order.

ある他の人がこのガイドを完成しました。

作成者

3人の作成者と共同で作成されました。

Nassr Al Mandhari

メンバー登録日: 02/14/18

118 ポイント

1ガイドが承認済み

チーム

USF Tampa, Team S1-G6, Nance Spring 2018 USF Tampa, Team S1-G6, Nance Spring 2018人のメンバー

USFT-NANCE-S18S1G6

3 メンバー

10のガイドは作成済み

0 件のコメント

コメントを追加

統計データ:

過去 24時間: 0

過去 7 日: 6

過去 30 日: 20

今までの合計 1,626