メインコンテンツにスキップ

Sony Clie PEG-UX50 Tilt Screen Replacement

必要な工具と部品

  1. Sony Clie PEG-UX50 Tilt Screen Replacement, Tilt Screen: 手順 1、 3の画像 1 Sony Clie PEG-UX50 Tilt Screen Replacement, Tilt Screen: 手順 1、 3の画像 2 Sony Clie PEG-UX50 Tilt Screen Replacement, Tilt Screen: 手順 1、 3の画像 3
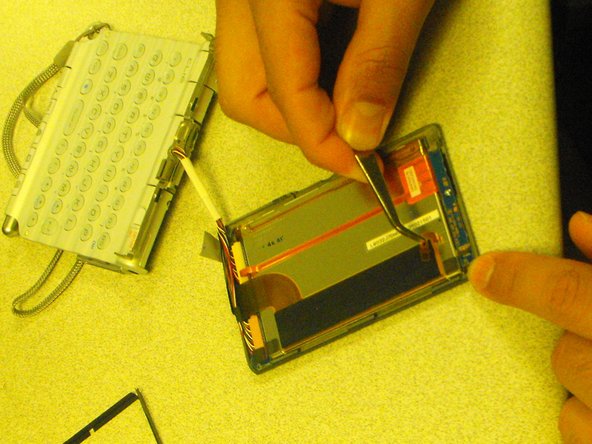
    • Take off the screws located on the two sides of the tilt screen.

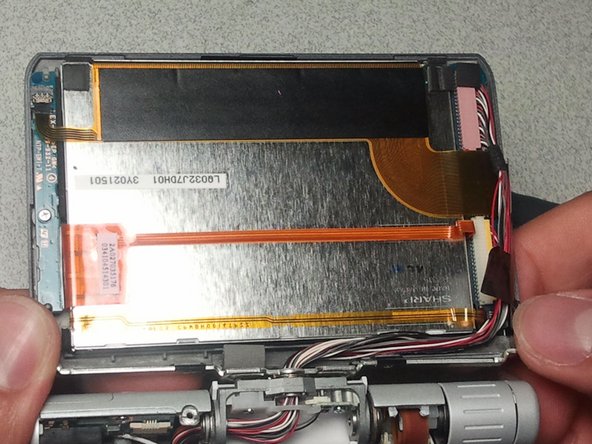
    • Unscrew the screw located at the tilt base of the screen.

  2. Sony Clie PEG-UX50 Tilt Screen Replacement: 手順 2、 3の画像 1 Sony Clie PEG-UX50 Tilt Screen Replacement: 手順 2、 3の画像 2 Sony Clie PEG-UX50 Tilt Screen Replacement: 手順 2、 3の画像 3
    • Gently remove the back plate of the tilt screen by sliding it upward.

    • With caution, lift the wires from the track in the back plate.

  3. Sony Clie PEG-UX50 Tilt Screen Replacement: 手順 3、 2の画像 1 Sony Clie PEG-UX50 Tilt Screen Replacement: 手順 3、 2の画像 2
    • Disconnect the thin USB cable attached to the Integrated Circuit.

  4. Sony Clie PEG-UX50 Tilt Screen Replacement: 手順 4、 2の画像 1 Sony Clie PEG-UX50 Tilt Screen Replacement: 手順 4、 2の画像 2
    • Detach the plastic black frame from in between the plate and the LCD.

    • Do not disconnect the display from the board yet.

  5. Sony Clie PEG-UX50 Tilt Screen Replacement: 手順 5、 1の画像 1
    • Disconnect the thin connector from the face plate using tweezers.

  6. Sony Clie PEG-UX50 Tilt Screen Replacement: 手順 6、 1の画像 1
    • Quickly release and disconnect the thick cable with your hands.

終わりに

Follow these instructions in reverse order to reassemble your device.

作成者

8人の作成者と共同で作成されました。

Rishad R Rai

メンバー登録日: 04/28/11

1 ポイント

1ガイドが承認済み

チーム

CSU Los Angeles, Team 1-4, Nelson Spring 2011 CSU Los Angeles, Team 1-4, Nelson Spring 2011人のメンバー

CSULA-NELSON-S11S1G4

5 メンバー

2のガイドは作成済み

0 件のコメント

コメントを追加

統計データ:

過去 24時間: 0

過去 7 日: 3

過去 30 日: 10

今までの合計 2,727