メインコンテンツにスキップ
リペアコミュニティに参加 - アカウントの作成

Sony Clie PEG-UX50 Rear Case Replacement

必要な工具と部品

  1. Sony Clie PEG-UX50 Rear Case Replacement, Rear Cover Case: 手順 1、 3の画像 1 Sony Clie PEG-UX50 Rear Case Replacement, Rear Cover Case: 手順 1、 3の画像 2 Sony Clie PEG-UX50 Rear Case Replacement, Rear Cover Case: 手順 1、 3の画像 3
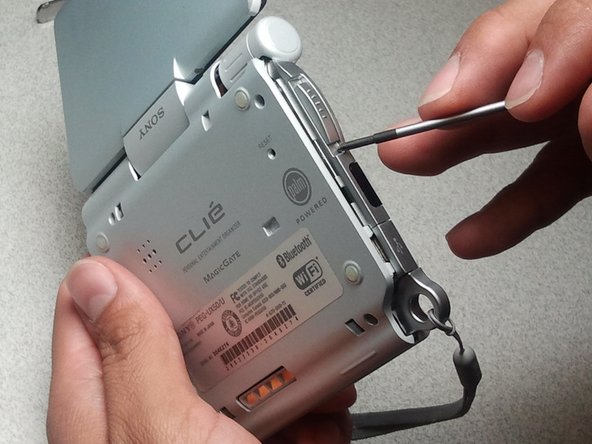
    • Use the Phillips #1 screwdriver to remove the four screws from the back of the rear cover.

    • Use the Phillips #1 screwdriver to remove the screw on the right side of the rear cover.

    • Use the Phillips #1 screwdriver to remove the screw on the top of the rear cover.

  2. Sony Clie PEG-UX50 Rear Case Replacement: 手順 2、 2の画像 1 Sony Clie PEG-UX50 Rear Case Replacement: 手順 2、 2の画像 2
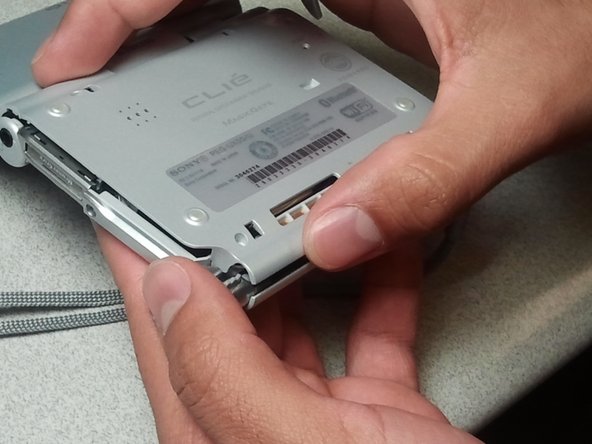
    • Gently pry the rear cover case off to remove both the USB port cover and the hold switch.

  3. Sony Clie PEG-UX50 Rear Case Replacement: 手順 3、 2の画像 1 Sony Clie PEG-UX50 Rear Case Replacement: 手順 3、 2の画像 2
    • Remove the side cover.

    • Slowly pull on the rear cover case to separate it from the rest of the device. The case should not come off completely.

    • To avoid wire breakage, do not pull hard on the speaker connection wire.

  4. Sony Clie PEG-UX50 Rear Case Replacement: 手順 4、 1の画像 1
    • Gently remove the speaker wire from the device.

    • The rear cover case should now be completely separate from the device.

終わりに

To reassemble your device, follow these instructions in reverse order.

2 の人々がこのガイドを完成させました。

作成者

8人の作成者と共同で作成されました。

Christopher M Garcia

メンバー登録日: 04/28/11

41 ポイント

1ガイドが承認済み

チーム

CSU Los Angeles, Team 1-4, Nelson Spring 2011 CSU Los Angeles, Team 1-4, Nelson Spring 2011人のメンバー

CSULA-NELSON-S11S1G4

5 メンバー

2のガイドは作成済み

0件のガイドコメント

コメントを追加

統計データ:

過去 24時間: 5

過去 7 日: 17

過去 30 日: 77

今までの合計 4,759