メインコンテンツにスキップ

Sony BDP-BX520 Disc Tray Replacement

必要な工具と部品

  1. Sony BDP-BX520 Disc Tray Replacement, Disc Tray Cover: 手順 1、 1の画像 1
    • Plug in the Blu-Ray player, then press the power button, making sure the Blu-Ray player is powered on.

    • Press the eject button on either the top of the Blu-Ray player or on the remote to open the disc tray.

  2. Sony BDP-BX520 Disc Tray Replacement: 手順 2、 1の画像 1
    • Grab the sides of the disc tray cover and carefully pull each side upwards, starting with the left side. This will unhook the cover from the tray.

  3. Sony BDP-BX520 Disc Tray Replacement: 手順 3、 1の画像 1
    • Close the disc tray, then power off and unplug the Blu-Ray player.

  4. Sony BDP-BX520 Disc Tray Replacement, Top Case: 手順 4、 1の画像 1
    • Locate the three 8 mm screws on the back of the Blu-Ray player.

    • Using the Phillips #2 screwdriver, unscrew each of the screws and set them aside.

  5. Sony BDP-BX520 Disc Tray Replacement: 手順 5、 2の画像 1 Sony BDP-BX520 Disc Tray Replacement: 手順 5、 2の画像 2
    • Gently pull the top case back to remove it from the Blu-Ray player.

  6. Sony BDP-BX520 Disc Tray Replacement, Front Panel: 手順 6、 1の画像 1
    • Insert the nylon or metal spudger under the clip on the side near the front of the device. Lift the clip so it is free from the device.

    • Lifting these clips may require you to hold one clip open while you move on to the next clip.

  7. Sony BDP-BX520 Disc Tray Replacement: 手順 7、 1の画像 1
    • Flip device over so the bottom faces you.

    • Insert the nylon or metal spudger and lift the two clips on the bottom of the device.

  8. Sony BDP-BX520 Disc Tray Replacement: 手順 8、 1の画像 1
    • Lift the clip on the opposite side of the device with the nylon or metal spudger.

  9. Sony BDP-BX520 Disc Tray Replacement: 手順 9、 2の画像 1 Sony BDP-BX520 Disc Tray Replacement: 手順 9、 2の画像 2
    • Grasp the front case firmly and lift from the rest of the device.

    • Lifting may require some force.

  10. Sony BDP-BX520 Disc Tray Replacement, Disc Tray: 手順 10、 2の画像 1 Sony BDP-BX520 Disc Tray Replacement, Disc Tray: 手順 10、 2の画像 2
    • Using a Phillips #2 screwdriver, remove the two silver 8 mm screws on the right side of the disk tray .

  11. Sony BDP-BX520 Disc Tray Replacement: 手順 11、 2の画像 1 Sony BDP-BX520 Disc Tray Replacement: 手順 11、 2の画像 2
    • Pull the medium-sized 9 pin ribbon cable out of its connector on the motherboard.

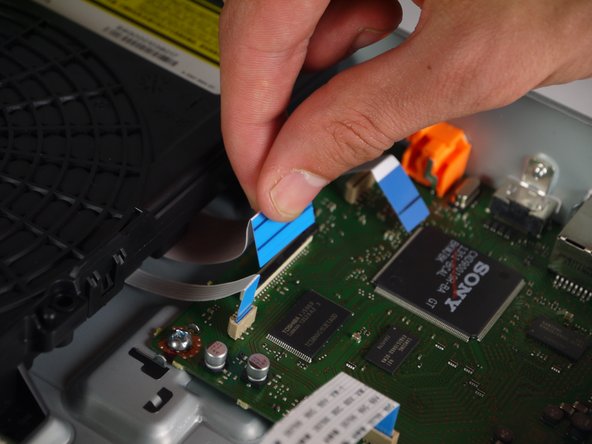
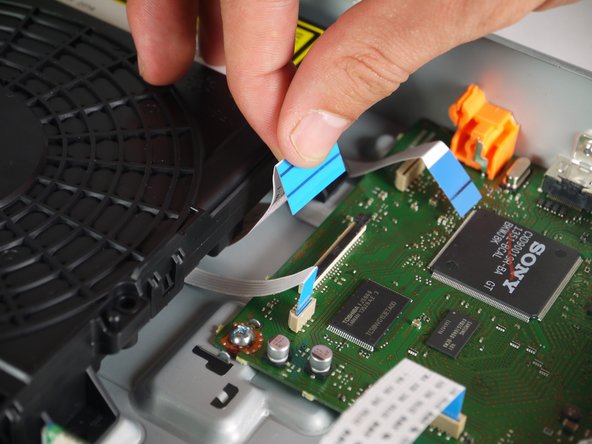
  12. Sony BDP-BX520 Disc Tray Replacement: 手順 12、 3の画像 1 Sony BDP-BX520 Disc Tray Replacement: 手順 12、 3の画像 2 Sony BDP-BX520 Disc Tray Replacement: 手順 12、 3の画像 3
    • Using tweezers, lift up the tab of the large 45 pin connector on the motherboard.

    • Pull the large 45 pin ribbon cable out of its connector.

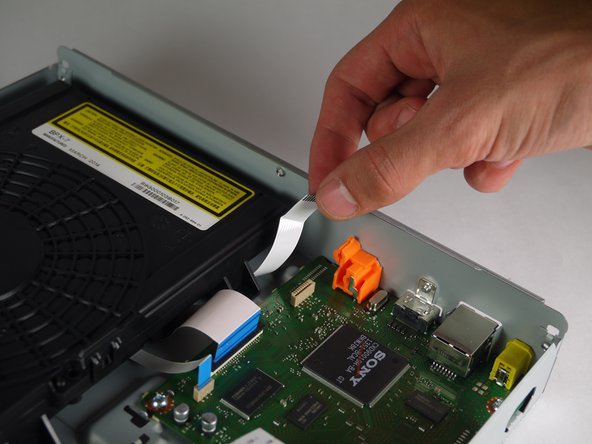
  13. Sony BDP-BX520 Disc Tray Replacement: 手順 13、 2の画像 1 Sony BDP-BX520 Disc Tray Replacement: 手順 13、 2の画像 2
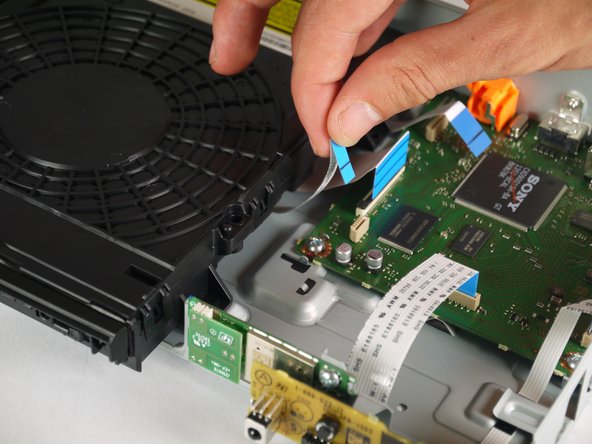
    • Pull the small 5 pin ribbon cable out of its connector on the motherboard.

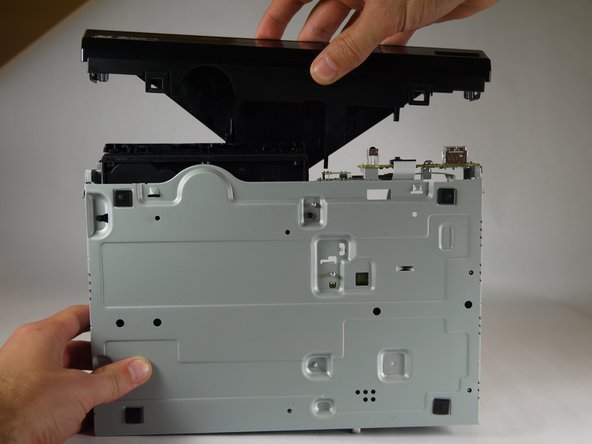
  14. Sony BDP-BX520 Disc Tray Replacement: 手順 14、 2の画像 1 Sony BDP-BX520 Disc Tray Replacement: 手順 14、 2の画像 2
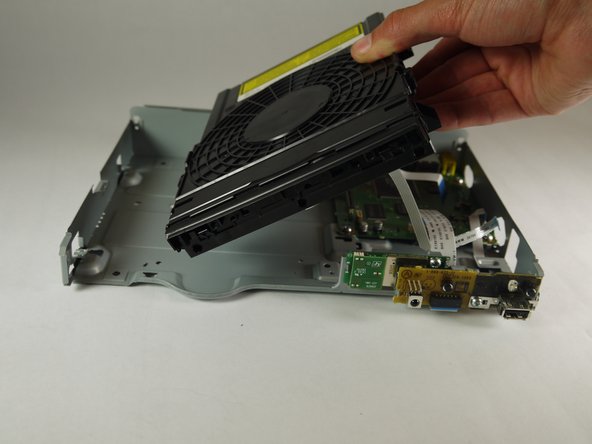
    • Slide the disk tray out from under the tabs on the case holding it down while lifting it out of the case.

終わりに

To reassemble your device, follow these instructions in reverse order.

6 の人々がこのガイドを完成させました。

作成者

2人の作成者と共同で作成されました。

Gregory Pellegrino

メンバー登録日: 02/02/15

405 ポイント

2のガイドは作成済み

チーム

Cal Poly, Team 8-41, Amido Winter 2015 Cal Poly, Team 8-41, Amido Winter 2015人のメンバー

CPSU-AMIDO-W15S8G41

4 メンバー

8のガイドは作成済み

2 件のコメント

Thanks, this helped a lot. I still cant get the DVD drawer to eject with the eject button. The power light will not turn off.

tomcerecedes - 返信

Thank you thank you thank you. I spent an hour on the phone with Sony “technical support “ and was told nothing could be done except to send it off for servicing. This worked PERFECTLY!!!! THANKS AGAIN ?

Susan Brown - 返信

コメントを追加

統計データ:

過去 24時間: 0

過去 7 日: 4

過去 30 日: 10

今までの合計 7,396