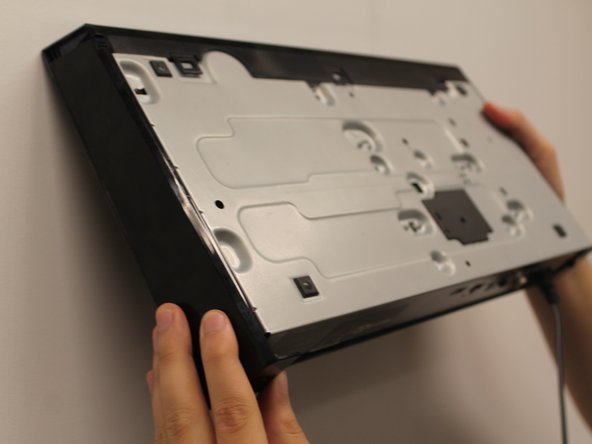
メインコンテンツにスキップ

Sony BDP-BX510 Disk Tray Replacement

必要な工具と部品

  1. Sony BDP-BX510 Disk Tray Replacement, Outer Cover: 手順 1、 1の画像 1
    • Plug in the device to turn it on, then press the eject ( ⏏ ) button to open the tray.

  2. Sony BDP-BX510 Disk Tray Replacement: 手順 2、 2の画像 1 Sony BDP-BX510 Disk Tray Replacement: 手順 2、 2の画像 2
    • To remove the tray cover, hold both sides of the tray cover and gently apply a downward pressure.

    • Apply slightly more pressure to the left side until it unhooks then unhook the right side.

    • Close the disk tray by pressing the eject button again, then power off the device and unplug it.

    • Do not use too much force to remove the tray cover as you may break it.

  3. Sony BDP-BX510 Disk Tray Replacement: 手順 3、 2の画像 1 Sony BDP-BX510 Disk Tray Replacement: 手順 3、 2の画像 2
    • Turn to the back of the device.

    • Remove the two 7mm Phillips #2 screws.

    • Slide the two plastic covers on both sides of the device towards the back of the device to remove them.

  4. Sony BDP-BX510 Disk Tray Replacement: 手順 4、 3の画像 1 Sony BDP-BX510 Disk Tray Replacement: 手順 4、 3の画像 2 Sony BDP-BX510 Disk Tray Replacement: 手順 4、 3の画像 3
    • Turn the device so you can see the bottom.

    • Unclip the three black plastic clips on the bottom of the device.

    • Unclip one clip on each side of the device.

  5. Sony BDP-BX510 Disk Tray Replacement: 手順 5、 1の画像 1
    • Slide the cover forward to remove.

  6. Sony BDP-BX510 Disk Tray Replacement, Disk Tray: 手順 6、 2の画像 1 Sony BDP-BX510 Disk Tray Replacement, Disk Tray: 手順 6、 2の画像 2
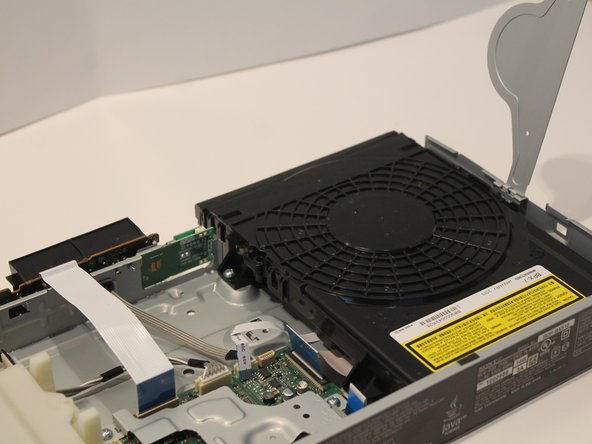
    • Pull the medium-sized 9 pin ribbon cable and the small 5 pin ribbon cable out of their connector in the motherboard.

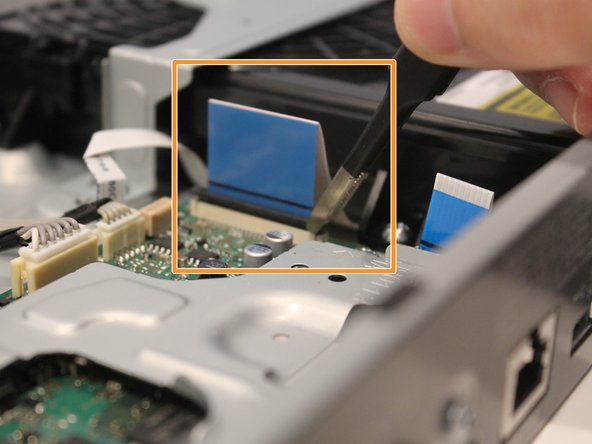
    • Using tweezers, lift the black tab on the connector of the large 45 pin connector on the motherboard.

    • Pull the large 45 pin ribbon cable out of the connector in the motherboard.

    • Be very careful. The goal is to slightly lift the pin connector, not to completely detach it. Do not forcibly pull.

  7. Sony BDP-BX510 Disk Tray Replacement: 手順 7、 1の画像 1
    • Remove the 5mm Phillips #2 screw holding the metal brace above the disk tray.

    • Remove the two 5mm Phillips #2 screws that hold the disk tray to the metal case on the bottom.

  8. Sony BDP-BX510 Disk Tray Replacement: 手順 8、 3の画像 1 Sony BDP-BX510 Disk Tray Replacement: 手順 8、 3の画像 2 Sony BDP-BX510 Disk Tray Replacement: 手順 8、 3の画像 3
    • Turn the device over to the backside.

    • Use tweezers or hands to take off the metal clasp for the metal brace near the center on the bottom of the device.

  9. Sony BDP-BX510 Disk Tray Replacement: 手順 9、 1の画像 1
    • Remove the metal brace then remove the disk tray.

終わりに

To reassemble your device, follow these instructions in reverse order.

作成者

2人の作成者と共同で作成されました。

Tae (Tim) Im

メンバー登録日: 01/14/20

279 ポイント

3のガイドは作成済み

チーム

York University, Team S1-G10, Woodhouse Winter 2020 York University, Team S1-G10, Woodhouse Winter 2020人のメンバー

YORK-WOODHOUSE-W20S1G10

2 メンバー

6のガイドは作成済み

0 件のコメント

コメントを追加

統計データ:

過去 24時間: 0

過去 7 日: 0

過去 30 日: 1

今までの合計 270