メインコンテンツにスキップ

Sony BDP BX350 Disc Tray Replacement

必要な工具と部品

  1. Sony BDP BX350 Disc Tray Replacement, Disc Assembly: 手順 1、 1の画像 1
    • Remove the three 10mm Philips head screws on the back of the player.

  2. Sony BDP BX350 Disc Tray Replacement: 手順 2、 1の画像 1
    • Using an opening tool lift up the tabs located on the bottom of the plastic front cover.

  3. Sony BDP BX350 Disc Tray Replacement: 手順 3、 1の画像 1
    • Lift the tabs located on each side of the device to free the front cover. Begin to separate the front and metal back covers.

  4. Sony BDP BX350 Disc Tray Replacement: 手順 4、 1の画像 1
    • Completely separate the front cover and the metal back cover from the grey casing.

    • The inner components should all be completely exposed after opening.

  5. Sony BDP BX350 Disc Tray Replacement: 手順 5、 1の画像 1
    • Unscrew the two 8mm Philips head screws securing the disc assembly to the main casing.

  6. Sony BDP BX350 Disc Tray Replacement: 手順 6、 1の画像 1
    • Pull the disc assembly out from under the metal tabs on the main casing.

  7. Sony BDP BX350 Disc Tray Replacement: 手順 7、 1の画像 1
    • Remove disc assembly.

  8. Sony BDP BX350 Disc Tray Replacement, Disc Tray: 手順 8、 1の画像 1
    • Take caution to not break plastic tabs.

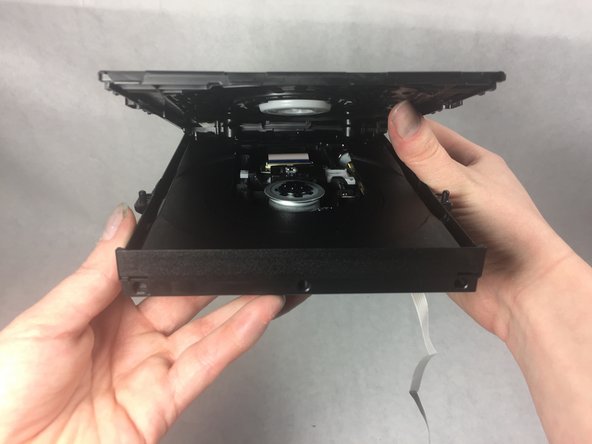
    • Undo the four tabs on the disc tray assembly.

  9. Sony BDP BX350 Disc Tray Replacement: 手順 9、 2の画像 1 Sony BDP BX350 Disc Tray Replacement: 手順 9、 2の画像 2
    • Lift front until back separates.

  10. Sony BDP BX350 Disc Tray Replacement: 手順 10、 1の画像 1
    • Remove disc from disc tray.

終わりに

To reassemble your device, follow these instructions in reverse order however do not put the disc back in.

作成者

3人の作成者と共同で作成されました。

Kristen Vezina

メンバー登録日: 03/06/17

413 ポイント

4のガイドは作成済み

チーム

UMass Dartmouth, Team S8-G5, Catania Spring 2017 UMass Dartmouth, Team S8-G5, Catania Spring 2017人のメンバー

UMASSD-CATANIA-S17S8G5

3 メンバー

5のガイドは作成済み

0 件のコメント

コメントを追加

統計データ:

過去 24時間: 0

過去 7 日: 5

過去 30 日: 7

今までの合計 432