メインコンテンツにスキップ

Sonos Play 5 Motherboard and Amplifier Replacement

アーカイブされたガイド
このガイドは将来的な使用のためにのみ保存されてます。ご自身の修理作業には更新バージョンをご利用ください。

必要な工具と部品

  1. Sonos Play 5 Motherboard and Amplifier Replacement, Sonos Play 5 Disassembly: 手順 1、 3の画像 1 Sonos Play 5 Motherboard and Amplifier Replacement, Sonos Play 5 Disassembly: 手順 1、 3の画像 2 Sonos Play 5 Motherboard and Amplifier Replacement, Sonos Play 5 Disassembly: 手順 1、 3の画像 3
    • Use the metal spudger to pry open the front grill. Little force will be needed to wedge the metal spudger into the crevice.

    • After the grill has been loosened on all edges. Use your fingers as a wedge and gently pull the grill off the speaker. This will reveal the front speaker panel.

  2. Sonos Play 5 Motherboard and Amplifier Replacement: 手順 2、 3の画像 1 Sonos Play 5 Motherboard and Amplifier Replacement: 手順 2、 3の画像 2 Sonos Play 5 Motherboard and Amplifier Replacement: 手順 2、 3の画像 3
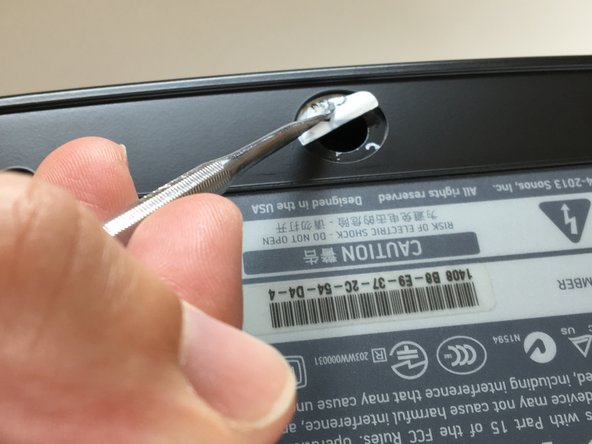
    • Use a pointed metal spudger to remove the rubber plugs covering the screws in the bottom left and right corners of the speaker panel.

    • Insert the spudger against the side of the rubber plug and the speaker panel while leveraging upward.

    • Remove the eight 12 mm Phillips #1 screws bordering the front speaker panel.

  3. Sonos Play 5 Motherboard and Amplifier Replacement: 手順 3、 2の画像 1 Sonos Play 5 Motherboard and Amplifier Replacement: 手順 3、 2の画像 2
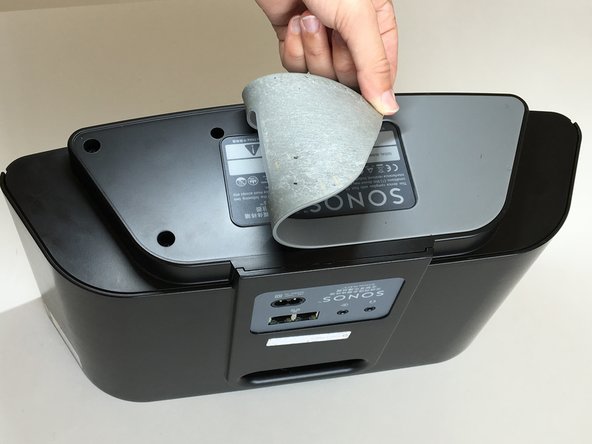
    • Orient the speaker so that the volume and speaker control buttons are facing down onto your work space. The Sonos name and product number should be facing upward toward the ceiling

    • Use a metal spudger to pry the outer corner of the grey rubber pad revealing eight 12mm screws.

  4. Sonos Play 5 Motherboard and Amplifier Replacement: 手順 4、 3の画像 1 Sonos Play 5 Motherboard and Amplifier Replacement: 手順 4、 3の画像 2 Sonos Play 5 Motherboard and Amplifier Replacement: 手順 4、 3の画像 3
    この手順で使用する道具:
    Tweezers
    $4.99
    購入する
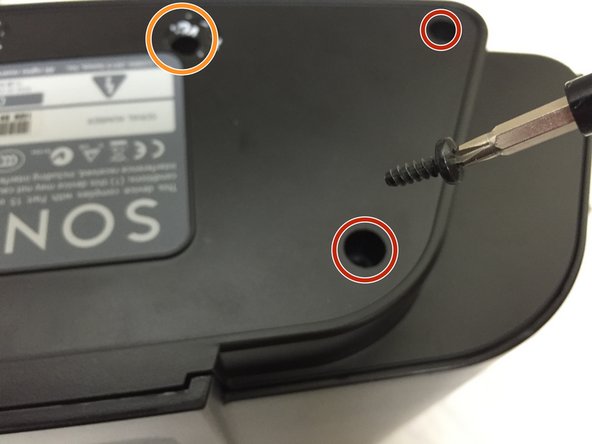
    • With a #1 Phillips-head screwdriver, remove the eight 12mm screws on the bottom panel.

    • We have marked the original placement of the warranty stickers in orange. To remove use a pair of tweezers to grip onto the sticker and pull with a gentle upward motion

    • We have already removed the warranty stickers in this picture.

  5. Sonos Play 5 Motherboard and Amplifier Replacement: 手順 5、 1の画像 1
    • Orient the speaker so that the speaker panel is facing upward.

    • With a metal spudger, apply medium force and wedge the spudger into the crevice with a prying motion

    • This action will need to be repeated on all sides to allow for the panel to be opened up

  6. Sonos Play 5 Motherboard and Amplifier Replacement: 手順 6、 3の画像 1 Sonos Play 5 Motherboard and Amplifier Replacement: 手順 6、 3の画像 2 Sonos Play 5 Motherboard and Amplifier Replacement: 手順 6、 3の画像 3
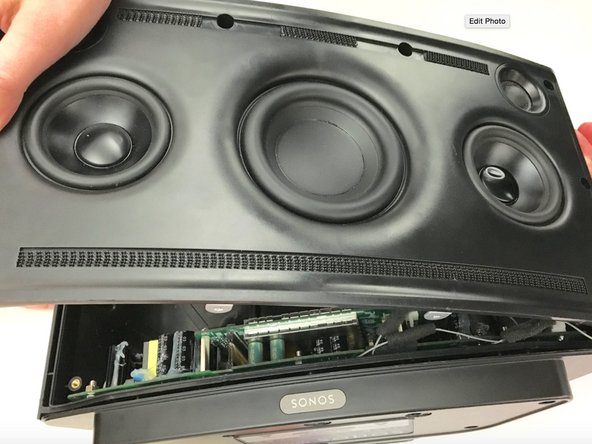
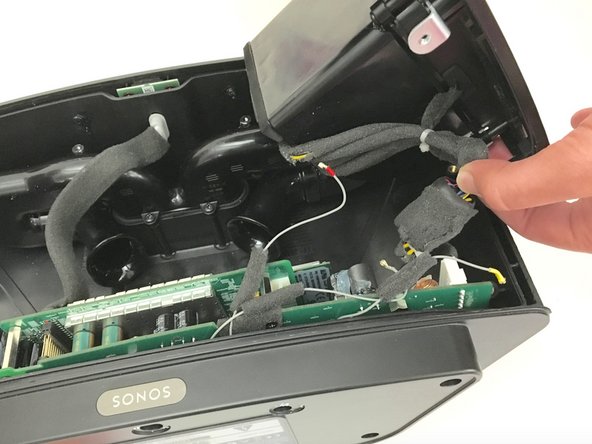
    • Use both hands to lift the front speaker panel away from the skeleton of the speaker housing.

    • While removing the front speaker panel, pay close attention to the bottom right-hand corner. There will be an antenna connector you will need to remove in the next step.

  7. Sonos Play 5 Motherboard and Amplifier Replacement: 手順 7、 2の画像 1 Sonos Play 5 Motherboard and Amplifier Replacement: 手順 7、 2の画像 2
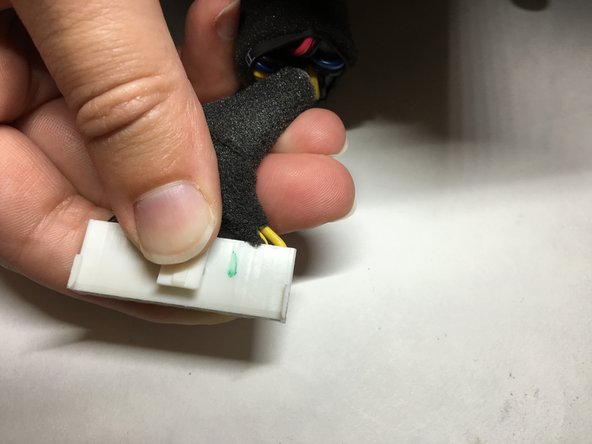
    • Using your thumb and forefinger to grip the antenna clasp while moving outward and away from the motherboard.

    • Do not use excessive force while disconnecting. This will damage the connector and motherboard.

    • We have removed the bottom panel in this picture for another guide.

  8. Sonos Play 5 Motherboard and Amplifier Replacement, Motherboard and Amplifier: 手順 8、 1の画像 1
    • Face the speaker with the power port facing you.

    • Use a metal spudger with a pointed tip to help remove the grey sticker from the back panel.

  9. Sonos Play 5 Motherboard and Amplifier Replacement: 手順 9、 1の画像 1
    • Use a #1 Philips-head screwdriver to remove two 10mm screws that surround the power and AC ports.

    • Use a #00 Phillips-head screwdriver to remove the remaining six 5 mm screws around the two jacks located on the lower half of the panel.

  10. Sonos Play 5 Motherboard and Amplifier Replacement: 手順 10、 2の画像 1 Sonos Play 5 Motherboard and Amplifier Replacement: 手順 10、 2の画像 2
    • The most efficient way to reach the motherboard is to remove the attached amplifier and the motherboard as one unit.

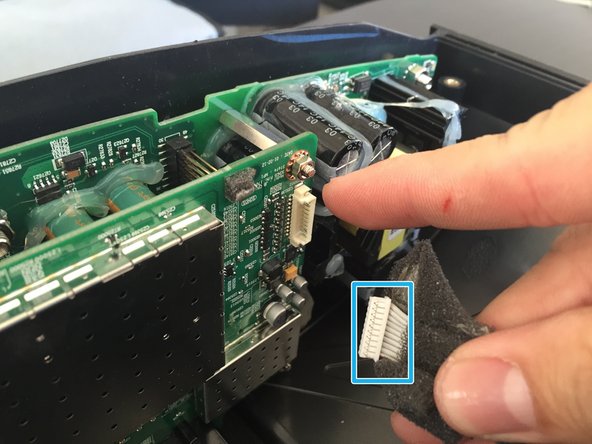
    • Remove the cable connected to the amplifier by gently pulling the cable away from the amplifier.

    • The cable wiring is now disconnected from the amplifier.

  11. Sonos Play 5 Motherboard and Amplifier Replacement: 手順 11、 1の画像 1
    この手順で使用する道具:
    Tweezers
    $4.99
    購入する
    • Use tweezers to pry away the four connectors that attach to the amplifier.

  12. Sonos Play 5 Motherboard and Amplifier Replacement: 手順 12、 2の画像 1 Sonos Play 5 Motherboard and Amplifier Replacement: 手順 12、 2の画像 2
    • Turn the speaker upside down, with the volume buttons facing down.

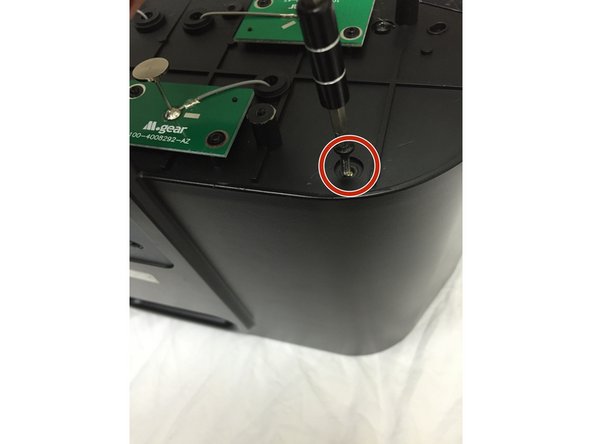
    • Use a #1 Phillips-head screwdriver to remove the six 10 mm screws at the bottom of the speaker.

  13. Sonos Play 5 Motherboard and Amplifier Replacement: 手順 13、 2の画像 1 Sonos Play 5 Motherboard and Amplifier Replacement: 手順 13、 2の画像 2
    • Gently lay the speaker flat, with the interior of the speaker facing the surface.

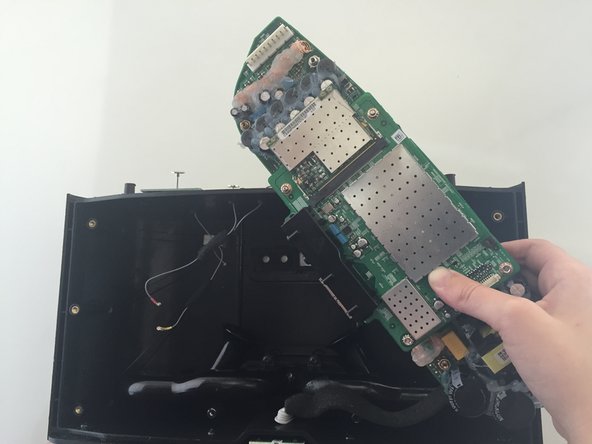
    • Slide out the amplifier and motherboard as one unit.

  14. Sonos Play 5 Motherboard and Amplifier Replacement: 手順 14、 3の画像 1 Sonos Play 5 Motherboard and Amplifier Replacement: 手順 14、 3の画像 2 Sonos Play 5 Motherboard and Amplifier Replacement: 手順 14、 3の画像 3
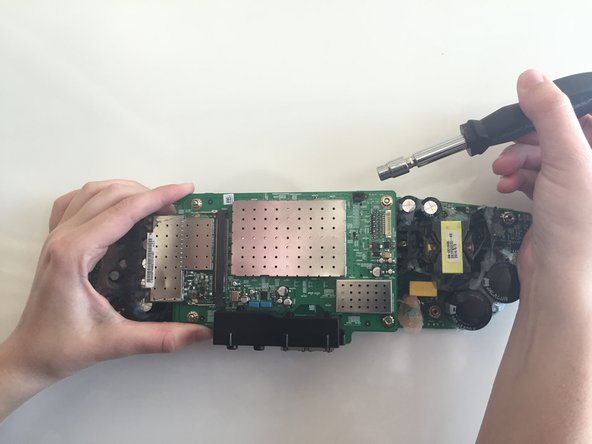
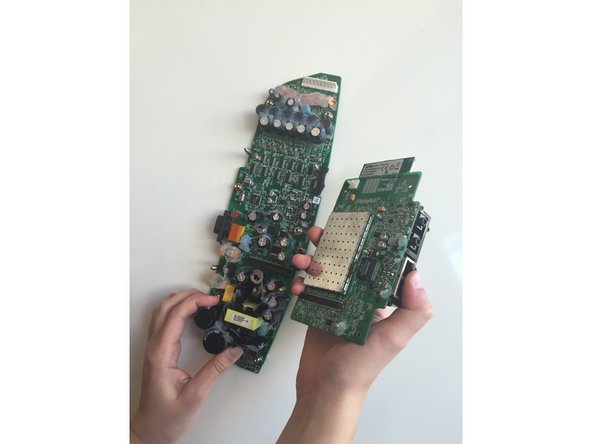
    • Use a 6 mm Allen socket to remove the four bolts attaching the amplifier to the motherboard.

    • Slowly lift the amplifier away from the motherboard.

  15. Sonos Play 5 Motherboard and Amplifier Replacement: 手順 15、 2の画像 1 Sonos Play 5 Motherboard and Amplifier Replacement: 手順 15、 2の画像 2
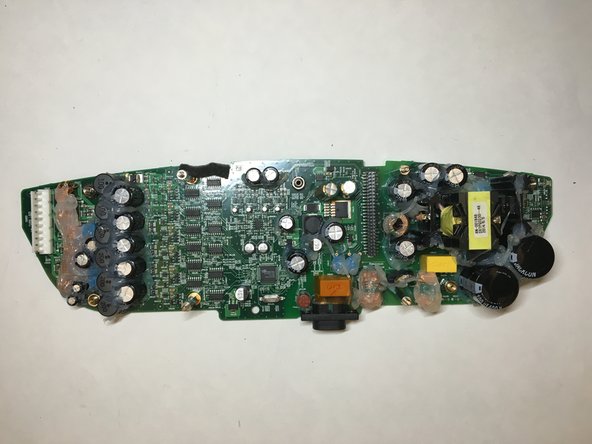
    • The Motherboard and Amplifier now stand alone as single parts.

終わりに

To reassemble your device, follow these instructions in reverse order.

作成者

4人の作成者と共同で作成されました。

Estefania Sanchez

メンバー登録日: 09/17/15

104 ポイント

1ガイドが承認済み

チーム

CSU Fullerton, Team 2-1, Bruce Fall 2015 CSU Fullerton, Team 2-1, Bruce Fall 2015人のメンバー

CSUF-BRUCE-F15S2G1

4 メンバー

5のガイドは作成済み

0 件のコメント

コメントを追加

統計データ:

過去 24時間: 0

過去 7 日: 0

過去 30 日: 3

今までの合計 726