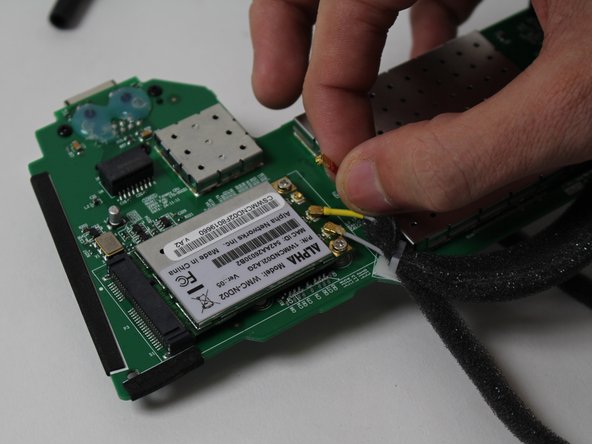
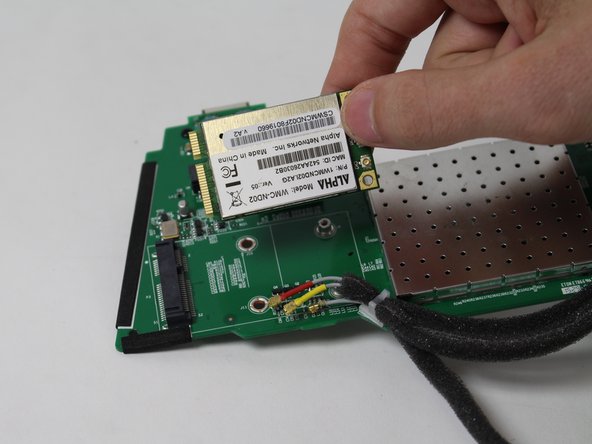
メインコンテンツにスキップ

Sonos Play 3 Wireless Card Replacement

必要な工具と部品

  1. Sonos Play 3 Wireless Card Replacement, Speaker Grille: 手順 1、 2の画像 1 Sonos Play 3 Wireless Card Replacement, Speaker Grille: 手順 1、 2の画像 2
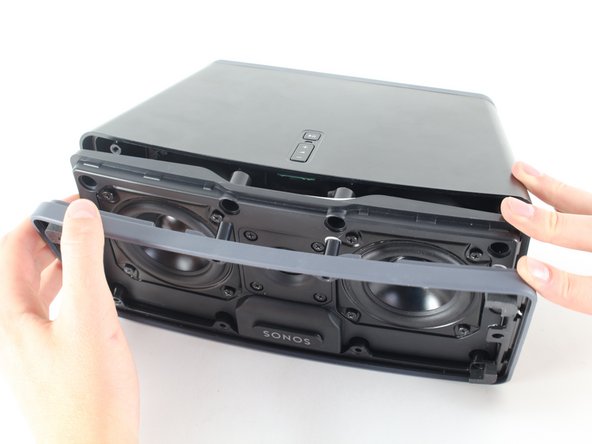
    • Insert a spudger along the edge of the screen and gently use it to pull the screen away from the casing. Slide the spudger along the length of the grill to detach all the clips holding it in place.

  2. Sonos Play 3 Wireless Card Replacement: 手順 2、 1の画像 1
    • Gently pull the screen away from the body of the speaker, revealing the tweeter and two mid-range drivers behind it.

    • There may be a kind of black sticky adhesive holding the screen clips to the rest of the body; however, it was previously removed on our model.

  3. Sonos Play 3 Wireless Card Replacement, Front Speaker Panel: 手順 3、 2の画像 1 Sonos Play 3 Wireless Card Replacement, Front Speaker Panel: 手順 3、 2の画像 2
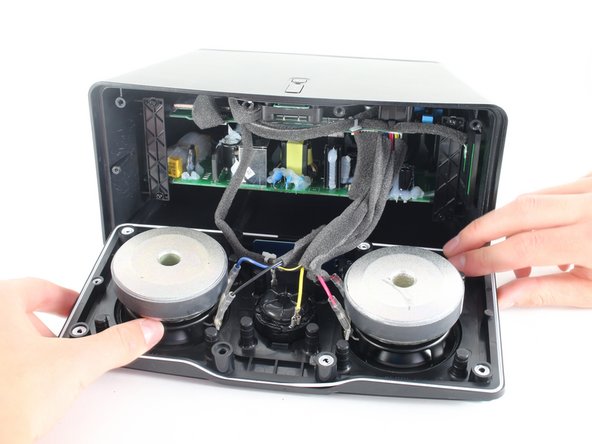
    • Unscrew eight 1.5 inch Phillips #2 screws attaching the front speaker panel to the box.

    • Unscrew the single 1 inch Phillips #2 screw located on the left side of the panel. This may be hidden beneath the warranty void sticker that you'll want to remove.

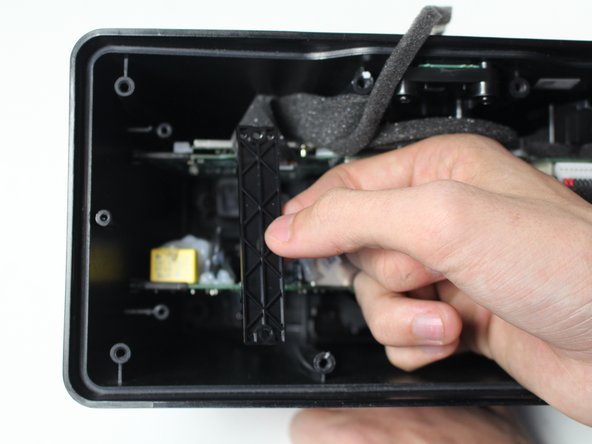
    • Unscrew the single 3/4 inch Phillips #2 screw, which is the last thing holding the front panel to the casing.

  4. Sonos Play 3 Wireless Card Replacement: 手順 4、 3の画像 1 Sonos Play 3 Wireless Card Replacement: 手順 4、 3の画像 2 Sonos Play 3 Wireless Card Replacement: 手順 4、 3の画像 3
    • Remove the front panel carefully.

    • Note that there are two layers to the panel that should stay in their original order.

  5. Sonos Play 3 Wireless Card Replacement: 手順 5、 2の画像 1 Sonos Play 3 Wireless Card Replacement: 手順 5、 2の画像 2
    • Disconnect the front panel from the motherboard by gently reaching in and pushing the tab underneath the wire connector and pulling towards you.

  6. Sonos Play 3 Wireless Card Replacement: 手順 6、 2の画像 1 Sonos Play 3 Wireless Card Replacement: 手順 6、 2の画像 2
    • Gently remove the wireless card located at the bottom of the front speaker panel by pulling up and out with your index finger and thumb.

  7. Sonos Play 3 Wireless Card Replacement, Motherboard: 手順 7、 2の画像 1 Sonos Play 3 Wireless Card Replacement, Motherboard: 手順 7、 2の画像 2
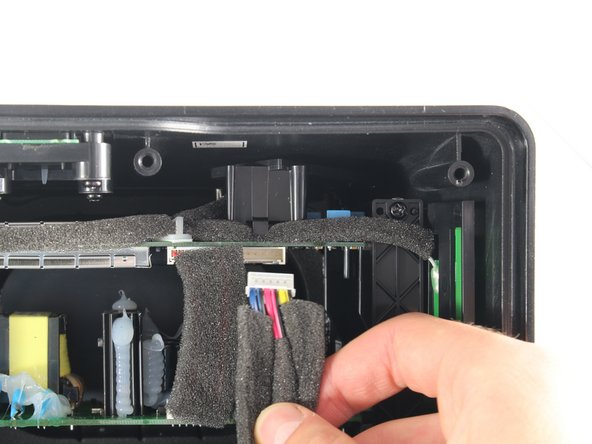
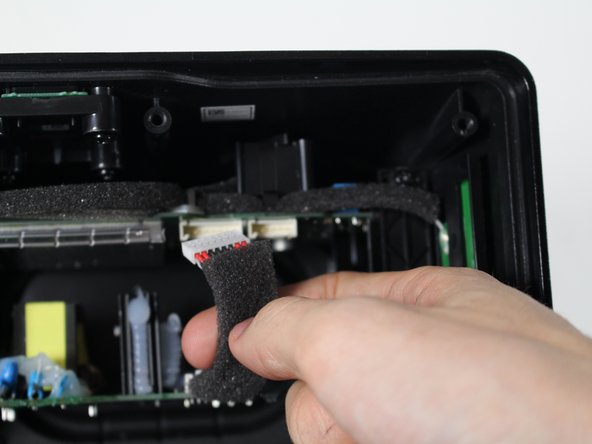
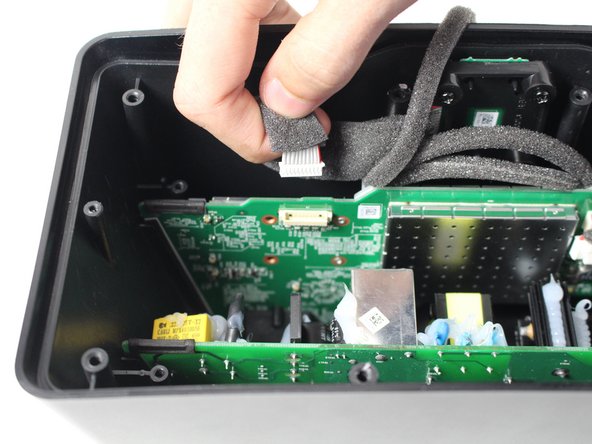
    • Disconnect the motherboard from the power supply board by gently reaching in and pushing the tab underneath the wire connector and pulling towards you.

  8. Sonos Play 3 Wireless Card Replacement: 手順 8、 2の画像 1 Sonos Play 3 Wireless Card Replacement: 手順 8、 2の画像 2
    • Disconnect the motherboard from the volume button board by gently grabbing the connector and pulling it towards you.

  9. Sonos Play 3 Wireless Card Replacement: 手順 9、 1の画像 1
    • Using a Phillips #2 screwdriver, remove the 4 screws securing the two plastic panels down.

  10. Sonos Play 3 Wireless Card Replacement: 手順 10、 2の画像 1 Sonos Play 3 Wireless Card Replacement: 手順 10、 2の画像 2
    • Remove the two plastic panels on either side of the device that hold the motherboard and power supply board in place.

  11. Sonos Play 3 Wireless Card Replacement: 手順 11、 1の画像 1
    • Using a Phillips screwdriver, unscrew the two screws in the back of the device that hold the motherboard in place.

  12. Sonos Play 3 Wireless Card Replacement: 手順 12、 3の画像 1 Sonos Play 3 Wireless Card Replacement: 手順 12、 3の画像 2 Sonos Play 3 Wireless Card Replacement: 手順 12、 3の画像 3
    • Gently remove the motherboard from the Sonos device by sliding it straight back towards you.

    • When putting the motherboard back inside the device, make sure it slides in the slots smoothly on both sides.

  13. Sonos Play 3 Wireless Card Replacement, Wireless Card: 手順 13、 1の画像 1
    • Before accessing the wire connectors, there will be glue covering all three of them and the screws. Remove this first carefully.

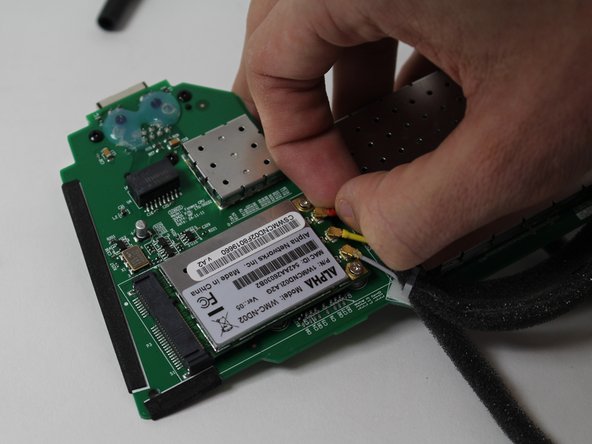
    • Using a Phillips screwdriver, unscrew the two screws securing the communication card to the motherboard.

  14. Sonos Play 3 Wireless Card Replacement: 手順 14、 3の画像 1 Sonos Play 3 Wireless Card Replacement: 手順 14、 3の画像 2 Sonos Play 3 Wireless Card Replacement: 手順 14、 3の画像 3
    • Disconnect the wire connector clips from the communication card by just using your index finger and thumb.

  15. Sonos Play 3 Wireless Card Replacement: 手順 15、 2の画像 1 Sonos Play 3 Wireless Card Replacement: 手順 15、 2の画像 2
    • Remove the communication card by grabbing it with your index finger and thumb and pulling it to the right and up.

終わりに

To reassemble your device, follow these instructions in reverse order.

3 の人々がこのガイドを完成させました。

作成者

3人の作成者と共同で作成されました。

Christina Santini

メンバー登録日: 04/14/16

1,350 ポイント

7のガイドは作成済み

チーム

Cal Poly, Team 25-6, Maness Spring 2016 Cal Poly, Team 25-6, Maness Spring 2016人のメンバー

CPSU-MANESS-S16S25G6

4 メンバー

14のガイドは作成済み

コメント 1 件

Do you have a recommendation for a replacement wireless card? If so where can I purchase it?

Max Chadwick - 返信

コメントを追加

統計データ:

過去 24時間: 1

過去 7 日: 6

過去 30 日: 28

今までの合計 2,291