メインコンテンツにスキップ

Sonos Play 3 Mid-Range Speakers Replacement

必要な工具と部品

  1. Sonos Play 3 Mid-Range Speakers Replacement, Speaker Grille: 手順 1、 2の画像 1 Sonos Play 3 Mid-Range Speakers Replacement, Speaker Grille: 手順 1、 2の画像 2
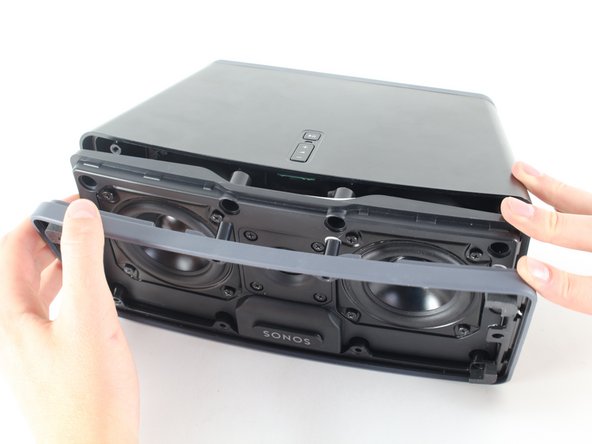
    • Insert a spudger along the edge of the screen and gently use it to pull the screen away from the casing. Slide the spudger along the length of the grill to detach all the clips holding it in place.

  2. Sonos Play 3 Mid-Range Speakers Replacement: 手順 2、 1の画像 1
    • Gently pull the screen away from the body of the speaker, revealing the tweeter and two mid-range drivers behind it.

    • There may be a kind of black sticky adhesive holding the screen clips to the rest of the body; however, it was previously removed on our model.

  3. Sonos Play 3 Mid-Range Speakers Replacement, Front Speaker Panel: 手順 3、 2の画像 1 Sonos Play 3 Mid-Range Speakers Replacement, Front Speaker Panel: 手順 3、 2の画像 2
    • Unscrew eight 1.5 inch Phillips #2 screws attaching the front speaker panel to the box.

    • Unscrew the single 1 inch Phillips #2 screw located on the left side of the panel. This may be hidden beneath the warranty void sticker that you'll want to remove.

    • Unscrew the single 3/4 inch Phillips #2 screw, which is the last thing holding the front panel to the casing.

  4. Sonos Play 3 Mid-Range Speakers Replacement: 手順 4、 3の画像 1 Sonos Play 3 Mid-Range Speakers Replacement: 手順 4、 3の画像 2 Sonos Play 3 Mid-Range Speakers Replacement: 手順 4、 3の画像 3
    • Remove the front panel carefully.

    • Note that there are two layers to the panel that should stay in their original order.

  5. Sonos Play 3 Mid-Range Speakers Replacement: 手順 5、 2の画像 1 Sonos Play 3 Mid-Range Speakers Replacement: 手順 5、 2の画像 2
    • Disconnect the front panel from the motherboard by gently reaching in and pushing the tab underneath the wire connector and pulling towards you.

  6. Sonos Play 3 Mid-Range Speakers Replacement: 手順 6、 2の画像 1 Sonos Play 3 Mid-Range Speakers Replacement: 手順 6、 2の画像 2
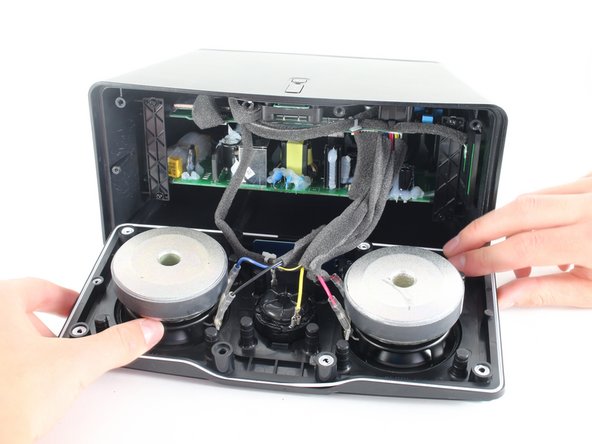
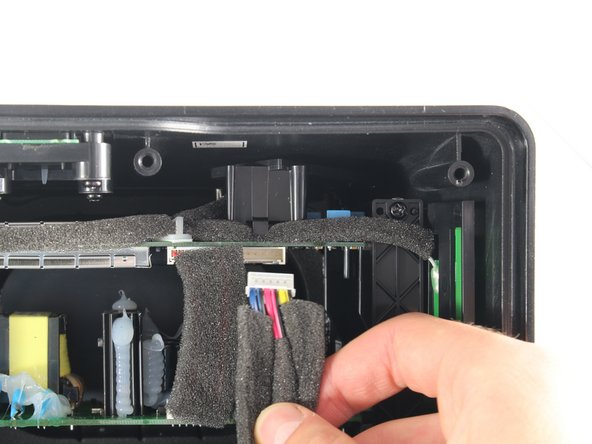
    • Gently remove the wireless card located at the bottom of the front speaker panel by pulling up and out with your index finger and thumb.

    You must first loosen the Phillips #1 screws holding the plastic brackets that keep the Wi-Fi card in place.

    Olivier Biot - 返信

    On the Sonos Play 3 I opened, the Wi-Fi card lied flat below the plastic clips. Between the card and the clips, there were 2 rectangular foam pads glued to the Wi-Fi card.

    Olivier Biot - 返信

  7. Sonos Play 3 Mid-Range Speakers Replacement, Mid-Range Speakers: 手順 7、 3の画像 1 Sonos Play 3 Mid-Range Speakers Replacement, Mid-Range Speakers: 手順 7、 3の画像 2 Sonos Play 3 Mid-Range Speakers Replacement, Mid-Range Speakers: 手順 7、 3の画像 3
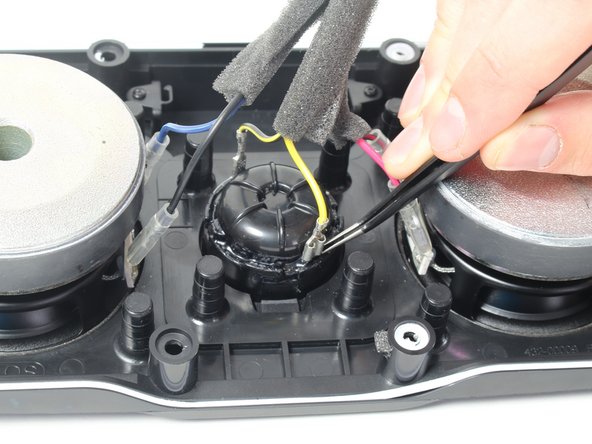
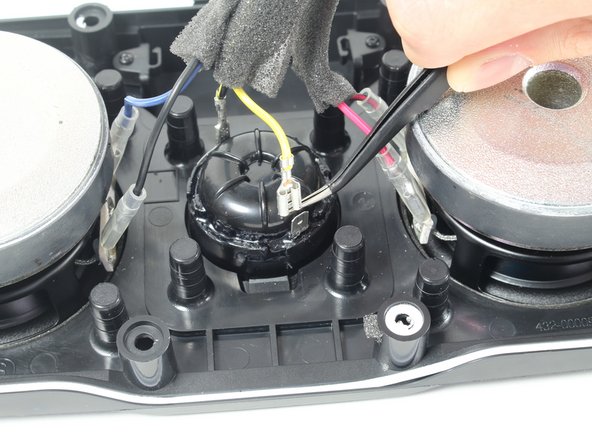
    • Use tweezers to disconnect the wire connectors from the mid-range speakers. The connectors may be very tight, but we promise they do come off.

  8. Sonos Play 3 Mid-Range Speakers Replacement: 手順 8、 1の画像 1
    • Using a Phillips #2 screwdriver, remove the screws securing the speakers to the front panel.

  9. Sonos Play 3 Mid-Range Speakers Replacement: 手順 9、 2の画像 1 Sonos Play 3 Mid-Range Speakers Replacement: 手順 9、 2の画像 2
    • Carefully lift the speaker you need to replace out the front of the panel.

終わりに

To reassemble your device, follow these instructions in reverse order.

3 の人々がこのガイドを完成させました。

作成者

2人の作成者と共同で作成されました。

Christina Santini

メンバー登録日: 04/14/16

1,350 ポイント

7のガイドは作成済み

チーム

Cal Poly, Team 25-6, Maness Spring 2016 Cal Poly, Team 25-6, Maness Spring 2016人のメンバー

CPSU-MANESS-S16S25G6

4 メンバー

14のガイドは作成済み

6 件のコメント

What’s the point of taking the speaker out, if I can’t buy a replacement?

Peter - 返信

hi! where can i buy a replacement speaker?

Kareem - 返信

Christina, where did you get the replacement speaker??? What is the point of the how to without the parts??

wedevets - 返信

Dove posso trovare i ricambi sonos

Giustino - 返信

Successful driver replacement !

I dropped my Play 3 about a month ago. Both of the mid range drivers suffered damage. The magnets pulled the cones off center. I was able to reset one of the cones and it tested ok. The other unit not so much. I bought 2 drivers from AliExpress, deciding to replace both anyway . They arrived in 3 weeks, fit perfectly in the enclosure and the wire connectors needed no mods either. The replacements took about 10-15 minutes to install and the Play 3 is now playing beautifully! Link for the drivers:

https://www.aliexpress.com/item/22518326...

Doug Field - 返信

This was a very good how to! Enough details and steps. I can use the same de mount procedure to remove the grill so that I can spray paint it white! Thx! 😊

Badsbb - 返信

コメントを追加

統計データ:

過去 24時間: 1

過去 7 日: 6

過去 30 日: 31

今までの合計 4,822