メインコンテンツにスキップ

Sonos Play 3 Front Speaker Panel Replacement

必要条件のみ
この修理ガイドは、他のガイドの前提条件として使用されます。それ自体は不完全で、単独で使用されることはありません。

必要な工具と部品

  1. Sonos Play 3 Front Speaker Panel Replacement, Front Speaker Panel: 手順 1、 2の画像 1 Sonos Play 3 Front Speaker Panel Replacement, Front Speaker Panel: 手順 1、 2の画像 2
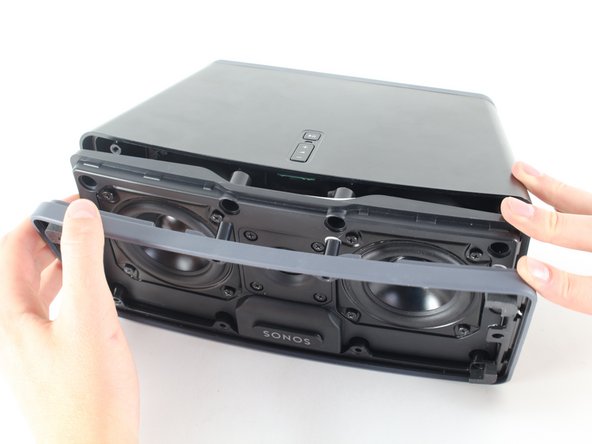
    • Unscrew eight 1.5 inch Phillips #2 screws attaching the front speaker panel to the box.

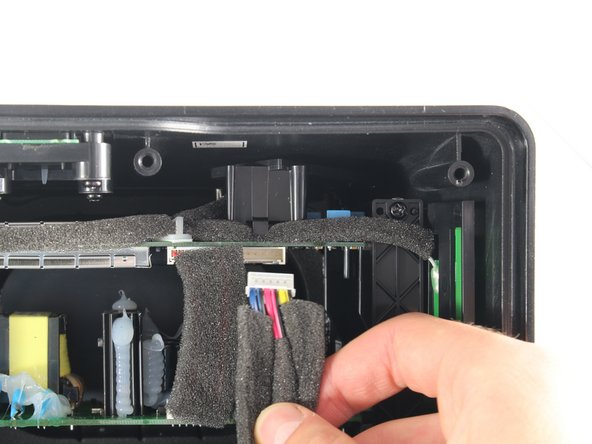
    • Unscrew the single 1 inch Phillips #2 screw located on the left side of the panel. This may be hidden beneath the warranty void sticker that you'll want to remove.

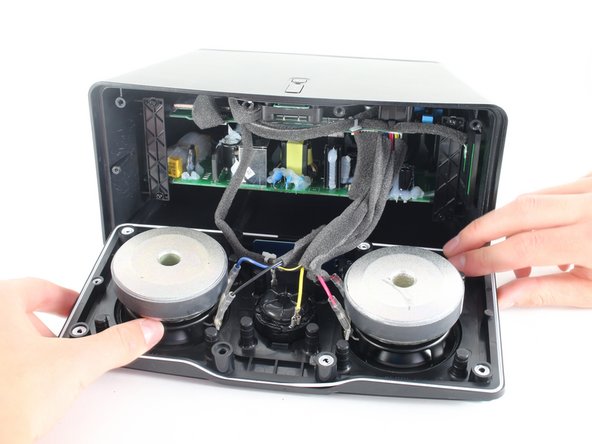
    • Unscrew the single 3/4 inch Phillips #2 screw, which is the last thing holding the front panel to the casing.

  2. Sonos Play 3 Front Speaker Panel Replacement: 手順 2、 3の画像 1 Sonos Play 3 Front Speaker Panel Replacement: 手順 2、 3の画像 2 Sonos Play 3 Front Speaker Panel Replacement: 手順 2、 3の画像 3
    • Remove the front panel carefully.

    • Note that there are two layers to the panel that should stay in their original order.

  3. Sonos Play 3 Front Speaker Panel Replacement: 手順 3、 2の画像 1 Sonos Play 3 Front Speaker Panel Replacement: 手順 3、 2の画像 2
    • Disconnect the front panel from the motherboard by gently reaching in and pushing the tab underneath the wire connector and pulling towards you.

  4. Sonos Play 3 Front Speaker Panel Replacement: 手順 4、 2の画像 1 Sonos Play 3 Front Speaker Panel Replacement: 手順 4、 2の画像 2
    • Gently remove the wireless card located at the bottom of the front speaker panel by pulling up and out with your index finger and thumb.

終わりに

To reassemble your device, follow these instructions in reverse order.

ある他の人がこのガイドを完成しました。

作成者

5人の作成者と共同で作成されました。

Christina Santini

メンバー登録日: 04/14/16

1,350 ポイント

7のガイドは作成済み

チーム

Cal Poly, Team 25-6, Maness Spring 2016 Cal Poly, Team 25-6, Maness Spring 2016人のメンバー

CPSU-MANESS-S16S25G6

4 メンバー

14のガイドは作成済み

0 件のコメント

コメントを追加

統計データ:

過去 24時間: 0

過去 7 日: 0

過去 30 日: 0

今までの合計 85