メインコンテンツにスキップ

Sonos Connect Fuse Replacement

必要な工具と部品

  1. Sonos Connect Fuse Replacement, Bottom Part: 手順 1、 1の画像 1
    • Remove the rubber pads and unscrew

  2. Sonos Connect Fuse Replacement, Continue to unscrew: 手順 2、 1の画像 1
    • Take care not to damage the wires of the Wi-Fi antennas which are very bothersome.

  3. Sonos Connect Fuse Replacement, Unclip the top cover: 手順 3、 2の画像 1 Sonos Connect Fuse Replacement, Unclip the top cover: 手順 3、 2の画像 2
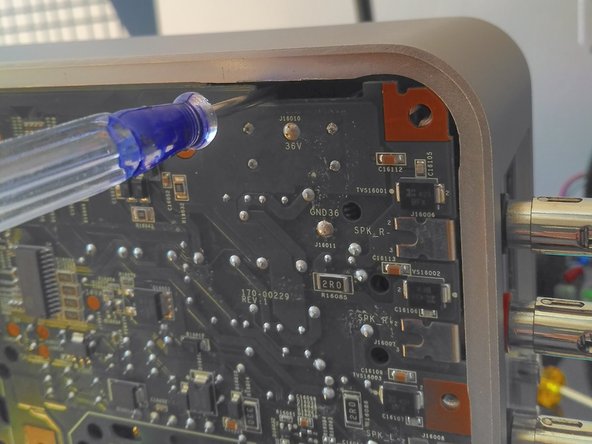
    • By using a screwdriver inserted through each of the 8 peripheral slots, you can access the clips of the top cover.

  4. Sonos Connect Fuse Replacement, Access under the top cover: 手順 4、 1の画像 1
    • Continue unscrewing (there is a screw under the seal).

  5. Sonos Connect Fuse Replacement, Locate the fuse: 手順 5、 1の画像 1
    • It's a soldered fuse. You will need to desolder it from the back in order to replace it.

  6. Sonos Connect Fuse Replacement, Replacement fuse: 手順 6、 1の画像 1
    • About 1$

    • 250V 5A T fuse (time delay).

終わりに

To reassemble your device, follow these instructions in reverse order.

ある他の人がこのガイドを完成しました。

以下の翻訳者の皆さんにお礼を申し上げます:

fr en

100%

これらの翻訳者の方々は世界を修理する私たちのサポートをしてくれています。 あなたも貢献してみませんか?
翻訳を始める ›

作成者

1人の作成者と共同作成されました。

YvesG

メンバー登録日: 06/04/18

290 ポイント

2のガイドは作成済み

コメント 1 件

Bravo

Ce tuto peux rendre service a des consommateurs abusés par la sociète Sonos .

Merci

bruno vinay - 返信

コメントを追加

統計データ:

過去 24時間: 6

過去 7 日: 16

過去 30 日: 61

今までの合計 2,001