メインコンテンツにスキップ

Sol Republic Deck Bluetooth Button Replacement

必要な工具と部品

  1. Sol Republic Deck Bluetooth Button Replacement, Bluetooth Button: 手順 1、 1の画像 1
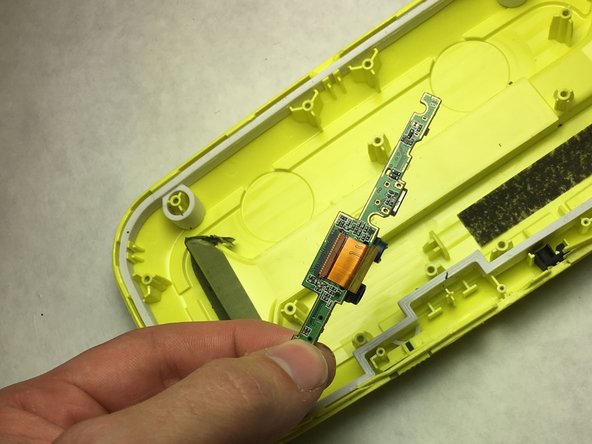
    • With plastic spudger wedge in between the top and bottom casings to force sepearation . Exposing the inside components of the Republic Deck.

  2. Sol Republic Deck Bluetooth Button Replacement: 手順 2、 1の画像 1
    • Use the screwdriver to unscrew two 3.6mm Phillips #0 screws securing the plastic plate.

  3. Sol Republic Deck Bluetooth Button Replacement: 手順 3、 1の画像 1
    • Remove the ribbon cable from the circuit board.

  4. Sol Republic Deck Bluetooth Button Replacement: 手順 4、 1の画像 1
    • Plug in de-soldering kit and wait 3 minutes for the solder to heat up.

    • Use the tip of your soldering iron to heat the old solder unit and apply until it melts.

    • Remove speaker wires connecting the speaker to the circuit board.

  5. Sol Republic Deck Bluetooth Button Replacement: 手順 5、 1の画像 1
    • Unscrew five 3.6 mm Phillips #0 screws securing the circuit board.

  6. Sol Republic Deck Bluetooth Button Replacement: 手順 6、 1の画像 1
    • Unscrew fifteen 6.2mm Phillips #0 screws and lift the black plastic plate from the case.

  7. Sol Republic Deck Bluetooth Button Replacement: 手順 7、 2の画像 1 Sol Republic Deck Bluetooth Button Replacement: 手順 7、 2の画像 2
    • Remove the three 3.6mm Phillips #0 screws.

    • Remove the circuit board containing the BlueTooth button.

終わりに

To reassemble your device, follow these instructions in reverse order.

ある他の人がこのガイドを完成しました。

作成者

2人の作成者と共同で作成されました。

Jonathan Holtman

メンバー登録日: 03/20/17

368 ポイント

2のガイドは作成済み

チーム

IUPUI, Team S3-G1, Baechle Spring 2017 IUPUI, Team S3-G1, Baechle Spring 2017人のメンバー

IUPUI-BAECHLE-S17S3G1

3 メンバー

3のガイドは作成済み

0 件のコメント

コメントを追加

統計データ:

過去 24時間: 0

過去 7 日: 2

過去 30 日: 2

今までの合計 545