はじめに
SodaStream Source は、ローダータブが作動するとソーダを生成します。このタブを押すことで、炭酸やフレーバーの注入が開始されます。このタブは使用中に破損することがありますが、本ガイドに記載されている手順で交換することができます。このタブは炭酸ブロックの中にあり、専用のカバーがあります。ローダータブを交換するには、デバイスの外部および内部を分解する必要があります。このガイドでは、この内部パーツにアクセスするための手順を説明しています。
必要な工具と部品
-
-
デバイスの正面からアウターカバーを引き抜きます。
We are working on that for the last two hours without succcess. The boytom seems to slide out, but the top is totally stuck.
Hey Robert Coles, I figured it out. It wants to slide out backwards. You’ll notice the bottom wants to come out but the top is stuck. There is a sturdy plastic catch at the top, I managed to dislodge it by inserting a flathead screwdriver and giving it a little twist while pulling the housing away at the same time. I hope this helps! -jt
I have the same problem.
I’m stuck here too. I’ve pulled a lot of things apart but this has got the better of me. I can’t even get the bottom to slide. I love the way his hands are delicately poised to gently lift the back off. I’ve tried pulling so hard I’m frightened of breaking it. Pity. Such a good, well thought out manual otherwise. Stuck on step 3
used two thin wood skewers to break the hold on the top. Slid them in each about 1/2” from the enter. finally released.
Brian’s comment is excellent. The only additional piece of information is that the skewers should be inserted from the back. The catch is in the middle near the back. I inserted from the front which was wrong, but still worked. I left a couple of very fine marks that I think would not happen if inserted from the back.
This step was unnecessary. I was able to slide off the front panel without pulling the outer cover off.
Same for me. Jump to step4/5 first to see if it's even necessary.
jwitt72 -
there might be different variations within the same “model”. in my case (source), i realized that there is a tab at the top of of the housing. i pulled upwards the top of the housing, and was able to slide the housing backwards. there were 2 pairs of tracks on the sides of the housing that i thought they might have latches, but they were only guides to slide the housing. i do not how to share pictures here to show my steps
This step was a real bugger. What helped was sliding a medium putty knife between the top and inner piece. The plastic snap is very near the back. They are right above the small “point” in the centre of the mechanism below it. Takes patience and let the plastic give way in time. I thought for sure I was going to bust it, and then it finally slid out like magic.
This step is only useful if you need to retension the two springs that lift the head and releases the pressure so that you don't have to lift it manually to get the bottle out.
till_vidar - 返信
There are definitely different model variations. The outer metal case on my 2013 is split at the bottom as in this guide. The plastic case on my 16/17 is different an has the catch at the top rear as discussed in this thread. A gentle push up with my thumbs was enough to release it.
There is no need for steps 1, 2 and 3. Start at 4, and just remove the two screws from the front square that you push down. Use a tool to firmly pull the cover off and go ahead and replace the battery. Put back the cover, the two screws and you are done!
MarianaFre - 返信
-
-
-
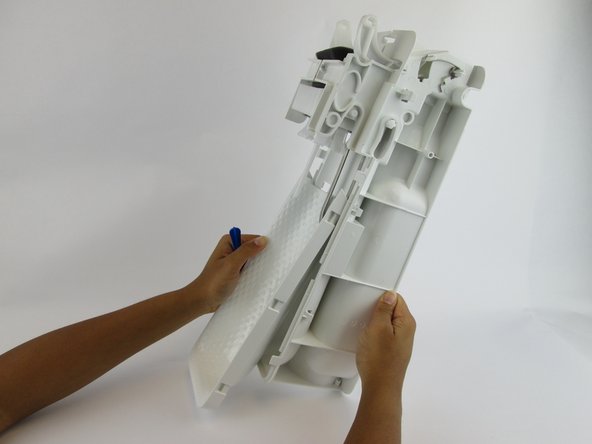
フロントカバーをしっかりと引き抜いて外します。
The plastic spudgers that are supplied for mobile phone or tablet screen removal are perfect for this job. Use 2 - 1 on each side.
Once the 18.2 mm screws are removed, I just pulled the black plastic outer cover a couple mm away from the white plastic internal block on each side to release 4 of the 6 plastic catches, and then rotated upward to release the last 2 plastic catches.
Note for the SodaStream Source model that doesn't have a battery: The contents of the electrical unit will come off along with the cover itself. The connecting wires are short and won't allow removing the cover as shown here. Disassemble carefully so as to not damage the wires.
This model looks slightly different than the one shown in this guide: there are three horizontally placed buttons along the top edge, used to select the degree of carbonation and to start the process. -
-
-
本体上部にある金色のバーを炭酸ブロックから押し出します。
We could,remove this covee, without sliding the assembly out ofbthe case. There was NO gold bar in the system…
-
-
-
黄色いバッテリーカバーを上にスライドさせて、デバイス本体から取り外します。
Careful! I had springs and retainers go flying on this step
Yep…same here. Took me a good minute to figure out where they came from!?
Fun fact: The lights on the SodaStream are simply a timer. They are in no way linked to a pressure gauge. If you want more bubbles it doesn't mean you have to press on the activation mechanism harder. you can press gently and just wait longer. This way the water will not spill out over the top and leak all over the table. Ignore the lights and just wait for the safety release valve to activate as you are filling the bottle. that's how you know you have reached the limit.
-
-
-
-
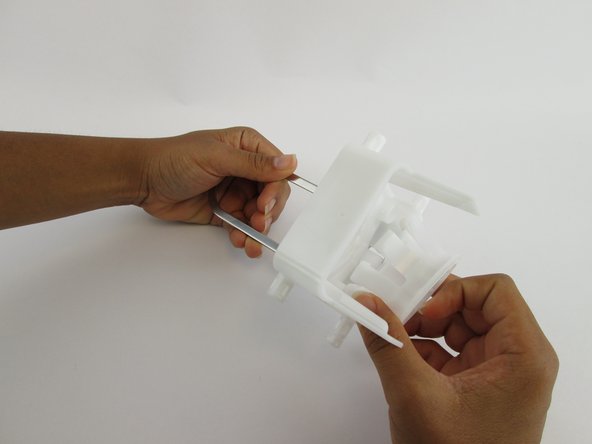
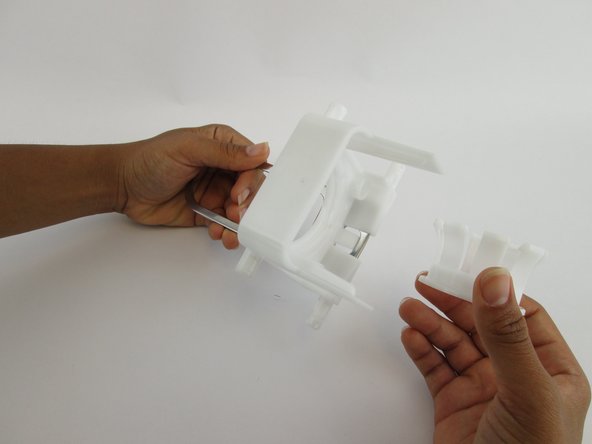
炭酸ブロックの前面付近にあるプラスチックのパーツを、プラスチック製の開口ツールやナイロン製スパッジャーなどを使って、装置の両側から取り外します。
-
-
-
プラスチックの楕円形パーツとその中にあるバネを取り出します。
Do not have this piece on mine?
nor do I. They must have made some changes.
Scott -
This piece exists on my 2013 metal chassis version, but not on my 2016/17 plastic chassis.
-
-
-
右側についている17.9 mm ネジを3本外します。
Should this be four screws? I followed all directions (I think) and had one extra screw to remove, just above the bottle mount, before I could split the two halves apart
Yes I had a 4th screw at this step too. Going backwards the missing fourth screw in the instruction messed me up and I had to redo it!
Yes the 4th screw still isn't mentioned - and just below it is the rare-earth magnet that can fall out when the halves are separated. This magnet activates the LEDs when the carbonating block is pushed down - no magnet, no lights.
-
-
-
本体の左右を握って、同じように2つに引き分けます。
what happens to the middle white piece?
Yeah there's a step missing here…between 17 & 18
Is it better to lay it on its side?
I hope someone will document the missing step of what it looks like if you separate the halves without having all the parts fall out.
What does it look like and where do they go? Kinda' important for reassembly.
I've added a photo to this step showing just this, fingers crossed it gets approved
Liz - would you post a link to your pic here so we can see it even though it's not approved yet?
Joe -
Re: "missing step"
On the newer models, (at least 2016/17) the valve is attached to the left side and it's two Phillips head screws must be removed.
These instructions are correct for earlier models where the valve is in the middle, so there is no missing step.
Thanks to this guide, I’ve taken a part my SodaStream Source a few times now. Like others have mentioned, during reassembly, this step tripped me up every time. It’s definitely missing details about the part orientation. I took some additional photos in efforts to help others. Please find the album here.
Thanks Mitch!! That's exactly what I needed! been pulling my hair out trying to figure out how that white piece went back in.
You’re very welcome! I’m so glad it helped you out!
Mitch -
-
-
-
フォームパッドを引き上げて、炭酸ガスを生成するパーツの前面から取り外します。
Any source for spare parts known? Ebay and Amazon does not help here!
The part on mine that was broken is the plastic cap/nut that connects the black hose to the canister holder.
Going to try and superglue it. Wonder if there's a source for this nut?
I wish it was that simple. The hose has a brass ferrule crimped on it, and the nut cannot be replaced without being able to remove and crimp a new ferrule to the (new?) hose. I have found a listing (eBay Europe?) for a split brass nut that allows replacement, but...
-
-
-
ローダータブをノズルから引き抜きます。
-
-
-
内側の小さなプラスチックの円を、大きなプラスチックのローダータブピースから引き抜きます。
Great fixit guide. Thanks. My loader tab fully engages when there is no bottle in it, but not when there is a bottle loaded. It hits resistance about 5cm short. Any ideas why and how to fix?
How do I know what needs replaced between loader tab, the sealer and/or the white tube. Because the symptoms seem to be the same for any of those(?) i’m not getting any gas at all but the tab pushes down as normal and blows big bubbles full of nothing’s the one problem. So i thought it might be the inside seal that i’ve looked at your instructions on that and these others.
-


このデバイスを再組み立てするには、インストラクションを逆の順番に従って作業を進めてください。
このデバイスを再組み立てするには、インストラクションを逆の順番に従って作業を進めてください。
8 の人々がこのガイドを完成させました。
以下の翻訳者の皆さんにお礼を申し上げます:
100%

Midori Doiさんは世界中で修理する私たちを助けてくれています! あなたも貢献してみませんか?
翻訳を始める ›
チーム

USF Tampa, Team S1-G4, Leahy Spring 2017 USF Tampa, Team S1-G4, Leahy Spring 2017人のメンバー
USFT-LEAHY-S17S1G4
3 メンバー
40のガイドは作成済み
6 件のコメント
Thank you SO much for this! I was having a lot of trouble with this thing not releasing the bottle, so I disassembled it all and put it back together and now it works a treat! Not sure what was going on but I am so excited. You weren’t kidding at the end about it all falling apart… took ages to work out how it all went back together, but now I understand it and I have a working SodaStream. 5*!
Do you know where the tiny magnet goes? It fell out on the table as I was disassembling.
I think it has something to do with the microchip for the LED’s. Can’t figure out how else the light would light. I haven’t taken it apart far enough to find the magnet. Hope this helps you.
You can see the magnet in step 18, the first picture. Its right below where a screw used to be.
I placed sodastream on side and removed top half. I could then see where parts needed to be after they “fell out” for reassembly. More pictures of those steps would be helpful. Thank
My machine is overflowing when i put gas
Elaine Anja - 返信
Does this article apply to the Fizzi too?
When I look at my Fizzi (that I bought secondhand), it does not have any black seal like the one shown in this article.
Greg Harrington - 返信
Parts are not specified - why? You would need a replacement circuit board (PCB, not a "chip")/battery holder assembly, if indeed that has failed.
Malcolm Noble - 返信
IMPORTANT! Don’t use Philips screwdriver size PH1, it’s too small and will damage the screws. The correct size is PH2. This goes for all screws on this machine.
Charles Greneby - 返信