メインコンテンツにスキップ

Snapfon ez One Charging Port Replacement

必要な工具と部品

  1. Snapfon ez One Charging Port Replacement, Remove the battery cover: 手順 1、 1の画像 1
    • Turn off the phone to prevent data loss.

    • Press and slide the battery out to remove it.

    • Picture rights belong to Snapfon®. Picture is used for educational purposes only. No copyright infringement intended.

  2. Snapfon ez One Charging Port Replacement, Remove the battery: 手順 2、 1の画像 1
    • Pry the battery out with your thumb or the iFixit opening tool.

    • Make sure to properly dispose of the old battery at a recycling center.

    • Picture rights belong to Snapfon®. Picture is used for educational purposes only. No copyright infringement intended.

  3. Snapfon ez One Charging Port Replacement, Removing the plastic inserts: 手順 3、 2の画像 1 Snapfon ez One Charging Port Replacement, Removing the plastic inserts: 手順 3、 2の画像 2
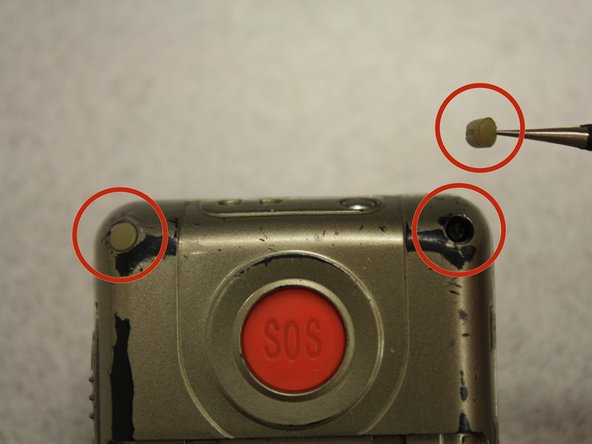
    • Remove the four rubber inserts from the screw holes using a pair of tweezers.

  4. Snapfon ez One Charging Port Replacement, Remove the shield screws: 手順 4、 3の画像 1 Snapfon ez One Charging Port Replacement, Remove the shield screws: 手順 4、 3の画像 2 Snapfon ez One Charging Port Replacement, Remove the shield screws: 手順 4、 3の画像 3
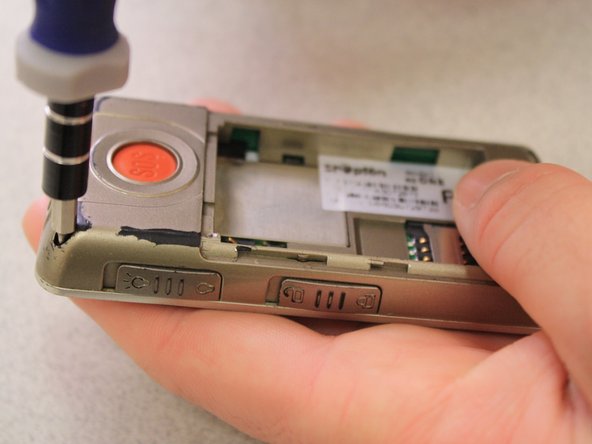
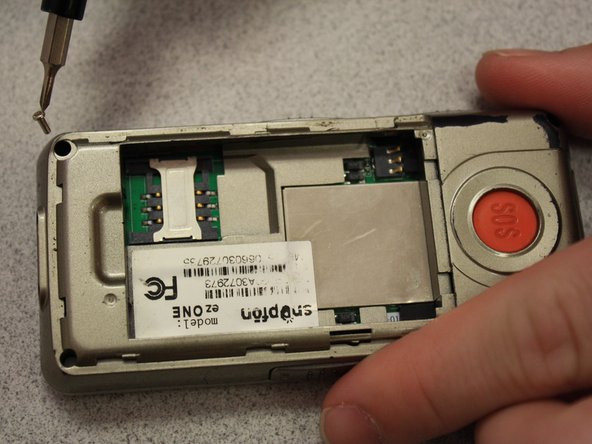
    • Remove the four 3.1mm screws in the corners with a Phillips #00 screwdriver.

  5. Snapfon ez One Charging Port Replacement, Separate the case: 手順 5、 3の画像 1 Snapfon ez One Charging Port Replacement, Separate the case: 手順 5、 3の画像 2 Snapfon ez One Charging Port Replacement, Separate the case: 手順 5、 3の画像 3
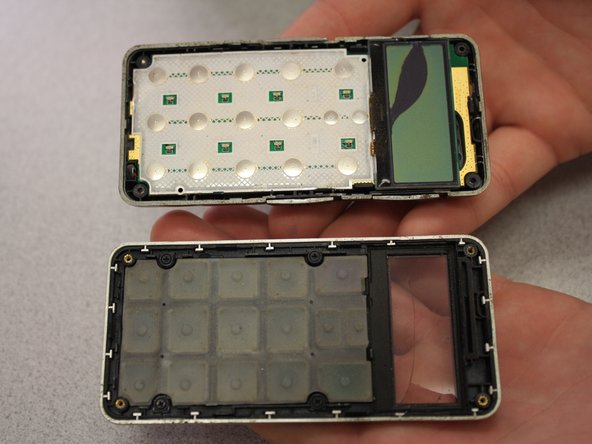
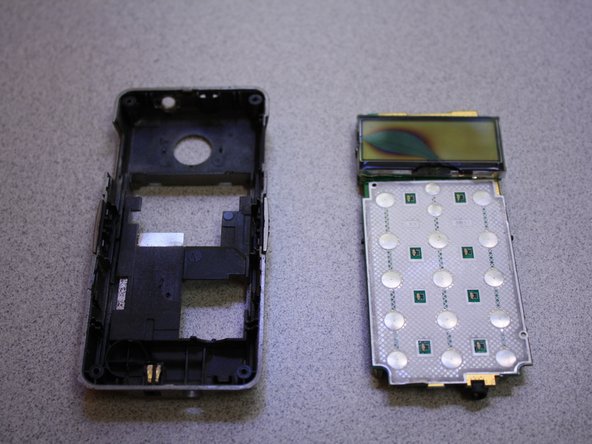
    • Separate the front case from the back case.

    • Remove the metal bumper from the front case’s perimeter.

  6. Snapfon ez One Charging Port Replacement, Remove the volume slider: 手順 6、 1の画像 1
    • Pry the volume slider button out with tweezers.

    • The volume slider button may fall out during the separation of the front and back cases. This is OK.

  7. Snapfon ez One Charging Port Replacement, Remove the motherboard: 手順 7、 3の画像 1 Snapfon ez One Charging Port Replacement, Remove the motherboard: 手順 7、 3の画像 2 Snapfon ez One Charging Port Replacement, Remove the motherboard: 手順 7、 3の画像 3
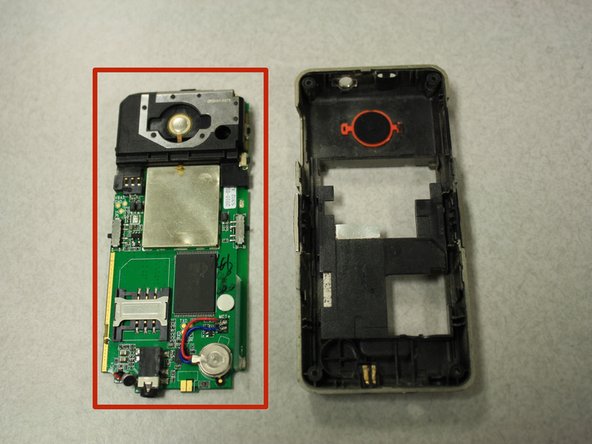
    • Separate the circuit board from the inside of the back case by prying between them with the opening tool.

    • The last picture is a view of the back of the circuit board.

  8. Snapfon ez One Charging Port Replacement, Charging Port: 手順 8、 3の画像 1 Snapfon ez One Charging Port Replacement, Charging Port: 手順 8、 3の画像 2 Snapfon ez One Charging Port Replacement, Charging Port: 手順 8、 3の画像 3
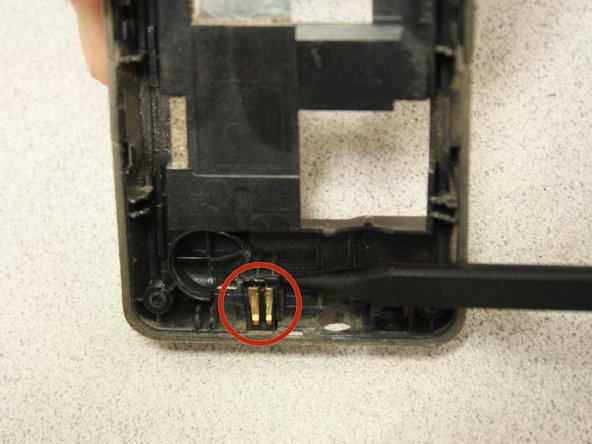
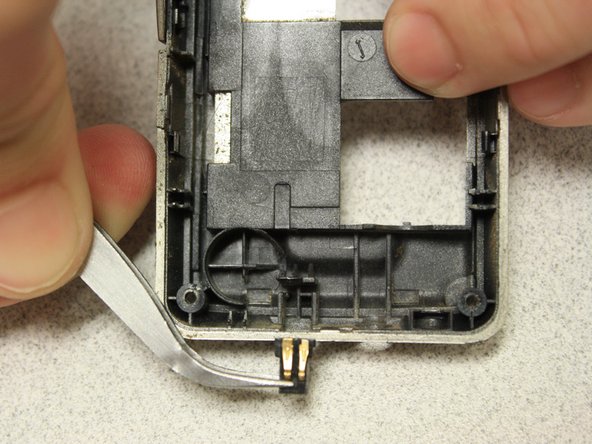
    • Use tweezers to remove the charging port located inside the back cover of the phone.

    • A spudger may be needed to apply pressure with the use of the tweezers for easier removal.

終わりに

Insert new charging port, and to reassemble your device, follow these instructions in reverse order.

作成者

3人の作成者と共同で作成されました。

John Bender

メンバー登録日: 03/26/14

818 ポイント

8のガイドは作成済み

チーム

Clemson, Team 6-5, Benson Spring 2014 Clemson, Team 6-5, Benson Spring 2014人のメンバー

CLEM-BENSON-S14S6G5

3 メンバー

16のガイドは作成済み

0 件のコメント

コメントを追加

統計データ:

過去 24時間: 0

過去 7 日: 6

過去 30 日: 7

今までの合計 299