メインコンテンツにスキップ

SiriusXM Onyx EZ Main Board Replacement

必要な工具と部品

  1. SiriusXM Onyx EZ Main Board Replacement, Main Board: 手順 1、 3の画像 1 SiriusXM Onyx EZ Main Board Replacement, Main Board: 手順 1、 3の画像 2 SiriusXM Onyx EZ Main Board Replacement, Main Board: 手順 1、 3の画像 3
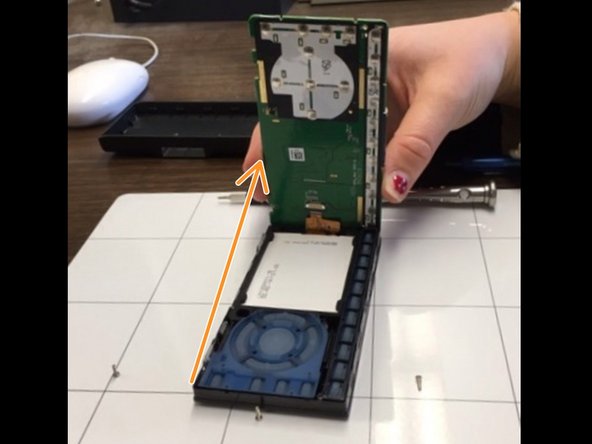
    • Separate the radio from the mount prior to dissassembly.

    • Use the 1-inch blue wedge from the iFixit Kit to carefully remove main body from black, plastic casing.

    • There are teeth on the casing that must be “popped” out of the holes in the main body.

  2. SiriusXM Onyx EZ Main Board Replacement: 手順 2、 2の画像 1 SiriusXM Onyx EZ Main Board Replacement: 手順 2、 2の画像 2
    • This will leave the back of the main board exposed.

    • Unscrew the (3) Philips head screws with a PH000 Philips head screwdriver from the iFixit kit to remove the main board.

    • Save the screws. You will need them to reassemble the device.

  3. SiriusXM Onyx EZ Main Board Replacement: 手順 3、 2の画像 1 SiriusXM Onyx EZ Main Board Replacement: 手順 3、 2の画像 2
    • Slide the main board towards the base of the unit away from the two clear clips at the top.

    • Once unclipped pull the board from the left side towards the right, exposing the LCD display.

  4. SiriusXM Onyx EZ Main Board Replacement: 手順 4、 1の画像 1
    • Lift up LCD display out of front casing.

    • At this point, refer to the LCD replacement guide if this is this part you wish to repair.

    • Make sure to remove the main board and the LCD display together as a single unit.

  5. SiriusXM Onyx EZ Main Board Replacement: 手順 5、 3の画像 1 SiriusXM Onyx EZ Main Board Replacement: 手順 5、 3の画像 2 SiriusXM Onyx EZ Main Board Replacement: 手順 5、 3の画像 3
    • Disconnect the LCD display from the main board by gently pulling the brown tab out of the main board’s metal slot.

    • You can now discard the main board and replace it with your new one.

  6. SiriusXM Onyx EZ Main Board Replacement: 手順 6、 2の画像 1 SiriusXM Onyx EZ Main Board Replacement: 手順 6、 2の画像 2
    • Attach the LCD Display to the main board by sliding the display's brown tab into the metal slot on the main board.

    • Place the LCD Display back into the front casing of the device, and slide the main board back into the two clear clips.

終わりに

To reassemble your device, follow these steps in reverse order.

作成者

10人の作成者と共同で作成されました。

Corbin Whitis

メンバー登録日: 10/09/12

2 ポイント

1ガイドが承認済み

チーム

Ohio State, Team 1-1, Burgess Spring 2016 Ohio State, Team 1-1, Burgess Spring 2016人のメンバー

OSU-BURGESS-S16S1G1

5 メンバー

1のガイドは作成済み

0 件のコメント

コメントを追加

統計データ:

過去 24時間: 0

過去 7 日: 0

過去 30 日: 6

今までの合計 422