メインコンテンツにスキップ

SiriusXM Onyx Casing Replacement

必要な工具と部品

  1. SiriusXM Onyx Casing Replacement, Casing: 手順 1、 1の画像 1
    • Take the iFixit opening tool and place it between the back casing and the device as shown.

  2. SiriusXM Onyx Casing Replacement: 手順 2、 2の画像 1 SiriusXM Onyx Casing Replacement: 手順 2、 2の画像 2
    • Apply pressure to the iFixit opening tool, pushing down until the the plastic casing pops off.

  3. SiriusXM Onyx Casing Replacement: 手順 3、 2の画像 1 SiriusXM Onyx Casing Replacement: 手順 3、 2の画像 2
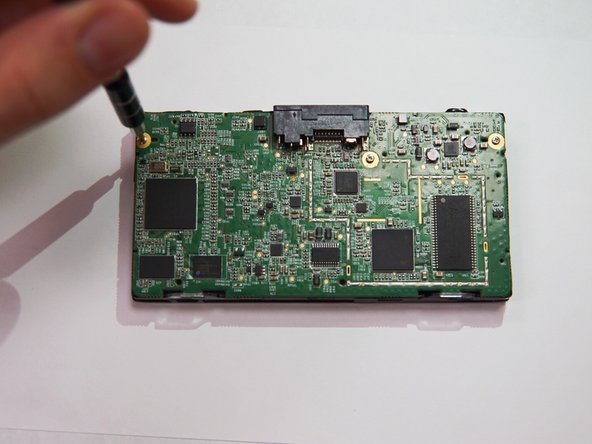
    • Use the Phillips PH00 screwdriver to remove the three marked screws.

  4. SiriusXM Onyx Casing Replacement: 手順 4、 3の画像 1 SiriusXM Onyx Casing Replacement: 手順 4、 3の画像 2 SiriusXM Onyx Casing Replacement: 手順 4、 3の画像 3
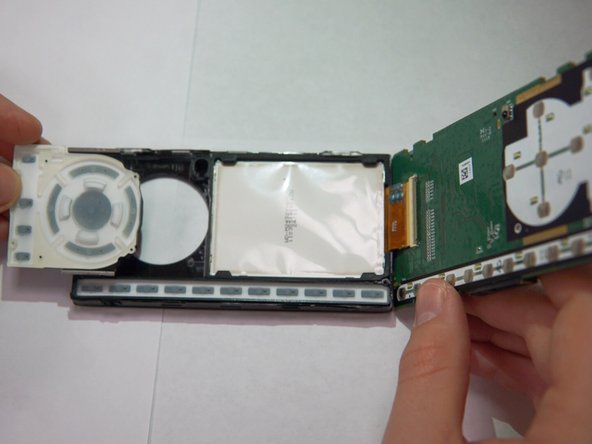
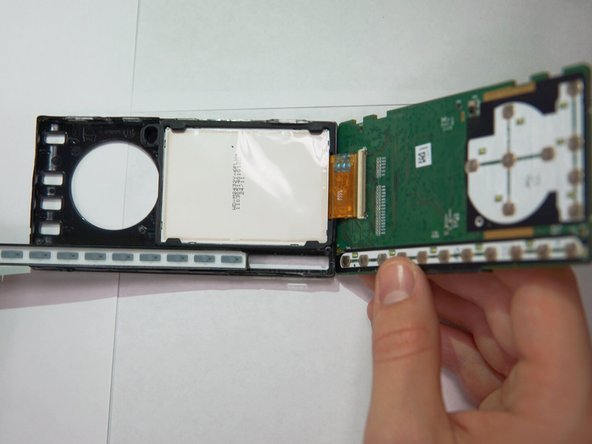
    • Remove the buttons from the casing.

  5. SiriusXM Onyx Casing Replacement: 手順 5、 2の画像 1 SiriusXM Onyx Casing Replacement: 手順 5、 2の画像 2
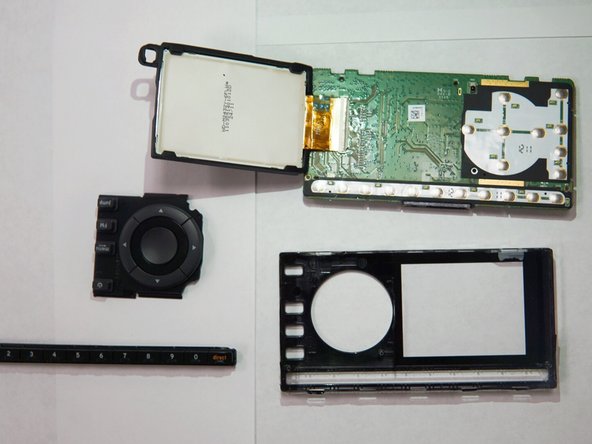
    • Remove the motherboard, and the casing should be free.

終わりに

To reassemble your device, follow these instructions in reverse order.

作成者

5人の作成者と共同で作成されました。

Christina Tao

メンバー登録日: 10/17/17

319 ポイント

3のガイドは作成済み

チーム

UC Santa Barbara, Team S2-G8, Weedon Fall 2017 UC Santa Barbara, Team S2-G8, Weedon Fall 2017人のメンバー

UCSB-WEEDON-F17S2G8

5 メンバー

4のガイドは作成済み

コメント 1 件

Thank you! I couldn’t figure out how to get it open!

Cameron Miller - 返信

コメントを追加

統計データ:

過去 24時間: 1

過去 7 日: 4

過去 30 日: 9

今までの合計 255