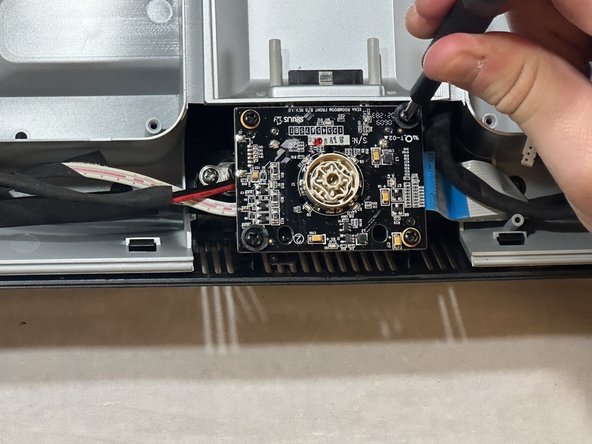
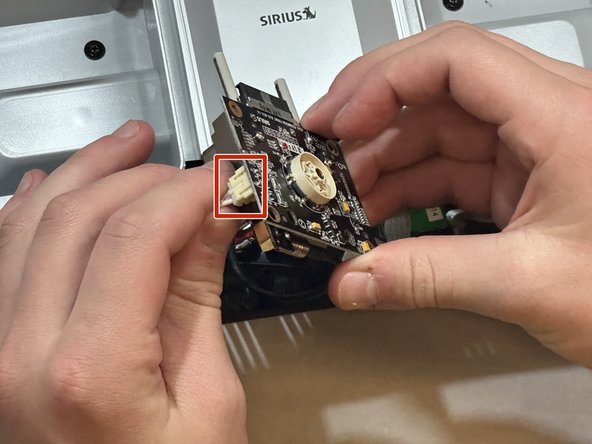
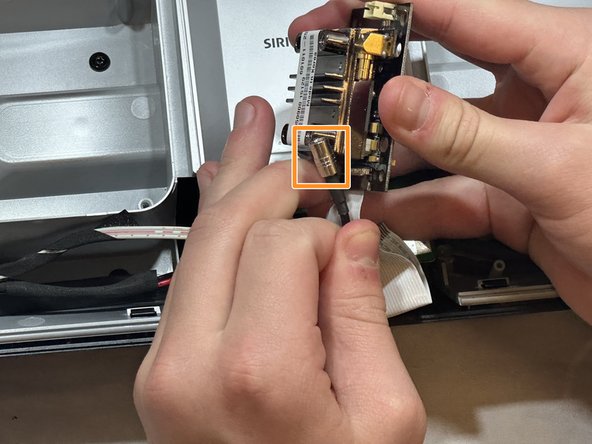
メインコンテンツにスキップ

Sirius S50-EX1 Channel Dial Daughterboard Replacement

必要な工具と部品

  1. Sirius S50-EX1 Channel Dial Daughterboard Replacement, Front Plate: 手順 1、 3の画像 1 Sirius S50-EX1 Channel Dial Daughterboard Replacement, Front Plate: 手順 1、 3の画像 2 Sirius S50-EX1 Channel Dial Daughterboard Replacement, Front Plate: 手順 1、 3の画像 3
    • Pry the speaker covers up gently from their sides by pulling up on the four corner posts that hold the cover in place.

  2. Sirius S50-EX1 Channel Dial Daughterboard Replacement: 手順 2、 2の画像 1 Sirius S50-EX1 Channel Dial Daughterboard Replacement: 手順 2、 2の画像 2
    • Remove the eight 11 mm screws from the front plate using a Phillips #1 screwdriver.

  3. Sirius S50-EX1 Channel Dial Daughterboard Replacement: 手順 3、 3の画像 1 Sirius S50-EX1 Channel Dial Daughterboard Replacement: 手順 3、 3の画像 2 Sirius S50-EX1 Channel Dial Daughterboard Replacement: 手順 3、 3の画像 3
    • Turn the device so its back is facing you.

    • Remove the two 11 mm screws using a Phillips #1 screwdriver.

    • Separate the stand from the device.

  4. Sirius S50-EX1 Channel Dial Daughterboard Replacement: 手順 4、 3の画像 1 Sirius S50-EX1 Channel Dial Daughterboard Replacement: 手順 4、 3の画像 2 Sirius S50-EX1 Channel Dial Daughterboard Replacement: 手順 4、 3の画像 3
    • Remove the two 9 mm screws with a Phillips #1 screwdriver.

    • The screws will be buried slightly into the frame.

  5. Sirius S50-EX1 Channel Dial Daughterboard Replacement: 手順 5、 3の画像 1 Sirius S50-EX1 Channel Dial Daughterboard Replacement: 手順 5、 3の画像 2 Sirius S50-EX1 Channel Dial Daughterboard Replacement: 手順 5、 3の画像 3
    • Turn the device so that its front is visible.

    • Remove the channel dial by pulling up on the dial firmly.

    • Remove the S50 by pulling it up and off of its connecting posts.

    • The front plate is now removable, but has a fairly strong adhesive so extra force will be required to pry it open.

    • Use an iFixit opening tool to pull up both sides of the speaker plate. They should come up easily. Pull firmly on the center to break the adhesive.

  6. Sirius S50-EX1 Channel Dial Daughterboard Replacement: 手順 6、 3の画像 1 Sirius S50-EX1 Channel Dial Daughterboard Replacement: 手順 6、 3の画像 2 Sirius S50-EX1 Channel Dial Daughterboard Replacement: 手順 6、 3の画像 3
    • Once the face place comes free, it will still be held in place by five connecting pieces.

    • Remove the three bundled-cable wires.

    • Remove the ribbon cable connector.

    • Remove the power connector cable.

    • The connecting points are delicate. To ensure that no damage comes to the device please use both hands to firmly disconnect each without wobbling.

  7. Sirius S50-EX1 Channel Dial Daughterboard Replacement, Channel Dial Daughterboard: 手順 7、 2の画像 1 Sirius S50-EX1 Channel Dial Daughterboard Replacement, Channel Dial Daughterboard: 手順 7、 2の画像 2
    • Remove the four 11 mm screws with a Phillips #1 screwdriver.

  8. Sirius S50-EX1 Channel Dial Daughterboard Replacement: 手順 8、 3の画像 1 Sirius S50-EX1 Channel Dial Daughterboard Replacement: 手順 8、 3の画像 2 Sirius S50-EX1 Channel Dial Daughterboard Replacement: 手順 8、 3の画像 3
    • Lift the board firmly towards you to pull it free from the posts.

    • Disconnect the locking power cable.

    • Disconnect the coaxial connector cable.

終わりに

To reassemble your device, follow these instructions in reverse order.

作成者

2人の作成者と共同で作成されました。

Harley Cejka

メンバー登録日: 10/02/23

533 ポイント

5のガイドは作成済み

チーム

Eastern Washington University, Team 1-3, Carnegie Fall 2023 Eastern Washington University, Team 1-3, Carnegie Fall 2023人のメンバー

EWU-CARNEGIE-F23S1G3

4 メンバー

6のガイドは作成済み

0 件のコメント

コメントを追加

統計データ:

過去 24時間: 0

過去 7 日: 0

過去 30 日: 2

今までの合計 32