はじめに
The brew group of these machines can be easily removed for cleaning. The most important seals need to be replaced from time to time. This is shown here.
Note: The brew group of the EQ9 is completely different, the instructions do not apply to it.
必要な工具と部品
-
-
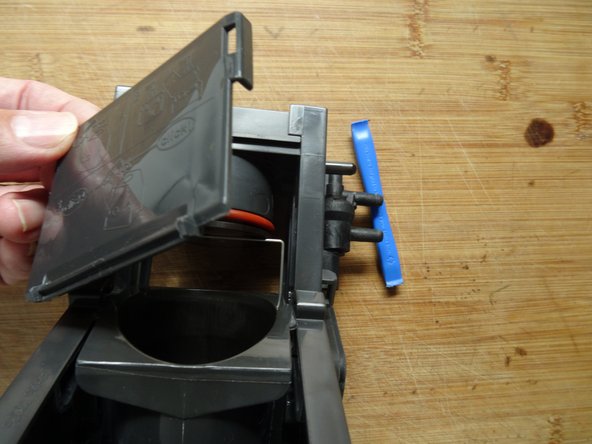
Picture of the brewing unit. The first gasket to be replaced is on the blue water inlet.
-
-
-
-
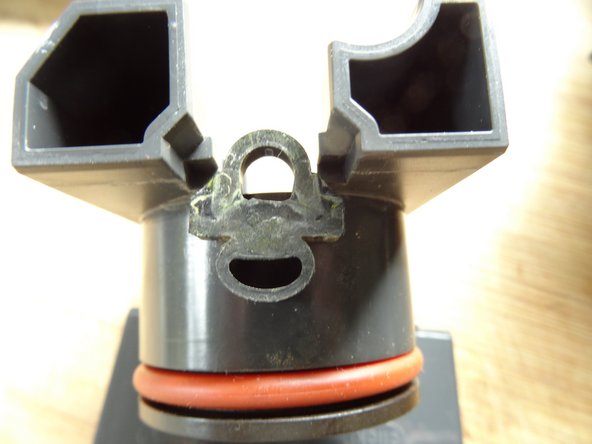
Lift out the cylinder with the lower piston.
-
Now the brewing unit is largely disassembled. The lower piston can also be removed, but it is usually sufficient to thoroughly clean the parts that have now been removed. Replace the O-ring on the upper piston and on the water inlet (possibly on both ends), grease them and the cylinder thinly with food-grade silicone grease.
-
Reassemble everything.
-


Work through the steps in reverse order to reassemble your device.
Work through the steps in reverse order to reassemble your device.
5 の人々がこのガイドを完成させました。
以下の翻訳者の皆さんにお礼を申し上げます:
100%


これらの翻訳者の方々は世界を修理する私たちのサポートをしてくれています。 あなたも貢献してみませんか?
翻訳を始める ›
チーム

6 件のコメント
von welcher Siemens EQ ist diese, meine der EQ9 sieht ganz anders aus….
Gibt es hier schon jemand, der sich mit meiner Brühgruppe auseinandergesetzt hat?
Grund: Sie macht gerne Schwierigkeiten: BRÜHGRUPPE REINIGEN, obwohl sie sauber ist . Nach Fetten geht sie wieder eine Weile…. In anderen Foren liest man etwas davon, daß an irgendwo einen Gummi (incl. Kerbung) einspannen soll, der dann ein Teil, das klemmt und die Meldung verursacht, in die Richtige Position bringt….
Stimmt! Die Brühgruppe der EQ.9 ist eine Neuentwicklung und ganz anders. Aber die Maschine dürfte noch so neu sein, dass Garantie drauf ist?
VauWeh -
Hallo, VauWeh - leider nein, ist schon 1,5 Jahre über Garantie.
In der Garantie-Zeit ging mir die Brühgruppe insofern kaputt, daß der Druckschlauch durch Abknicken und Überdruck gerissen ist.
(Leider bekomme ich diesen Schlauch nirgends, schade um die fast neue Brühgruppe)
Die Reklamation hat zu einem sofortigen Neuversand geführt, aber genau diese bringt den Fehler “Brühgruppe reinigen”, selbst wenn sie sauber gereinigt und gefettet wieder eingebaut wurde. Nun habe ich gerade Ruhe, nachdem ich sogar die Spindel mit Silikon-Öl besprüht habe.
Danke für die Info. Die EQ9 kenne ich (noch) nicht. Habe mal gegoogelt, das Problem scheint ja häufiger aufzutreten. Hmmm, das Gerät ist doch ganz schön teuer…
VauWeh -
so, mittlerweile ist die 2. BE blockiert, die 3. hat einen Riss (während der Reinigung mit Tablette -vllt. weil diese “hochkant” hineinfiel???- Hast du %&^*, die gerissene zu zerlegen, um Sie kennen zu lernen und dabei gleich das Gehäuse der Ersten, wo der Schlauch geplatzt war, zu tauschen? Weiteres per PN?