はじめに
The XLR connector is the place where the XLR cable connects to the microphone. If the connector is pulled out, the internal wiring of the microphone can be damaged.
必要な工具と部品
-
-
While holding the microphone connector in one hand, and the XLR cable in the other hand, slowly pull them apart.
-
Check to make sure all of the internal wires are connected. If you see a disconnected wire, take a look at the connector soldering guide.
-
-
-
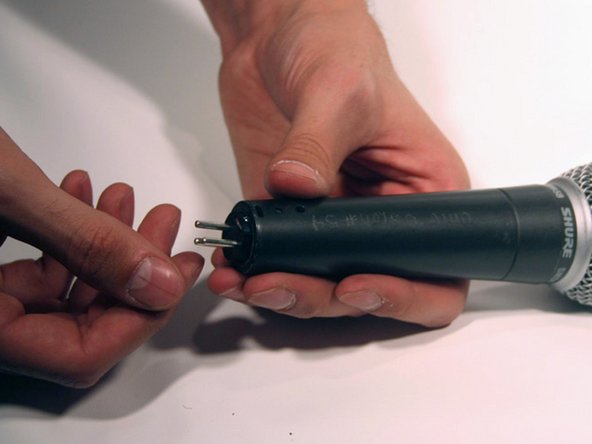
Hold the microphone connector in one hand and the microphone base in the other.
-
Line up the screw in the connector with the hole in the middle of the microphone.
-
Also, align the ridge on the microphone connector (located near the top of the connector) with the slot in the base of the microphone.
-
-


Following these steps should reinstall the XLR connector back into the microphone.
Following these steps should reinstall the XLR connector back into the microphone.
2 の人々がこのガイドを完成させました。
チーム

Cal Poly, Team 7-53, Forte Fall 2012 Cal Poly, Team 7-53, Forte Fall 2012人のメンバー
CPSU-FORTE-F12S7G53
5 メンバー
20のガイドは作成済み
2 件のコメント
you can buy the part here
simple clear and precise. Small problem fixed in no time, thank you very much!