はじめに
Successfully replace a dead battery in the Sharp EL-531X calculator using common household tools.
We'll see how easy it is to replace a dead battery, including a list of useful tools for this procedure as well as instructions with accompanying images.
必要な工具と部品
-
-
Clear the work table of items not related to repair.
-
Use a small container to temporarily store removed parts.
-
Use a work light, if desired.
-
-
-
One replacement “LR44” battery
-
-
Remove the grey protective case and set aside.
-
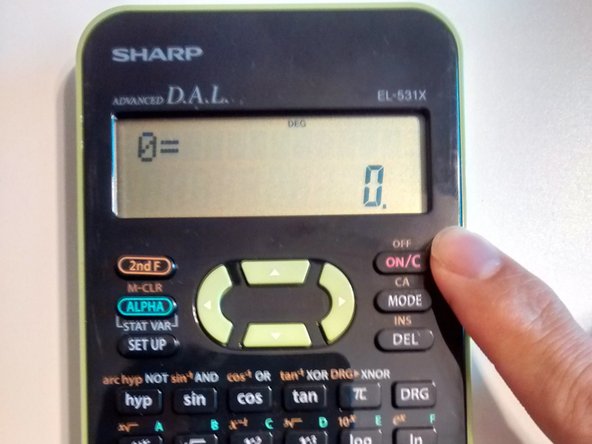
Press the orange <2nd F> button, located in the top-left corner of the keyboard.
-
Press the pink <ON/C> button, located in the top-right corner of the keyboard.
-
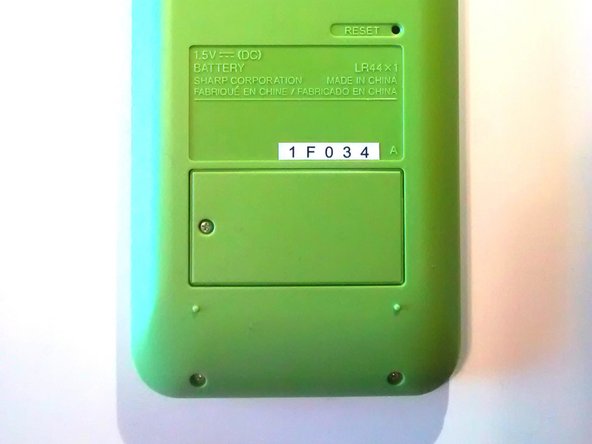
Flip the device over so the green backing and battery door face up.
-
-
-
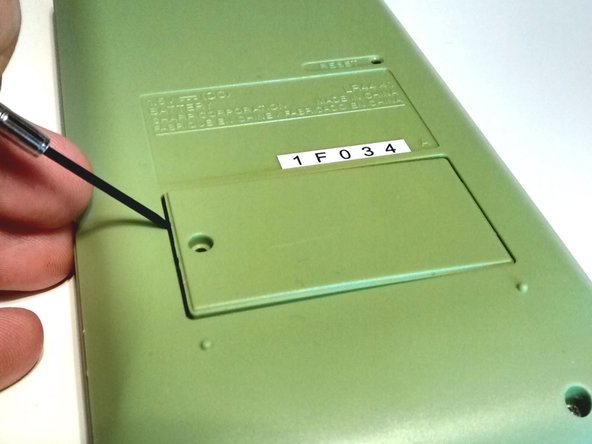
This screw is removable with the #0 Phillips screwdriver.
-
Insert the #0 Phillips screwdriver into the screw head.
-
Turn the screwdriver counterclockwise until the screw releases from the housing.
-
Carefully flip the calculator over and allow the screw to fall into the palm of your hand.
-
Note: The battery door may fall with the screw. If this is the case, place both parts into the small container for later use.
-
Place the screw into small container.
-
-
-
-
If the battery door sticks, use the 1.5 mm flat blade screwdriver or prying tool to CAREFULLY and GENTLY pull up on the left side of the door.
-
Remove the battery door and place in small container.
-
-
-
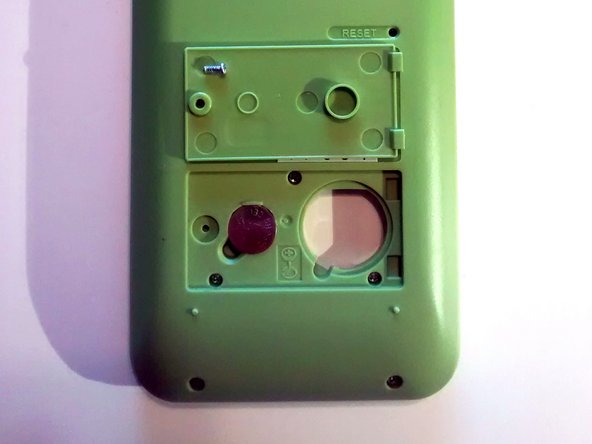
The small LR44 battery is located on the left hand side of the battery compartment.
-
CAREFULLY insert the 1.5mm flat blade screwdriver into the small space located on the bottom left hand side of the battery.
-
GENTLY press down on the screwdriver. The battery will easily slide upward.
-
Remove the battery from the battery compartment.
-
Set battery aside to discard properly after repair.
-
-
-
Remove battery from packaging. The proper replacement battery will have “LR44” printed on the top, or positive side, of the battery.
-
Place replacement battery, positive side facing up and visible, into the battery compartment
-
Apply gentle pressure until the battery lays flush with the surrounding green housing.
-
Note: This step will automatically turn calculator on. If the calculator is not turned on automatically, the battery may be placed incorrectly or another issue may be causing the calculator to malfunction.
-
-
-
Ensure the two small plastic latches are oriented on the bottom and right side.
-
Fit battery door into the two calculator housing slots. Once placed, the battery door should lay flush with the surrounding green housing.
-
Ensure the screw hole on the left hand side aligns with the screw hole on the battery compartment housing.
-
Using the #0 Phillips screwdriver, insert the screw.
-
Rotate screwdriver clockwise until secure.
-
Note: Do not over tighten, this may crack the plastic battery door housing or otherwise break device.
-
-
-
Note: Replacing the battery turns the calculator on automatically.
-
Press <2nd F> in the top left hand side of the keyboard.
-
Press <ON/C> in the top right hand side of the keyboard to turn the calculator off.
-
-
-
Hold the calculator in the palm of your hand with the display and keyboard facing up.
-
Slide the grey protective case, short side facing down, from the bottom to the top of the calculator, ensuring the case slides easily along the two channels on the calculator body.
-


Congratulations! You have successfully replaced the dead battery in your Sharp EL-531X calculator.
Congratulations! You have successfully replaced the dead battery in your Sharp EL-531X calculator.
2 の人々がこのガイドを完成させました。