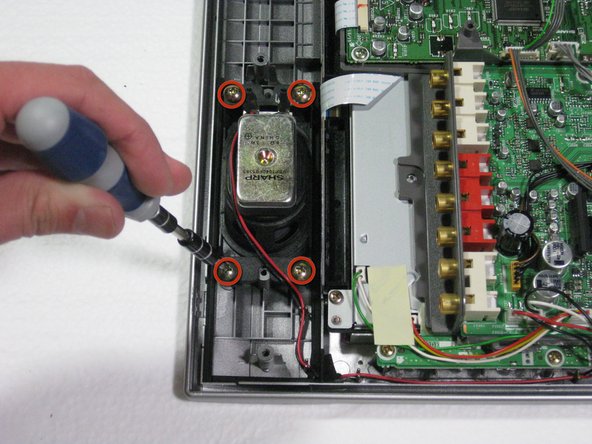
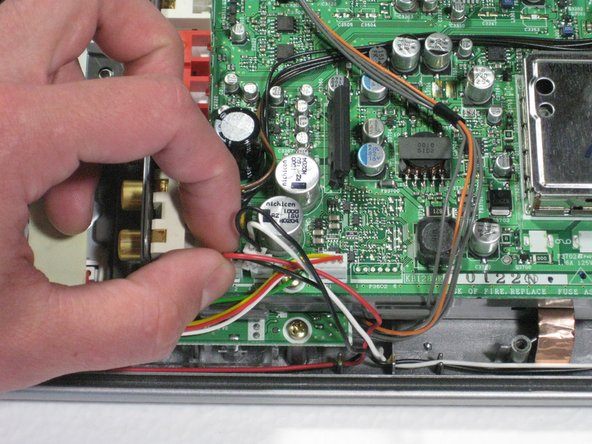
メインコンテンツにスキップ

Sharp Aquos LC13B2UA Speakers Replacement

必要な工具と部品

  1. Sharp Aquos LC13B2UA Speakers Replacement, Stand: 手順 1、 2の画像 1 Sharp Aquos LC13B2UA Speakers Replacement, Stand: 手順 1、 2の画像 2
    • Place the TV face down on a flat smooth surface as to not scratch the screen.

    • Using a Phillips #2 screwdriver remove the four 8mm screws attaching the stand to the TV.

  2. Sharp Aquos LC13B2UA Speakers Replacement: 手順 2、 2の画像 1 Sharp Aquos LC13B2UA Speakers Replacement: 手順 2、 2の画像 2
    • Lift the stand off the television.

  3. Sharp Aquos LC13B2UA Speakers Replacement, Back Case: 手順 3、 3の画像 1 Sharp Aquos LC13B2UA Speakers Replacement, Back Case: 手順 3、 3の画像 2 Sharp Aquos LC13B2UA Speakers Replacement, Back Case: 手順 3、 3の画像 3
    • Remove the two back panels by prying them out with your hands.

  4. Sharp Aquos LC13B2UA Speakers Replacement: 手順 4、 2の画像 1 Sharp Aquos LC13B2UA Speakers Replacement: 手順 4、 2の画像 2
    • Using a Phillips #2 screwdriver, remove the eight 6mm Phillips screws located around the edge.

    • Using a Phillips #2 screwdriver, remove the two 6mm Phillips screws located near the inputs.

  5. Sharp Aquos LC13B2UA Speakers Replacement: 手順 5、 1の画像 1
    • Using your hands, gently lift and remove the back case of the television.

  6. Sharp Aquos LC13B2UA Speakers Replacement, Speakers: 手順 6、 2の画像 1 Sharp Aquos LC13B2UA Speakers Replacement, Speakers: 手順 6、 2の画像 2
    • Remove the eight 9mm screws from both speakers.

    • Do not remove the speakers yet—they are still attached.

  7. Sharp Aquos LC13B2UA Speakers Replacement: 手順 7、 2の画像 1 Sharp Aquos LC13B2UA Speakers Replacement: 手順 7、 2の画像 2
    • Remove the two speaker cables from the circuit board by pinching the plastic connectors and firmly pulling up.

    • Pull on the plastic part of the connector, even though it may seem easiest to pull on the wires.

    • Do not remove the speakers yet—they are still attached.

  8. Sharp Aquos LC13B2UA Speakers Replacement: 手順 8、 2の画像 1 Sharp Aquos LC13B2UA Speakers Replacement: 手順 8、 2の画像 2
    • Remove the two black tape strips (one on each side) securing the power cable to the frame.

    • The speakers can now be removed.

終わりに

To reassemble your device, follow these instructions in reverse order.

ある他の人がこのガイドを完成しました。

作成者

8人の作成者と共同で作成されました。

Robert Hobson

メンバー登録日: 01/20/11

1,290 ポイント

9のガイドは作成済み

チーム

Cal Poly, Team 1-11, Amido Winter 2011 Cal Poly, Team 1-11, Amido Winter 2011人のメンバー

CPSU-AMIDO-W11S1G11

4 メンバー

9のガイドは作成済み

0 件のコメント

コメントを追加

統計データ:

過去 24時間: 1

過去 7 日: 4

過去 30 日: 9

今までの合計 5,092