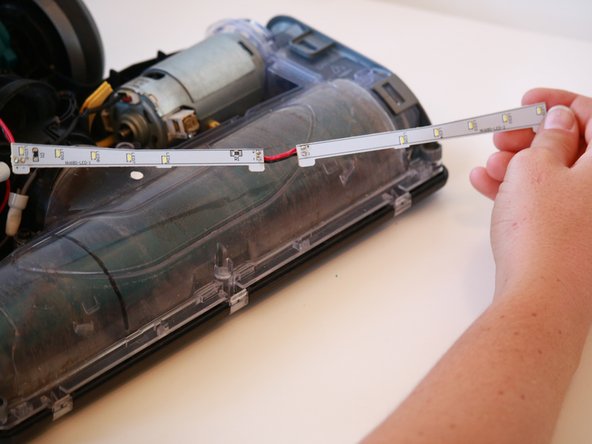
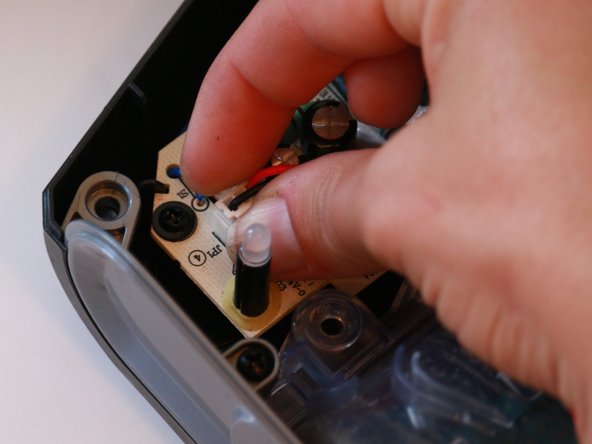
メインコンテンツにスキップ

Shark Rotator Powered Lift-Away Speed Headlight Replacement

必要な工具と部品

  1. Shark Rotator Powered Lift-Away Speed Headlight Replacement, Headlight: 手順 1、 2の画像 1 Shark Rotator Powered Lift-Away Speed Headlight Replacement, Headlight: 手順 1、 2の画像 2
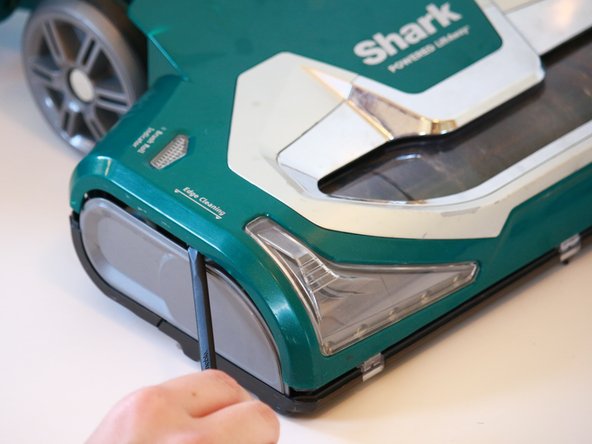
    • Flip the vacuum on its underside, and use a coin to rotate the cam-screws on the bottom panel so that their grooves are parallel with the front of the vacuum.

  2. Shark Rotator Powered Lift-Away Speed Headlight Replacement: 手順 2、 2の画像 1 Shark Rotator Powered Lift-Away Speed Headlight Replacement: 手順 2、 2の画像 2
    • Squeeze the sides of the roller brush cover release clasp, and swing the cover open.

  3. Shark Rotator Powered Lift-Away Speed Headlight Replacement: 手順 3、 1の画像 1
    • Using a T20 screwdriver remove five 15.9 mm screws on the outside of the cover.

  4. Shark Rotator Powered Lift-Away Speed Headlight Replacement: 手順 4、 2の画像 1 Shark Rotator Powered Lift-Away Speed Headlight Replacement: 手順 4、 2の画像 2
    • Using a T20 screwdriver, remove three 13.4 mm screws from where the roller brush cover attaches to the bottom of the vacuum.

  5. Shark Rotator Powered Lift-Away Speed Headlight Replacement: 手順 5、 1の画像 1
    • Using a T20 screwdriver, remove two 13.4 mm screws from under the wheels.

  6. Shark Rotator Powered Lift-Away Speed Headlight Replacement: 手順 6、 1の画像 1
    • Using a T20 screwdriver, remove two 15.9 mm screws behind the vacuum wheels.

  7. Shark Rotator Powered Lift-Away Speed Headlight Replacement: 手順 7、 1の画像 1
    • Using a PH0 screwdriver bit, remove the single 13.4 mm screw in between the roller brush and where the release clasp was attached.

  8. Shark Rotator Powered Lift-Away Speed Headlight Replacement: 手順 8、 1の画像 1
    • Using a T20 screwdriver, remove the single 13.4 mm screw from behind the belted end of the roller brush.

  9. Shark Rotator Powered Lift-Away Speed Headlight Replacement: 手順 9、 3の画像 1 Shark Rotator Powered Lift-Away Speed Headlight Replacement: 手順 9、 3の画像 2 Shark Rotator Powered Lift-Away Speed Headlight Replacement: 手順 9、 3の画像 3
    • Flip the vacuum into the upright position, and use a spudger to open the front assembly cover by prying the seam where the colored front assembly and the grey side covers meet.

  10. Shark Rotator Powered Lift-Away Speed Headlight Replacement: 手順 10、 1の画像 1
    • Separate the front assembly cover from the vacuum.

  11. Shark Rotator Powered Lift-Away Speed Headlight Replacement: 手順 11、 3の画像 1 Shark Rotator Powered Lift-Away Speed Headlight Replacement: 手順 11、 3の画像 2 Shark Rotator Powered Lift-Away Speed Headlight Replacement: 手順 11、 3の画像 3
    • Use a spudger to remove the headlight covers by prying the seams where the headlight covers meet the bottom front of the vacuum.

  12. Shark Rotator Powered Lift-Away Speed Headlight Replacement: 手順 12、 3の画像 1 Shark Rotator Powered Lift-Away Speed Headlight Replacement: 手順 12、 3の画像 2 Shark Rotator Powered Lift-Away Speed Headlight Replacement: 手順 12、 3の画像 3
    • Pull the LED headlight strand up and away from where it is attached to the bottom front of the vacuum.

  13. Shark Rotator Powered Lift-Away Speed Headlight Replacement: 手順 13、 3の画像 1 Shark Rotator Powered Lift-Away Speed Headlight Replacement: 手順 13、 3の画像 2 Shark Rotator Powered Lift-Away Speed Headlight Replacement: 手順 13、 3の画像 3
    • Pinch the tabs on the circuit board clasp for the LED headlight inwards , and pull the clasp up and away to detach the headlight.

終わりに

To reassemble your device, follow these instructions in reverse order.

2 の人々がこのガイドを完成させました。

作成者

3人の作成者と共同で作成されました。

Dakota Rodriguez-Ransom

メンバー登録日: 10/08/18

605 ポイント

2のガイドは作成済み

チーム

Cal Poly, Team S4-G6, White Fall 2018 Cal Poly, Team S4-G6, White Fall 2018人のメンバー

CPSU-WHITE-F18S4G6

4 メンバー

12のガイドは作成済み

0 件のコメント

コメントを追加

統計データ:

過去 24時間: 1

過去 7 日: 6

過去 30 日: 15

今までの合計 1,996