メインコンテンツにスキップ

このバージョンは誤った内容を含んでいる可能性があります。最新の承認済みスナップショットに切り替えてください。

必要条件のみ
この修理ガイドは、他のガイドの前提条件として使用されます。それ自体は不完全で、単独で使用されることはありません。

必要な工具と部品

  1. この手順は未翻訳です。 翻訳を手伝う。

    : 手順 1、 2の画像 1 : 手順 1、 2の画像 2
    • Push the lift away button and pull the handle up to separate the body from the wand section.

  2. この手順は未翻訳です。 翻訳を手伝う。

    : 手順 2、 1の画像 1
    • Push lift away button on the wand then lift up on the top section to separate.

  3. この手順は未翻訳です。 翻訳を手伝う。

    : 手順 3、 2の画像 1 : 手順 3、 2の画像 2
    • Tilt the wand shaft backwards for convenient.

  4. この手順は未翻訳です。 翻訳を手伝う。

    : 手順 4、 2の画像 1 : 手順 4、 2の画像 2
    • Lay the head nozzle piece upside down.

    • Rotate the three gray taps to the unlock position.

  5. この手順は未翻訳です。 翻訳を手伝う。

    : 手順 5、 1の画像 1
    • With your fingers, pry and pull the brush cage open.

  6. この手順は未翻訳です。 翻訳を手伝う。

    : 手順 6、 2の画像 1 : 手順 6、 2の画像 2
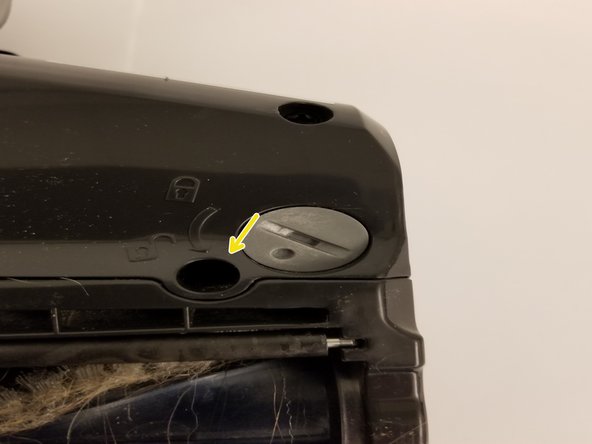
    • Remove the 13 screws (circled in yellow) using a phillips screwdriver.

    • Be sure to keep track of which screws go into which hole.

    • Remove the one screw (circled in red) that has a Torx head (might be Phillips head on some models).

    • The Torx screw is hidden under a rubber gasket. Carefully, lift up the gasket without damaging it to access this screw.

    • Remove the horizontal screw (circled in orange) that attaches the gray side panel (necessary to remove the white cap on the roller brush in step 8)

  7. この手順は未翻訳です。 翻訳を手伝う。

    : 手順 7、 1の画像 1
    • Lift up the top cover now that all of the screws have been removed.

ゴール

ある他の人がこのガイドを完成しました。

作成者

7人の作成者と共同で作成されました。

Dan lee

メンバー登録日: 09/27/17

101 ポイント

1ガイドが承認済み

チーム

Cal Poly, Team S9-G3, Banghart Fall 2017 Cal Poly, Team S9-G3, Banghart Fall 2017人のメンバー

CPSU-BANGHART-F17S9G3

4 メンバー

12のガイドは作成済み

0 件のコメント

コメントを追加

統計データ:

過去 24時間: 0

過去 7 日: 2

過去 30 日: 3

今までの合計 70