メインコンテンツにスキップ

Shark Navigator Lift-Away Deluxe NV360 Motherboard Replacement

必要な工具と部品

  1. Shark Navigator Lift-Away Deluxe NV360 Motherboard Replacement, Roller Brush Belt: 手順 1、 2の画像 1 Shark Navigator Lift-Away Deluxe NV360 Motherboard Replacement, Roller Brush Belt: 手順 1、 2の画像 2
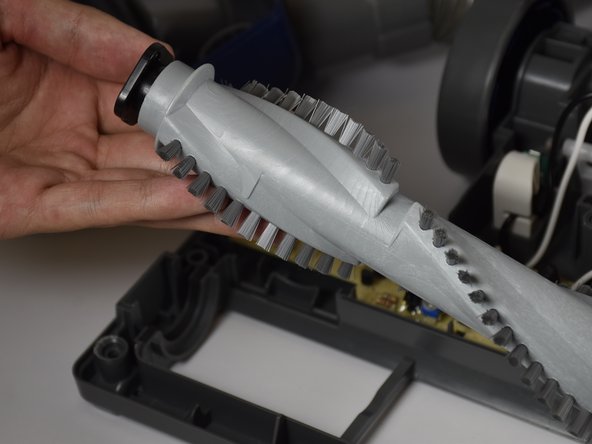
    • Lay the vacuum down by hand and locate the roller brush underneath the vacuum cleaner.

  2. Shark Navigator Lift-Away Deluxe NV360 Motherboard Replacement: 手順 2、 3の画像 1 Shark Navigator Lift-Away Deluxe NV360 Motherboard Replacement: 手順 2、 3の画像 2 Shark Navigator Lift-Away Deluxe NV360 Motherboard Replacement: 手順 2、 3の画像 3
    • Insert the metal spudger between the inside side of the wheel and the plastic body.

    • Push the metal spudger away from you to pop the wheels out.

    • Repeat the step to remove the other wheel on the other side.

  3. Shark Navigator Lift-Away Deluxe NV360 Motherboard Replacement: 手順 3、 1の画像 1
    • Remove the six 15mm screws using the PH1 screwdriver.

  4. Shark Navigator Lift-Away Deluxe NV360 Motherboard Replacement: 手順 4、 2の画像 1 Shark Navigator Lift-Away Deluxe NV360 Motherboard Replacement: 手順 4、 2の画像 2
    • Move the blue fulcrum connecting the bottom and the main body of the vacuum cleaner back and forth to loosen up crevice between the two halves of the roller brush enclosure.

  5. Shark Navigator Lift-Away Deluxe NV360 Motherboard Replacement: 手順 5、 3の画像 1 Shark Navigator Lift-Away Deluxe NV360 Motherboard Replacement: 手順 5、 3の画像 2 Shark Navigator Lift-Away Deluxe NV360 Motherboard Replacement: 手順 5、 3の画像 3
    • Insert the plastic opening tool into the crevice between the blue and the dark grey plastic frames enclosing the roller brush.

    • Apply an outward force throughout and all around the gap in order to separate the two plastic frames.

  6. Shark Navigator Lift-Away Deluxe NV360 Motherboard Replacement: 手順 6、 2の画像 1 Shark Navigator Lift-Away Deluxe NV360 Motherboard Replacement: 手順 6、 2の画像 2
    • Lift the grey frame off the bottom of the vacuum cleaner with your hands and place it on a flat surface.

  7. Shark Navigator Lift-Away Deluxe NV360 Motherboard Replacement: 手順 7、 3の画像 1 Shark Navigator Lift-Away Deluxe NV360 Motherboard Replacement: 手順 7、 3の画像 2 Shark Navigator Lift-Away Deluxe NV360 Motherboard Replacement: 手順 7、 3の画像 3
    • Lift the roller brush slightly upwards using your hand.

    • Take one side of the black roller brush belt off by pulling it over the end of the roller brush with your other hand.

  8. Shark Navigator Lift-Away Deluxe NV360 Motherboard Replacement: 手順 8、 1の画像 1
    • Remove the roller brush belt with your hands by sliding it of the end of the motor.

  9. Shark Navigator Lift-Away Deluxe NV360 Motherboard Replacement, Roller Brush: 手順 9、 2の画像 1 Shark Navigator Lift-Away Deluxe NV360 Motherboard Replacement, Roller Brush: 手順 9、 2の画像 2
    • Remove the roller brush from the plastic frame using your hands by lifting it away.

  10. Shark Navigator Lift-Away Deluxe NV360 Motherboard Replacement, Roller Brush Motor: 手順 10、 2の画像 1 Shark Navigator Lift-Away Deluxe NV360 Motherboard Replacement, Roller Brush Motor: 手順 10、 2の画像 2
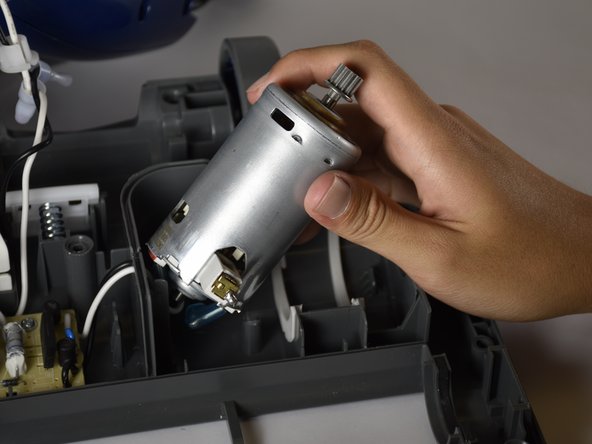
    • Lift the roller brush motor up and away from its half-cylindrical holder with your hand.

  11. Shark Navigator Lift-Away Deluxe NV360 Motherboard Replacement: 手順 11、 3の画像 1 Shark Navigator Lift-Away Deluxe NV360 Motherboard Replacement: 手順 11、 3の画像 2 Shark Navigator Lift-Away Deluxe NV360 Motherboard Replacement: 手順 11、 3の画像 3
    • Locate the two connectors coming out of the roller brush motor.

    • Pinch and pull the blue plastic insulation down the wire and away from the motor until the metal connectors are fully exposed.

  12. Shark Navigator Lift-Away Deluxe NV360 Motherboard Replacement: 手順 12、 3の画像 1 Shark Navigator Lift-Away Deluxe NV360 Motherboard Replacement: 手順 12、 3の画像 2 Shark Navigator Lift-Away Deluxe NV360 Motherboard Replacement: 手順 12、 3の画像 3
    • Locate the protrusion near the connection between the metal and wire.

    • Push down on the protrusion with your finger and push the metal connector away from the motor with the metal spudger.

  13. Shark Navigator Lift-Away Deluxe NV360 Motherboard Replacement: 手順 13、 3の画像 1 Shark Navigator Lift-Away Deluxe NV360 Motherboard Replacement: 手順 13、 3の画像 2 Shark Navigator Lift-Away Deluxe NV360 Motherboard Replacement: 手順 13、 3の画像 3
    • Continue to push on the connector away from the motor with the metal spudger until it is disconnected completely.

    • Repeat the steps 12-14 for the other wire.

  14. Shark Navigator Lift-Away Deluxe NV360 Motherboard Replacement: 手順 14、 1の画像 1
    • Take the motor out and away from the motorized floor brush compartment by hand.

  15. Shark Navigator Lift-Away Deluxe NV360 Motherboard Replacement, Motherboard: 手順 15、 3の画像 1 Shark Navigator Lift-Away Deluxe NV360 Motherboard Replacement, Motherboard: 手順 15、 3の画像 2 Shark Navigator Lift-Away Deluxe NV360 Motherboard Replacement, Motherboard: 手順 15、 3の画像 3
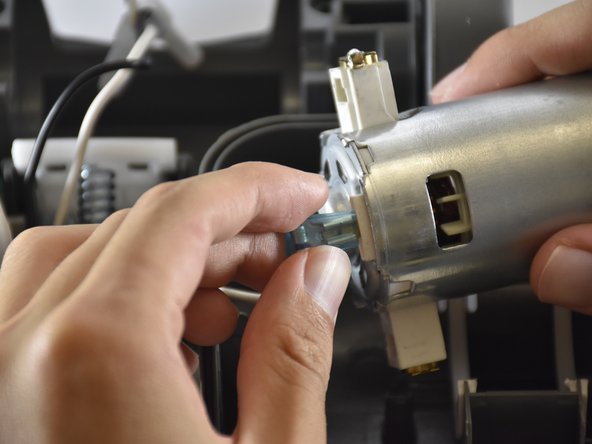
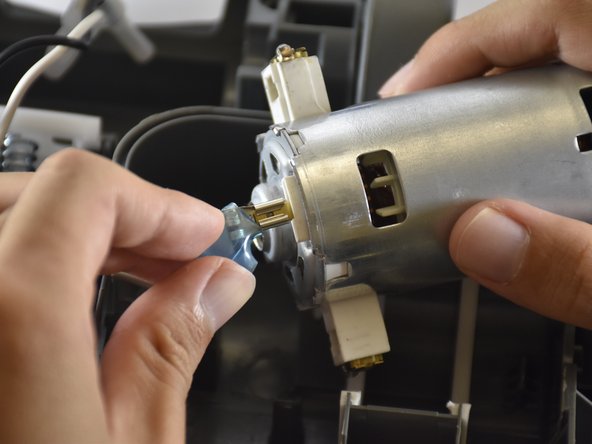
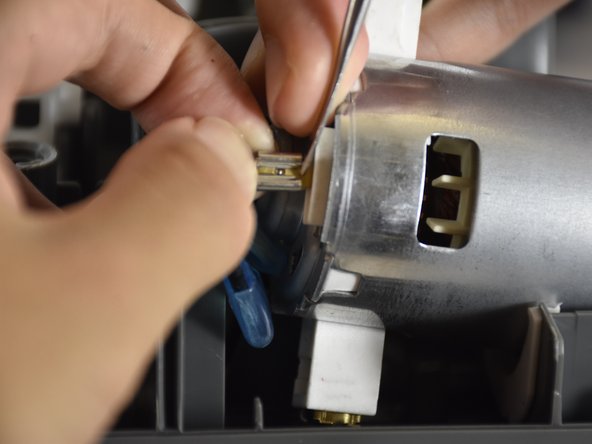
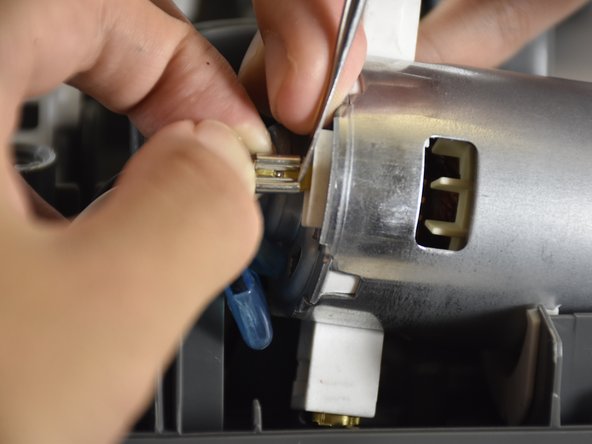
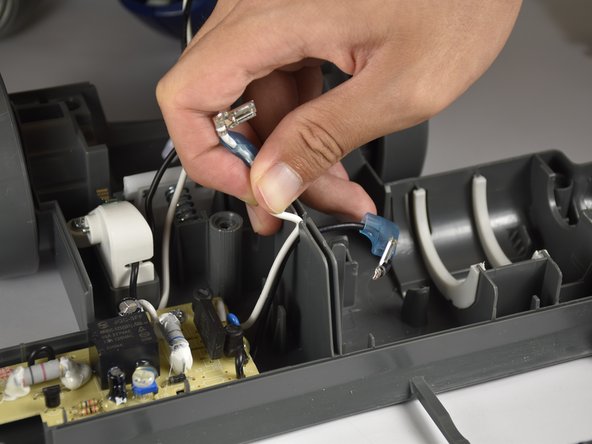
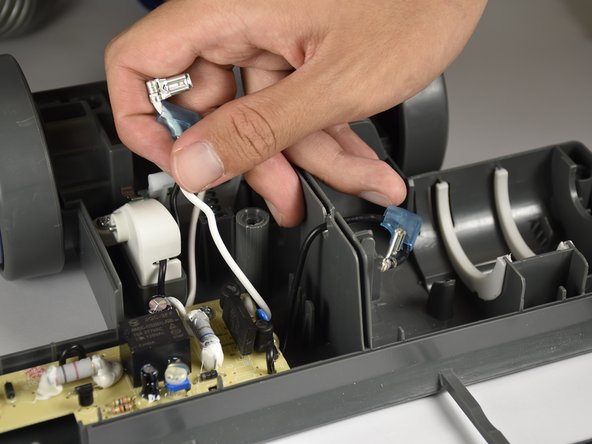
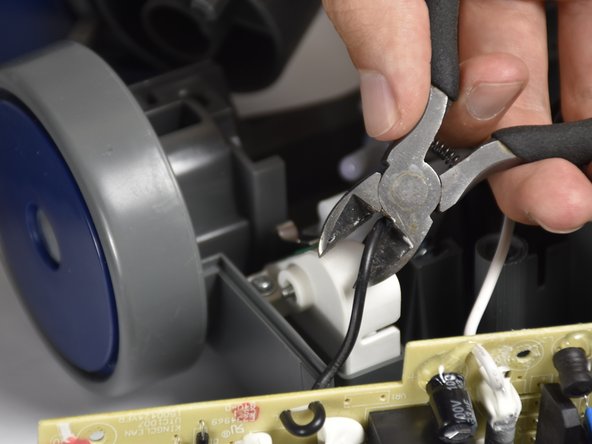
    • Locate the two wires that were connected to the roller brush motor.

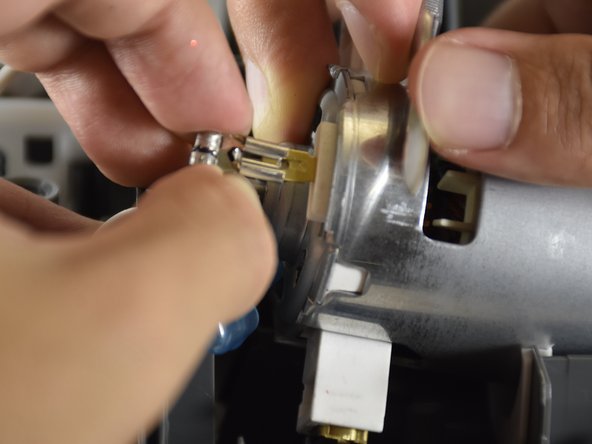
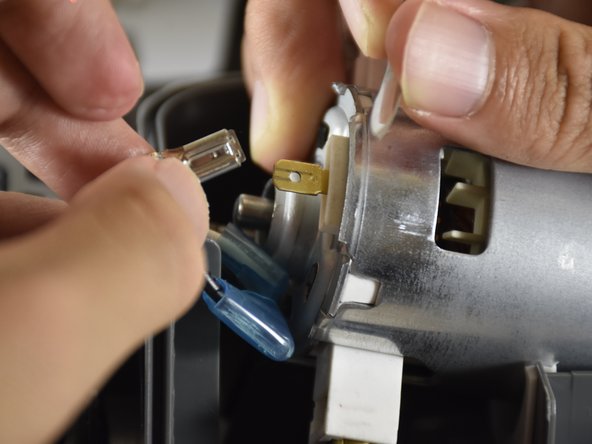
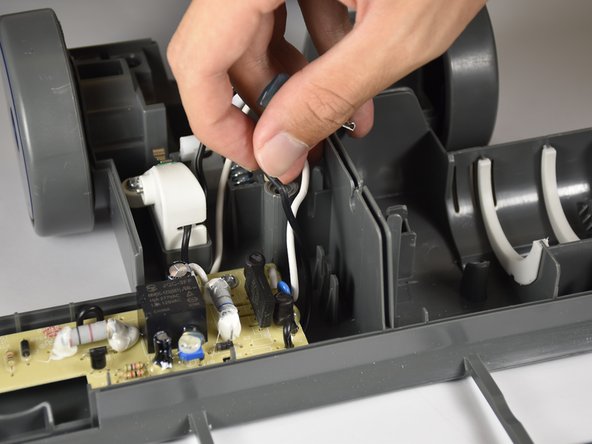
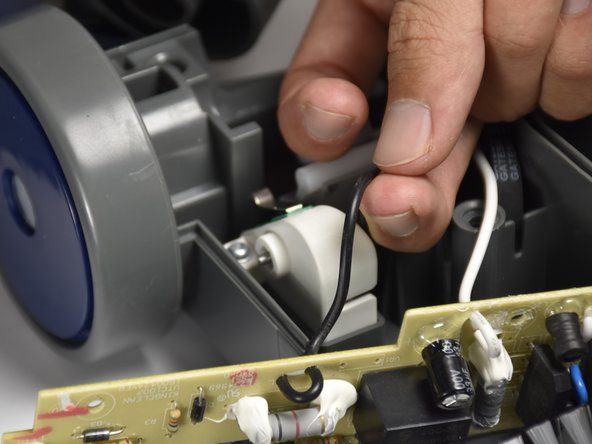
    • Remove the white wire from the pass-through hole in the divider of the motorized floor brush compartment.

  16. Shark Navigator Lift-Away Deluxe NV360 Motherboard Replacement: 手順 16、 2の画像 1 Shark Navigator Lift-Away Deluxe NV360 Motherboard Replacement: 手順 16、 2の画像 2
    • Remove the black wire from the pass-through hole in the divider of the motorized floor brush compartment.

  17. Shark Navigator Lift-Away Deluxe NV360 Motherboard Replacement: 手順 17、 1の画像 1
    • Locate and remove the two 10mm screws on the motherboard with the PH1 screwdriver.

  18. Shark Navigator Lift-Away Deluxe NV360 Motherboard Replacement: 手順 18、 1の画像 1
    • Cut the white wire from the motherboard with wire cutters.

    • Solder the wire connection back together during reassembly.

  19. Shark Navigator Lift-Away Deluxe NV360 Motherboard Replacement: 手順 19、 3の画像 1 Shark Navigator Lift-Away Deluxe NV360 Motherboard Replacement: 手順 19、 3の画像 2 Shark Navigator Lift-Away Deluxe NV360 Motherboard Replacement: 手順 19、 3の画像 3
    • Pull the black wire out of the white holder with a pass-through slot using your hands.

    • Cut the black wire from the motherboard with the wire cutters.

    • Solder the wire connection back together during reassembly.

  20. Shark Navigator Lift-Away Deluxe NV360 Motherboard Replacement: 手順 20、 1の画像 1
    • Remove the motherboard by lifting it away from the motorized floor brush compartment with your hands.

終わりに

To reassemble your device, follow these instructions in reverse order.

3 の人々がこのガイドを完成させました。

作成者

3人の作成者と共同で作成されました。

Elena Postupalskaya

メンバー登録日: 10/02/17

1,177 ポイント

6のガイドは作成済み

チーム

Cal Poly, Team S15-G2, Livingston Fall 2017 Cal Poly, Team S15-G2, Livingston Fall 2017人のメンバー

CPSU-LIVINGSTON-F17S15G2

3 メンバー

14のガイドは作成済み

0 件のコメント

コメントを追加

統計データ:

過去 24時間: 0

過去 7 日: 2

過去 30 日: 22

今までの合計 2,770