メインコンテンツにスキップ

Shark ION Robot 750 Charging Dock Motherboard Replacement

必要な工具と部品

  1. Shark ION Robot 750 Charging Dock Motherboard Replacement, Charging Dock: 手順 1、 1の画像 1
    • Remove the three Torx T6 screws on the underside of the charging dock.

    • Lift off the lower case.

  2. Shark ION Robot 750 Charging Dock Motherboard Replacement: 手順 2、 1の画像 1
    • Using a Phillips #0 screwdriver, unscrew the four screws inside.

  3. Shark ION Robot 750 Charging Dock Motherboard Replacement: 手順 3、 2の画像 1 Shark ION Robot 750 Charging Dock Motherboard Replacement: 手順 3、 2の画像 2
    • Gently push in the tabs to remove the sensor housing.

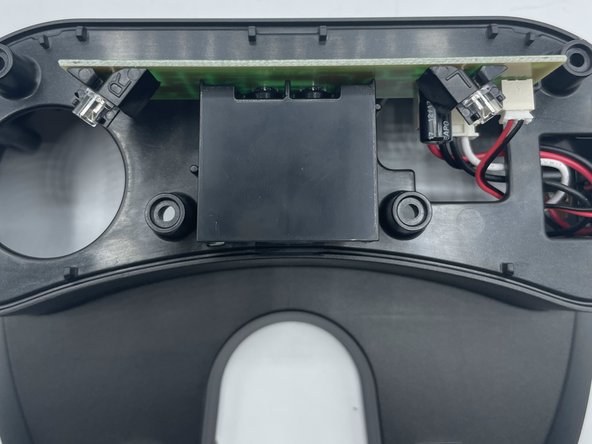
  4. Shark ION Robot 750 Charging Dock Motherboard Replacement: 手順 4、 1の画像 1
    • Unplug the two wires going into the motherboard, then gently lift the motherboard up and out of its slot.

終わりに

To reassemble your device, follow these instructions in reverse order.

作成者

3人の作成者と共同で作成されました。

corieon downing

メンバー登録日: 09/13/23

181 ポイント

2のガイドは作成済み

チーム

University of North Texas, Team 1-7, Kilpatrick Fall 2023 University of North Texas, Team 1-7, Kilpatrick Fall 2023人のメンバー

UNT-KILPATRICK-F23S1G7

4 メンバー

5のガイドは作成済み

0 件のコメント

コメントを追加

統計データ:

過去 24時間: 0

過去 7 日: 0

過去 30 日: 12

今までの合計 65