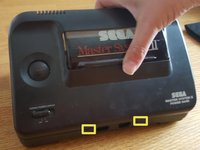
メインコンテンツにスキップ

Sega Master System II Motherboard Replacement

必要な工具と部品

  1. Sega Master System II Motherboard Replacement, Outer Case: 手順 1、 1の画像 1
    • Flip the console on it's back and unscrew the 5 screws marked on this photo.

  2. Sega Master System II Motherboard Replacement: 手順 2、 1の画像 1
    • Once you've unscrewed those 5 screws, flip the console upright again.

  3. Sega Master System II Motherboard Replacement: 手順 3、 2の画像 1 Sega Master System II Motherboard Replacement: 手順 3、 2の画像 2
    • Once the console is upright, first gently pull the rear of the top up.

    • After the top is at an angle, gently remove it by pulling upwards.

    • Note: Be very careful! The top has 2 tabs connecting it with the bottom half, those are in the vincinity of the 2 controller ports! (marked yellow)

  4. Sega Master System II Motherboard Replacement: 手順 4、 1の画像 1
    • Once the 2 halves are separated, it should look something like this.

  5. Sega Master System II Motherboard Replacement, Motherboard: 手順 5、 1の画像 1
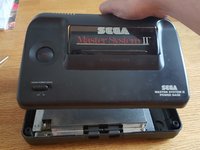
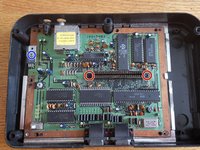
    • Next step is the removal of the RF shield

    • There are 7 screws in total, please unscrew those.

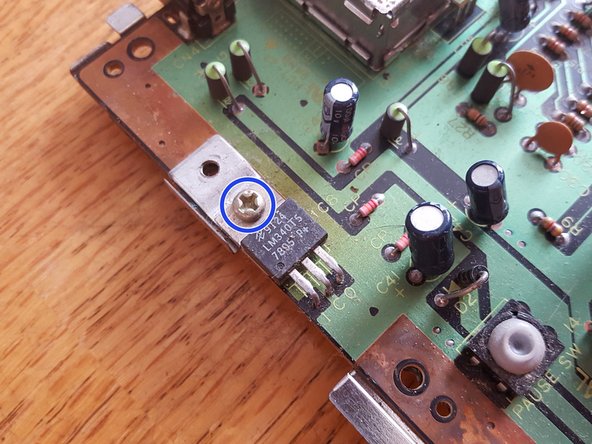
    • The blue marked screw is shorten than the other 6 screws, this screw has to be put back in the exact same location during reassembly.

    • Note: Tab marked in yellow!

  6. Sega Master System II Motherboard Replacement: 手順 6、 1の画像 1
    • Carefully lift the RF shield up, left side first.

    • See note previous step.

  7. Sega Master System II Motherboard Replacement: 手順 7、 2の画像 1 Sega Master System II Motherboard Replacement: 手順 7、 2の画像 2
    • Now we have a complete view of the motherboard, thus coming to the last step.

    • For this step you only need to remove 3 remaining screws.

    • 2 screws on the connector.

    • There's 1 shorter screw as previously with the RF shield. This small screw keeps the voltage regulator in place.

  8. Sega Master System II Motherboard Replacement: 手順 8、 1の画像 1
    • When you've disassembled everything, it should look like this.

    • Once you've got the replacement board, just follow this guide in reverse order,

終わりに

Om het apparaat weer te monteren, volg je deze instructies in omgekeerde volgorde.

ある他の人がこのガイドを完成しました。

作成者

1人の作成者と共同作成されました。

Arjan Kuiper

メンバー登録日: 04/20/16

290 ポイント

1ガイドが承認済み

0 件のコメント

コメントを追加

統計データ:

過去 24時間: 2

過去 7 日: 7

過去 30 日: 46

今までの合計 3,939