メインコンテンツにスキップ

このバージョンは誤った内容を含んでいる可能性があります。最新の承認済みスナップショットに切り替えてください。

必要な工具と部品

  1. この手順は未翻訳です。 翻訳を手伝う。

    : 手順 1、 2の画像 1 : 手順 1、 2の画像 2
    • Using a Phillips head screwdriver remove six screws from the bottom of the console.

    • The six screws are marked.

  2. この手順は未翻訳です。 翻訳を手伝う。

    : 手順 2、 1の画像 1
    • Remove the two screws that attach the Genesis' connector to the rest of the console.

    • The two screws are marked in the diagram.

  3. この手順は未翻訳です。 翻訳を手伝う。

    : 手順 3、 1の画像 1
    • Slide the lock tab to the left to separate the halves of the console.

  4. この手順は未翻訳です。 翻訳を手伝う。

    : 手順 4、 1の画像 1
    • Lift from the left side to remove the top of the case.

  5. この手順は未翻訳です。 翻訳を手伝う。

    : 手順 5、 1の画像 1
    • Using the spudger, pry the cover off of the Genesis attachment.

  6. この手順は未翻訳です。 翻訳を手伝う。

    : 手順 6、 1の画像 1
    • Lift the top of the case to remove the cover.

  7. この手順は未翻訳です。 翻訳を手伝う。

    : 手順 7、 1の画像 1
    • Remove the faceplate by pulling it up, then out.

  8. この手順は未翻訳です。 翻訳を手伝う。

    : 手順 8、 2の画像 1 : 手順 8、 2の画像 2
    • Using a #00 Philips screwdriver remove the two screws that attach the Genesis adapter to the console.

    • Disconnect the adapter from the console by carefully pulling the adapter out.

  9. この手順は未翻訳です。 翻訳を手伝う。

    : 手順 9、 1の画像 1
    • Remove the four screws from the metal plate as shown using a #00 Philips screwdriver.

    • The four half inch bronze screws are indicated by the yellow marking circles.

  10. この手順は未翻訳です。 翻訳を手伝う。

    : 手順 10、 2の画像 1 : 手順 10、 2の画像 2
    • Carefully remove the metal cover from the connector by sliding the cover up and out.

  11. この手順は未翻訳です。 翻訳を手伝う。

    : 手順 11、 2の画像 1 : 手順 11、 2の画像 2
    • Remove the connector from the housing.

ゴール

作成者

6人の作成者と共同で作成されました。

Ryan Kotzebue

メンバー登録日: 10/07/10

271 ポイント

4のガイドは作成済み

チーム

Cal Poly, Team 5-14, Maness Fall 2010 Cal Poly, Team 5-14, Maness Fall 2010人のメンバー

CPSU-MANESS-F10S5G14

4 メンバー

12のガイドは作成済み

3 件のコメント

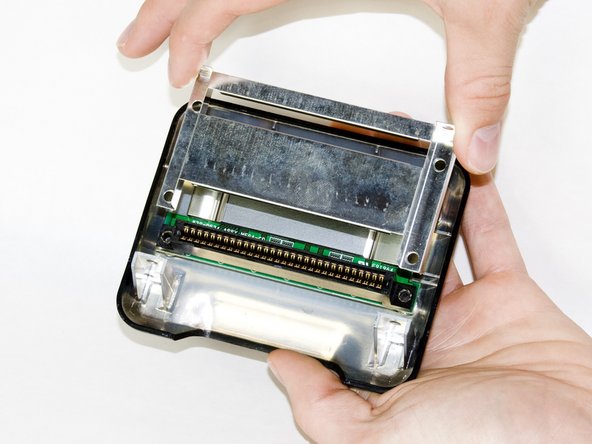
So, I'm assuming you are doing this to correct a connection problem between the Sega CD and Genesis. Now that it's disassembled are you slightly bending the connections for a better fit, or cleaning the connectors to remove over 20 years of tarnish build up, or replacing all together with a new manufactured unit? By the way, I have my Sega CD and Genesis still to this day. They are in their original box with all the manuals and other pamphlets that they came with. I should see if Sherlock Holmes is still boring as it was when I first played it back in '91. Better yet play Night Trap and think about how controversial this game was at the time and even was pulled from store shelves, because of the controversy surrounding the girls outfits worn in the game.

helliant1 - 返信

Anyone know where I can obtain a new connector slot? I got my unit from a friend and one of the pins are crushed into the back of the the plastic housing. Can not pull the prong out and need a new connector. Can’t seem to find this connector on ebay or anywhere else.

joeybinky - 返信

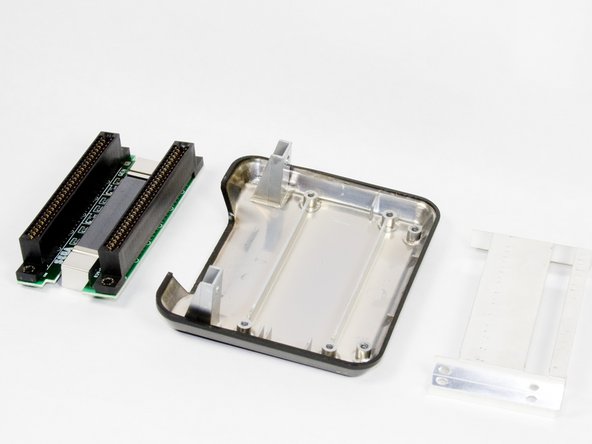
I also need a new Genesis Connector. Mine is bent and I can't get a clean fit from the console. Where can we purchase replacement parts?

brothermers3 - 返信

コメントを追加

統計データ:

過去 24時間: 2

過去 7 日: 6

過去 30 日: 13

今までの合計 5,851