メインコンテンツにスキップ

Sceptre X9 Komodo VII Power Supply Unit Replacement

必要な工具と部品

  1. Sceptre X9 Komodo VII Power Supply Unit Replacement, Stand: 手順 1、 1の画像 1
    • Place the monitor face down.

    • Remove the four 11.5mm screws with a #2 Phillips screwdriver.

    • Remove the stand by pulling it out.

  2. Sceptre X9 Komodo VII Power Supply Unit Replacement: 手順 2、 1の画像 1
    • Remove two 11.5mm screws with a #2 Phillips screwdriver.

    • Remove the plastic bar.

  3. Sceptre X9 Komodo VII Power Supply Unit Replacement, Board Cover: 手順 3、 1の画像 1
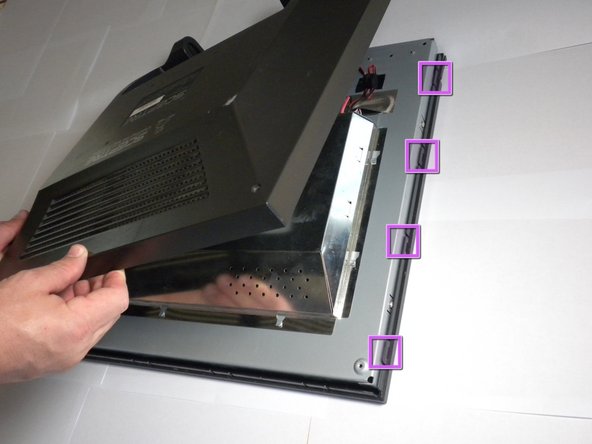
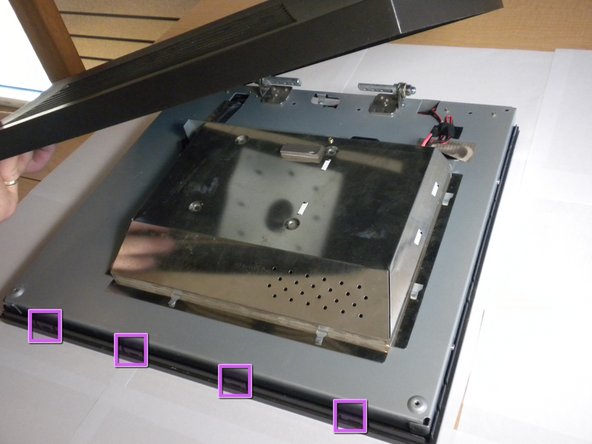
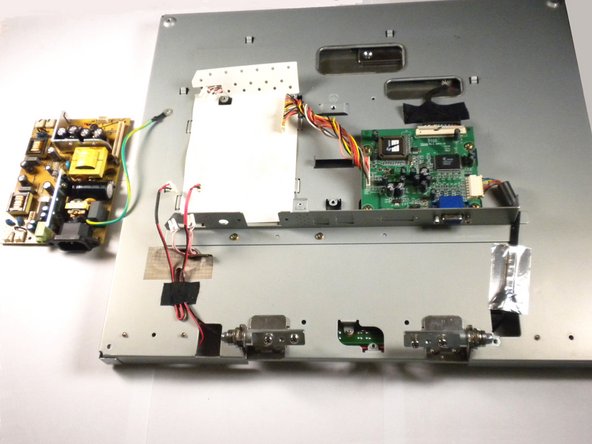
    • Using a #2 Phillips screwdriver, remove the six 7mm screws at the circled locations.

  4. Sceptre X9 Komodo VII Power Supply Unit Replacement: 手順 4、 3の画像 1 Sceptre X9 Komodo VII Power Supply Unit Replacement: 手順 4、 3の画像 2 Sceptre X9 Komodo VII Power Supply Unit Replacement: 手順 4、 3の画像 3
    • Pry the monitor using the plastic opening tool to release the clips holding the cover on.

    • There are four clips on each side, four on the top, and one on the bottom.

    • You may hear a loud snapping noise when releasing the clips. Do not be alarmed, it is natural.

    • Once all the clips have been released, remove the cover by pulling it up.

  5. Sceptre X9 Komodo VII Power Supply Unit Replacement: 手順 5、 2の画像 1 Sceptre X9 Komodo VII Power Supply Unit Replacement: 手順 5、 2の画像 2
    • Using the #2 Phillips screwdriver, remove the one 6mm screw.

    • Unplug the indicated cable by pulling on the base.

    • Slide the cover toward the top of the monitor.

    • Remove the cover.

  6. Sceptre X9 Komodo VII Power Supply Unit Replacement, Power Supply Unit: 手順 6、 1の画像 1
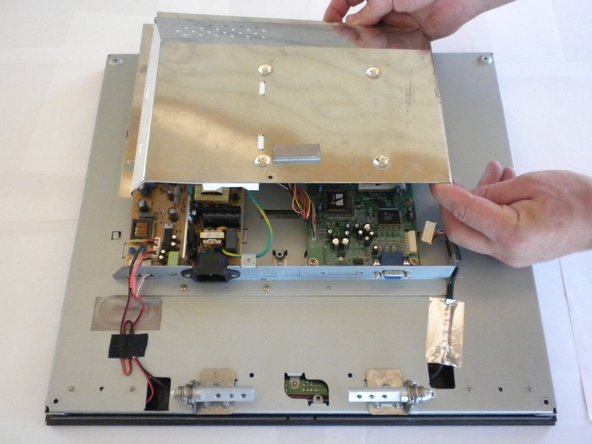
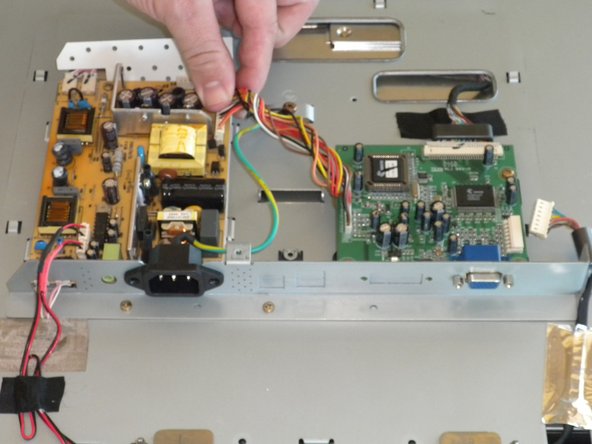
    • Using a #2 Phillips screwdriver, remove the two 4.72 mm Phillips screws that hold the power adapter in place.

  7. Sceptre X9 Komodo VII Power Supply Unit Replacement: 手順 7、 3の画像 1 Sceptre X9 Komodo VII Power Supply Unit Replacement: 手順 7、 3の画像 2 Sceptre X9 Komodo VII Power Supply Unit Replacement: 手順 7、 3の画像 3
    • Unplug the seven connections from the power supply unit by gently pulling on them.

  8. Sceptre X9 Komodo VII Power Supply Unit Replacement: 手順 8、 1の画像 1
    • Using a #2 Phillips screwdriver, remove the screws and the wire that is attached to the ground.

    • Four 6 mm Phillips screws

    • One 8 mm Phillips screw

  9. Sceptre X9 Komodo VII Power Supply Unit Replacement: 手順 9、 2の画像 1 Sceptre X9 Komodo VII Power Supply Unit Replacement: 手順 9、 2の画像 2
    • Lift the power supply unit straight up to remove it from the back panel.

終わりに

To reassemble your device, follow these instructions in reverse order.

作成者

5人の作成者と共同で作成されました。

Jose Carrillo

メンバー登録日: 09/26/12

23 ポイント

1ガイドが承認済み

チーム

Cal Poly, Team 16-56, Forte Fall 2012 Cal Poly, Team 16-56, Forte Fall 2012人のメンバー

CPSU-FORTE-F12S16G56

5 メンバー

13のガイドは作成済み

0 件のコメント

コメントを追加

統計データ:

過去 24時間: 0

過去 7 日: 0

過去 30 日: 1

今までの合計 664