メインコンテンツにスキップ

Sanyo-PM 8200 Motherboard Replacement

必要な工具と部品

  1. Sanyo-PM 8200 Motherboard Replacement, Power Off Phone: 手順 1、 1の画像 1
    • Power down the phone by holding down the red "end" button.

  2. Sanyo-PM 8200 Motherboard Replacement, Remove Old Battery: 手順 2、 1の画像 1
    • Push and hold the button on the back toward the direction of the arrow to unlock the battery.

    • Lift and remove the battery from the back of the phone.

  3. Sanyo-PM 8200 Motherboard Replacement, Back Casing: 手順 3、 1の画像 1
    • Use a push pin or tweezers to remove the neoprene screw-cover located on the upper, left corner of the back casing.

  4. Sanyo-PM 8200 Motherboard Replacement: 手順 4、 1の画像 1
    • Unscrew all four, 5mm Tri-Wing screws.

  5. Sanyo-PM 8200 Motherboard Replacement: 手順 5、 2の画像 1 Sanyo-PM 8200 Motherboard Replacement: 手順 5、 2の画像 2
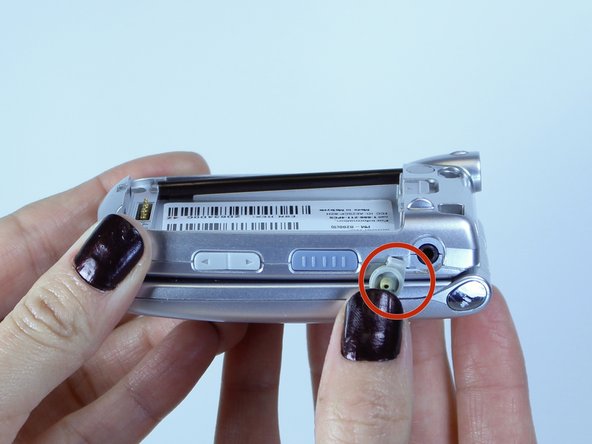
    • Pry the back casing off the device using a spudger. Work your way along the edges to completely separate the back casing from the device.

    • This step may require extra force. But too much force could break the back casing.

    • Remove the headphone jack cover when separating the back casing. The headphone jack is located on the opposite side of the antenna.

  6. Sanyo-PM 8200 Motherboard Replacement, Lift the Motherboard: 手順 6、 1の画像 1
    • Gently lift up the motherboard. The keypad should now be exposed.

  7. Sanyo-PM 8200 Motherboard Replacement, Disconnect the Flex Ribbon: 手順 7、 1の画像 1
    • Using tweezers, pull on the silver flex ribbon to disconnect it from the motherboard.

  8. Sanyo-PM 8200 Motherboard Replacement, Remove the Motherboard: 手順 8、 1の画像 1
    • Remove the motherboard from the back of the phone.

終わりに

To reassemble your device, follow these instructions in reverse order.

作成者

4人の作成者と共同で作成されました。

Michaella

メンバー登録日: 10/07/14

101 ポイント

1ガイドが承認済み

チーム

USF Tampa, Team 1-6, Leahy Fall 2014 USF Tampa, Team 1-6, Leahy Fall 2014人のメンバー

USFT-LEAHY-F14S1G6

6 メンバー

10のガイドは作成済み

0 件のコメント

コメントを追加

統計データ:

過去 24時間: 2

過去 7 日: 2

過去 30 日: 3

今までの合計 359