メインコンテンツにスキップ

Sanyo VPC-X1200 flash replacement

必要な工具と部品

  1. Sanyo VPC-X1200 flash replacement, Back Case: 手順 1、 3の画像 1 Sanyo VPC-X1200 flash replacement, Back Case: 手順 1、 3の画像 2 Sanyo VPC-X1200 flash replacement, Back Case: 手順 1、 3の画像 3
    • Remove the five case screws with a Phillips #00 Screwdriver.

    • Five 3.5mm Phillips Screws

  2. Sanyo VPC-X1200 flash replacement: 手順 2、 1の画像 1
    • Gently lift up the back cover and set aside.

  3. Sanyo VPC-X1200 flash replacement, LCD Screen: 手順 3、 2の画像 1 Sanyo VPC-X1200 flash replacement, LCD Screen: 手順 3、 2の画像 2
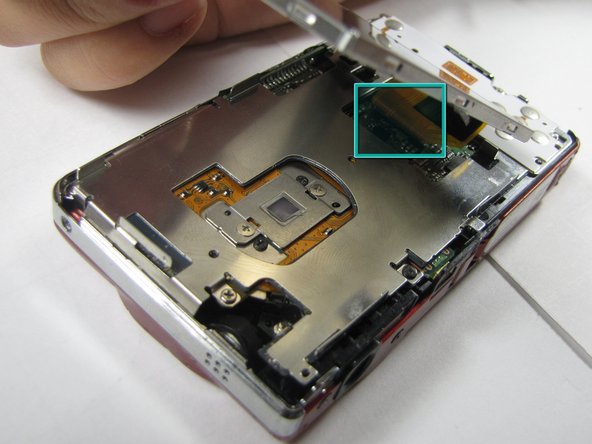
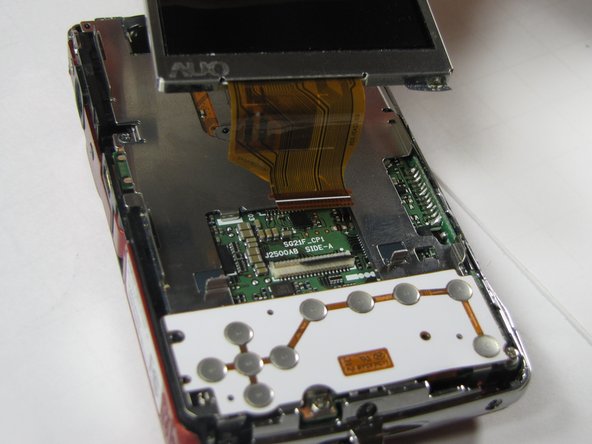
    • Gently lift up on the left side of the LCD and slowly pull it to the left side of the camera but do not remove entirely, there is a ribbon connector.

    • Be careful not to rip out the ribbon connector.

  4. Sanyo VPC-X1200 flash replacement: 手順 4、 2の画像 1 Sanyo VPC-X1200 flash replacement: 手順 4、 2の画像 2
    • To clear the ribbon connection underneath the screen, lift up the black ribbon gate with the spudger.

    • Gently lift ribbon out of the gate and set screen aside.

  5. Sanyo VPC-X1200 flash replacement, Button Plate: 手順 5、 2の画像 1 Sanyo VPC-X1200 flash replacement, Button Plate: 手順 5、 2の画像 2
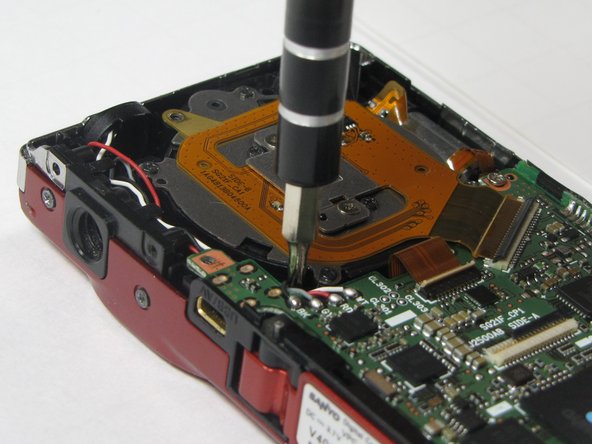
    • There are five screws of three different sizes which need removal.

    • One 4.5mm screw

    • Four 3.5mm screws, one on the button side

    • One 5.5mm screws

  6. Sanyo VPC-X1200 flash replacement: 手順 6、 2の画像 1 Sanyo VPC-X1200 flash replacement: 手順 6、 2の画像 2
    • Slowly lift metal tray to the right.

    • Be careful not to bend the screw tabs or rip out the ribbon cable.

    • Remove ribbon cable by using the spudger to lift up the black ribbon gate to release the ribbon

  7. Sanyo VPC-X1200 flash replacement, Lens Unit: 手順 7、 1の画像 1
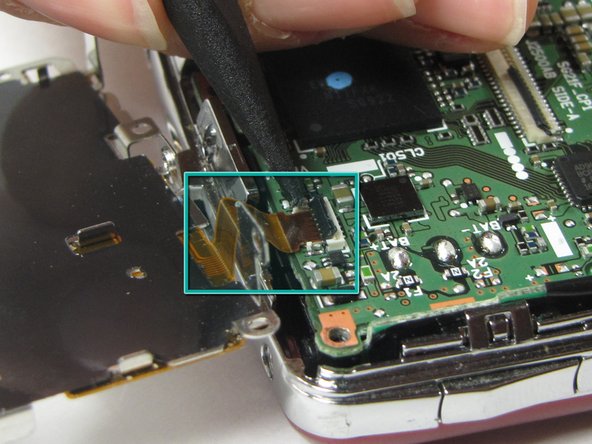
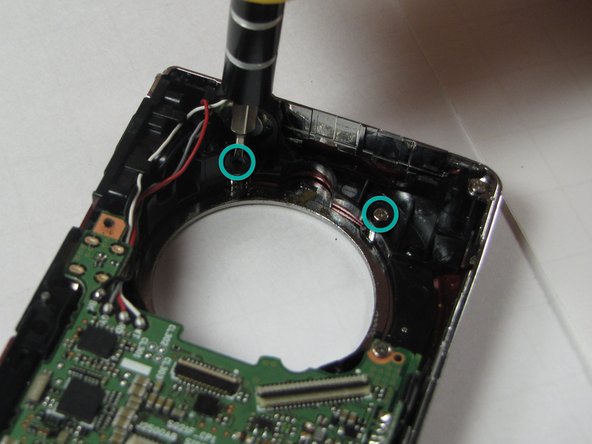
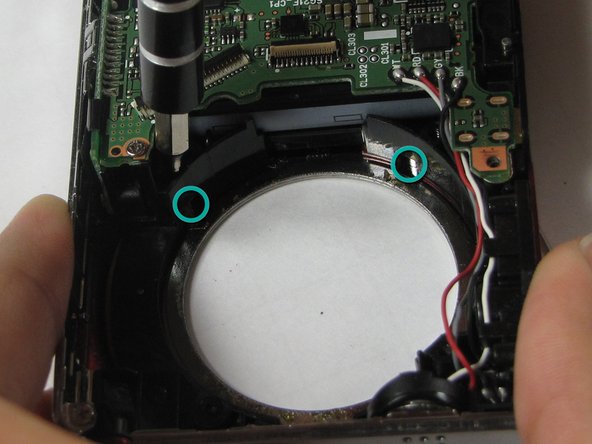
    • Disconnect the two ribbon cables from the lens unit by using the spudger to lift the ribbon gates.

    • One gate is black and another is white.

  8. Sanyo VPC-X1200 flash replacement: 手順 8、 2の画像 1 Sanyo VPC-X1200 flash replacement: 手順 8、 2の画像 2
    • Remove the three silver screws.

    • Three 5.5mm screws

  9. Sanyo VPC-X1200 flash replacement: 手順 9、 1の画像 1
    • Lift the lens unit free of the camera. A spudger can be used to separate the lens unit if necessary.

  10. Sanyo VPC-X1200 flash replacement, Flash Lens: 手順 10、 3の画像 1 Sanyo VPC-X1200 flash replacement, Flash Lens: 手順 10、 3の画像 2 Sanyo VPC-X1200 flash replacement, Flash Lens: 手順 10、 3の画像 3
    • Remove 4 screws attached to the exterior silver bezel.

    • Four 3.5mm screws

  11. Sanyo VPC-X1200 flash replacement: 手順 11、 1の画像 1
    • Remove round silver bezel from the front of the camera.

  12. Sanyo VPC-X1200 flash replacement: 手順 12、 1の画像 1
    • Remove the two screws on the bottom of the front cover.

  13. Sanyo VPC-X1200 flash replacement: 手順 13、 1の画像 1
    • Remove tripod mount.

  14. Sanyo VPC-X1200 flash replacement: 手順 14、 1の画像 1
    • Carefully lift off the front cover plate of the camera.

  15. Sanyo VPC-X1200 flash replacement: 手順 15、 1の画像 1
    • Remove the flash lens using the spudger or a finger.

    • It will be attached by a piece of tape, peel the lens off of that piece of tape without removing the tape.

終わりに

To reassemble your device, follow these instructions in reverse order.

作成者

4人の作成者と共同で作成されました。

Anthony Giardina

メンバー登録日: 04/19/10

20 ポイント

7のガイドは作成済み

チーム

Cal Poly, Team 7-10, Maness Spring 2010 Cal Poly, Team 7-10, Maness Spring 2010人のメンバー

CPSU-MANESS-S10S7G10

4 メンバー

14のガイドは作成済み

0 件のコメント

コメントを追加

統計データ:

過去 24時間: 1

過去 7 日: 1

過去 30 日: 3

今までの合計 2,107