メインコンテンツにスキップ

Sanyo Katana Back Casing Replacement

必要な工具と部品

  1. Sanyo Katana Back Casing Replacement, Battery: 手順 1、 3の画像 1 Sanyo Katana Back Casing Replacement, Battery: 手順 1、 3の画像 2 Sanyo Katana Back Casing Replacement, Battery: 手順 1、 3の画像 3
    • Place thumb on the tab located at the back of the phone and slide button towards your hand and away from phone.

    • While holding down the button, pull cover off with other hand.

  2. Sanyo Katana Back Casing Replacement: 手順 2、 3の画像 1 Sanyo Katana Back Casing Replacement: 手順 2、 3の画像 2 Sanyo Katana Back Casing Replacement: 手順 2、 3の画像 3
    • Use fingers to grip the battery and remove it from the phone.

  3. Sanyo Katana Back Casing Replacement, Back Casing: 手順 3、 1の画像 1
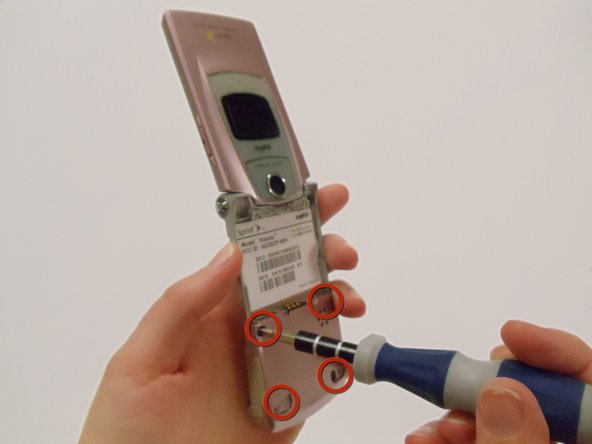
    • Using a spudger, remove the four rubber coverings on the lower back plate.

  4. Sanyo Katana Back Casing Replacement: 手順 4、 3の画像 1 Sanyo Katana Back Casing Replacement: 手順 4、 3の画像 2 Sanyo Katana Back Casing Replacement: 手順 4、 3の画像 3
    • Using a Tri-wing Y0 screwdriver, remove the four 4.4mm screws securing the back plate.

  5. Sanyo Katana Back Casing Replacement: 手順 5、 3の画像 1 Sanyo Katana Back Casing Replacement: 手順 5、 3の画像 2 Sanyo Katana Back Casing Replacement: 手順 5、 3の画像 3
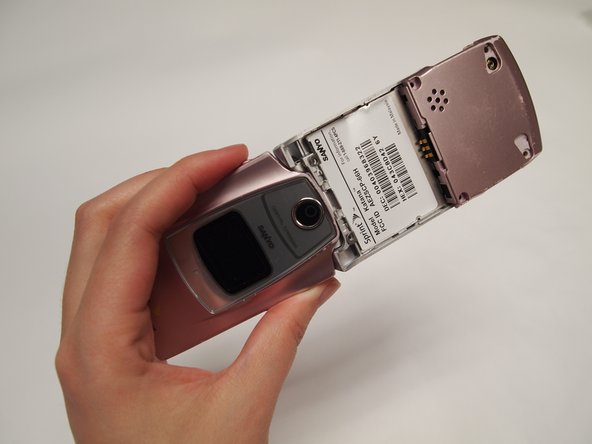
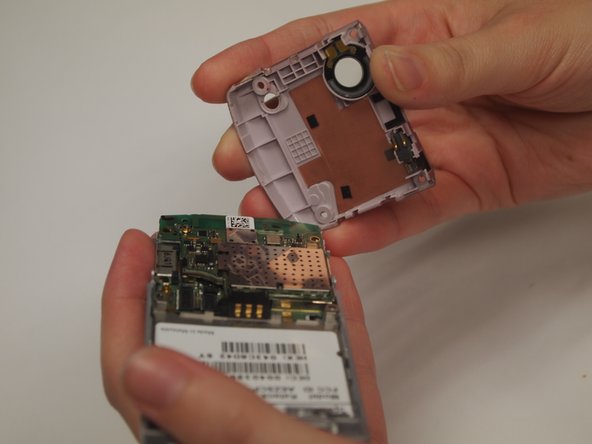
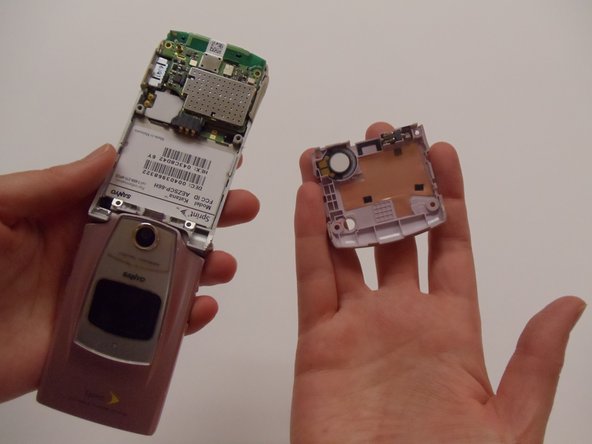
    • Remove the lower back cover to reveal part of the motherboard and the circular speaker housed in the back cover plate.

終わりに

To reassemble your device, follow these instructions in reverse order.

2 の人々がこのガイドを完成させました。

作成者

5人の作成者と共同で作成されました。

Preston

メンバー登録日: 03/11/13

216 ポイント

5のガイドは作成済み

チーム

Clemson, Team 12-1, Benson Spring 2013 Clemson, Team 12-1, Benson Spring 2013人のメンバー

CLEM-BENSON-S13S12G1

4 メンバー

20のガイドは作成済み

0 件のコメント

コメントを追加

統計データ:

過去 24時間: 0

過去 7 日: 0

過去 30 日: 2

今までの合計 531