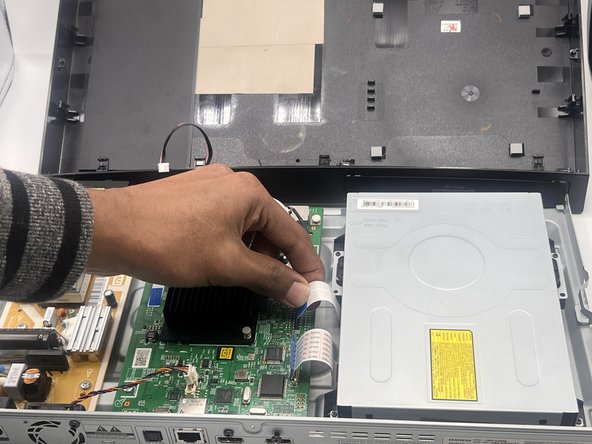
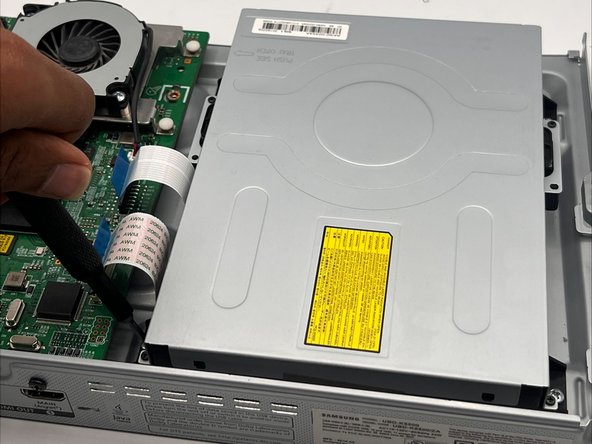
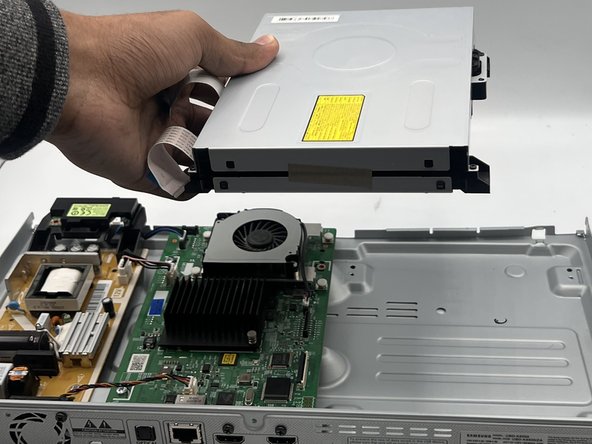
メインコンテンツにスキップ

Samsung UBD-K8500 Disc Tray Replacement

必要な工具と部品

  1. Samsung UBD-K8500 Disc Tray Replacement, Top Panel: 手順 1、 2の画像 1 Samsung UBD-K8500 Disc Tray Replacement, Top Panel: 手順 1、 2の画像 2
    • Remove the six 10 mm screws from the back of the unit using a Phillips #0 screwdriver.

  2. Samsung UBD-K8500 Disc Tray Replacement: 手順 2、 2の画像 1 Samsung UBD-K8500 Disc Tray Replacement: 手順 2、 2の画像 2
    • Carefully lift up the top panel.

    • There is a cables that must be disconnected before completely removing the panel.

    • Detach the cable connecting the top panel to the motherboard.

    • Take the top off and set it to the side.

  3. Samsung UBD-K8500 Disc Tray Replacement, Disc Tray: 手順 3、 2の画像 1 Samsung UBD-K8500 Disc Tray Replacement, Disc Tray: 手順 3、 2の画像 2
    • Find the blue tabs of the ribbon connectors, and gently pull them both out.

  4. Samsung UBD-K8500 Disc Tray Replacement: 手順 4、 2の画像 1 Samsung UBD-K8500 Disc Tray Replacement: 手順 4、 2の画像 2
    • Remove the four 8 mm screws from the disc drive using a Phillips #0 screwdriver.

  5. Samsung UBD-K8500 Disc Tray Replacement: 手順 5、 2の画像 1 Samsung UBD-K8500 Disc Tray Replacement: 手順 5、 2の画像 2
    • Gently remove the disc tray.

終わりに

To reassemble your device, follow these instructions in reverse order.

作成者

2人の作成者と共同で作成されました。

Aashishpal Reddy Kandala

メンバー登録日: 09/12/23

97 ポイント

1ガイドが承認済み

チーム

University of North Texas, Team 2-7, Harold Fall 2023 University of North Texas, Team 2-7, Harold Fall 2023人のメンバー

UNT-HAROLD-F23S2G7

4 メンバー

5のガイドは作成済み

0 件のコメント

コメントを追加

統計データ:

過去 24時間: 0

過去 7 日: 0

過去 30 日: 1

今までの合計 77