メインコンテンツにスキップ

Samsung TFT Color YP-T7J The Screen Replacement

必要な工具と部品

  1. Samsung TFT Color YP-T7J The Screen Replacement, The Back Cover: 手順 1、 2の画像 1 Samsung TFT Color YP-T7J The Screen Replacement, The Back Cover: 手順 1、 2の画像 2
    • Remove the 2 screws on the back cover using a Phillips head #0 screwdriver.

  2. Samsung TFT Color YP-T7J The Screen Replacement: 手順 2、 2の画像 1 Samsung TFT Color YP-T7J The Screen Replacement: 手順 2、 2の画像 2
    • Remove the screw on each side of the device using a Phillips head screwdriver.

  3. Samsung TFT Color YP-T7J The Screen Replacement: 手順 3、 3の画像 1 Samsung TFT Color YP-T7J The Screen Replacement: 手順 3、 3の画像 2 Samsung TFT Color YP-T7J The Screen Replacement: 手順 3、 3の画像 3
    • Using the plastic opening kit, place the prying end of the kit into the opening created by removing the screws.

    • Gently pry open the back cover. Insert the plastic opening tool in between the cover joints.

  4. Samsung TFT Color YP-T7J The Screen Replacement, The Battery: 手順 4、 2の画像 1 Samsung TFT Color YP-T7J The Screen Replacement, The Battery: 手順 4、 2の画像 2
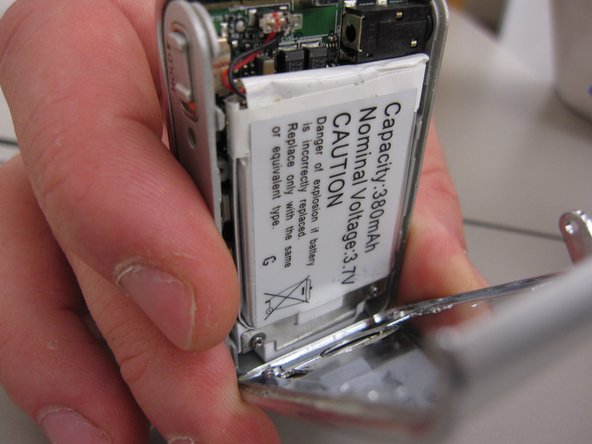
    • Once the back cover has been removed the battery will be visible.

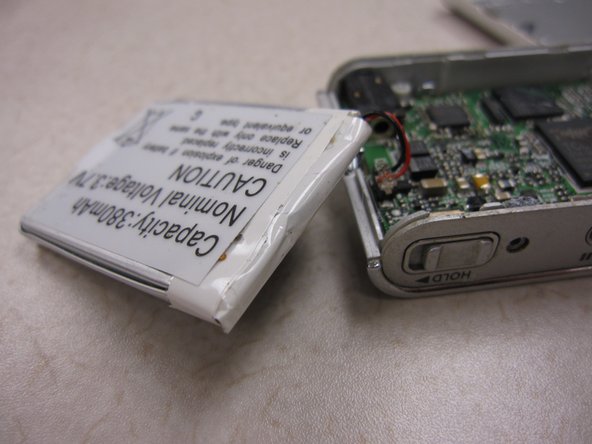
    • Pry the battery from the device.

    • NOTE: The battery should still be connected to the device

  5. Samsung TFT Color YP-T7J The Screen Replacement: 手順 5、 2の画像 1 Samsung TFT Color YP-T7J The Screen Replacement: 手順 5、 2の画像 2
    • Unplug the battery connecting cables.

    • NOTE: The battery now should be free from all connections to the device.

  6. Samsung TFT Color YP-T7J The Screen Replacement, Disassembling Samsung TFT Color YP-T7J USB Connector Dock: 手順 6、 3の画像 1 Samsung TFT Color YP-T7J The Screen Replacement, Disassembling Samsung TFT Color YP-T7J USB Connector Dock: 手順 6、 3の画像 2 Samsung TFT Color YP-T7J The Screen Replacement, Disassembling Samsung TFT Color YP-T7J USB Connector Dock: 手順 6、 3の画像 3
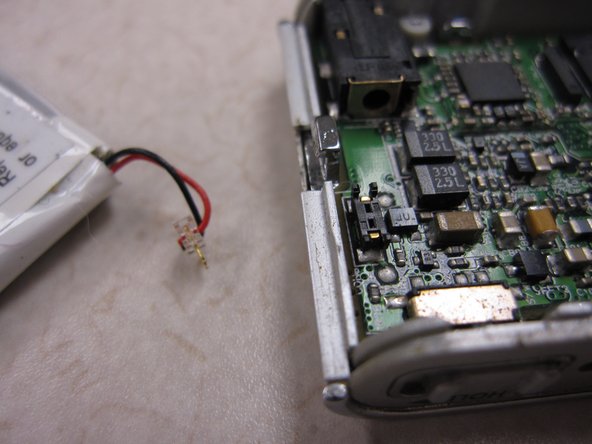
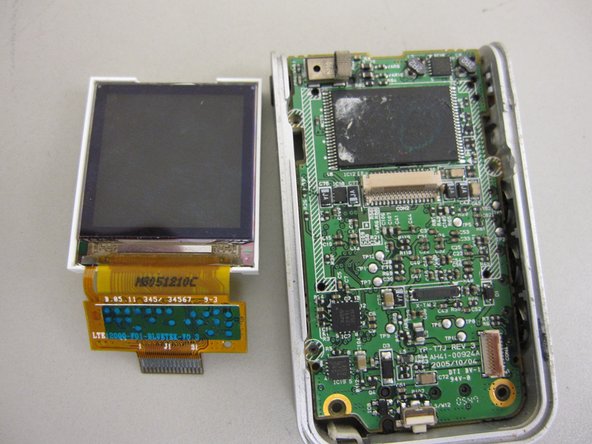
    • Once the battery has been removed you can see the motherboard.

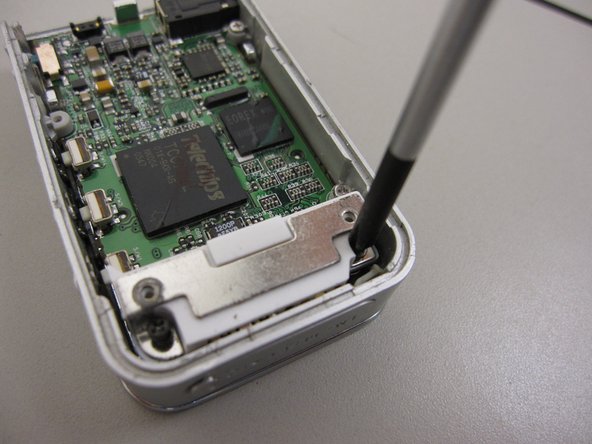
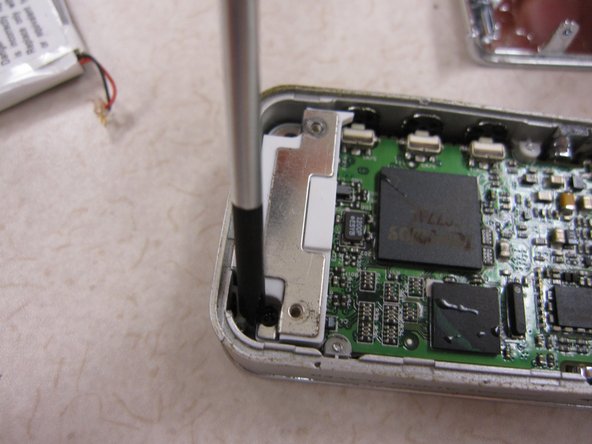
    • Unscrew 4 screws on the metal docket using a Phillips head screw driver.

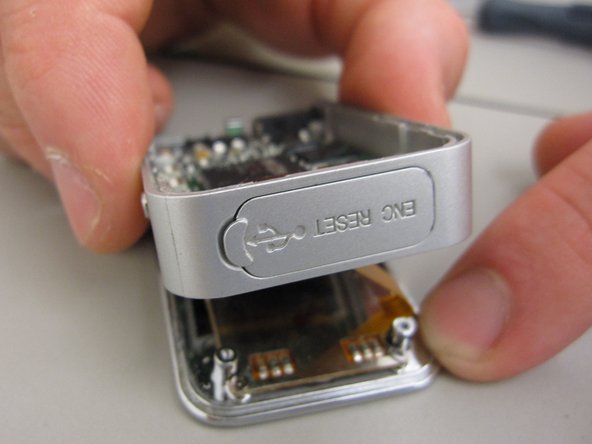
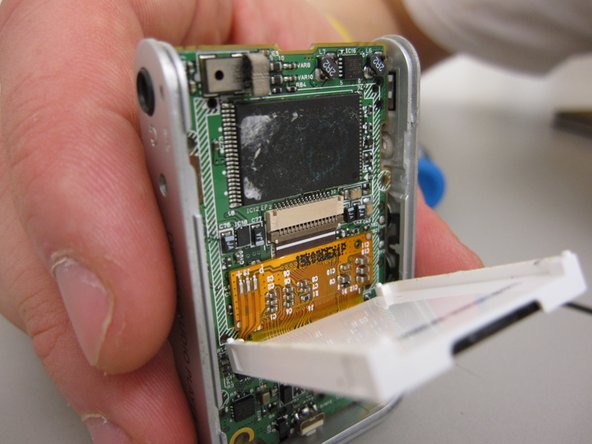
    • The USB connector can now be taken off of the device.

  7. Samsung TFT Color YP-T7J The Screen Replacement, The Front Cover: 手順 7、 2の画像 1 Samsung TFT Color YP-T7J The Screen Replacement, The Front Cover: 手順 7、 2の画像 2
    • Using the philips screwdriver, remove the two screws on the mother board.

  8. Samsung TFT Color YP-T7J The Screen Replacement: 手順 8、 3の画像 1 Samsung TFT Color YP-T7J The Screen Replacement: 手順 8、 3の画像 2 Samsung TFT Color YP-T7J The Screen Replacement: 手順 8、 3の画像 3
    • Place the pry tool in-between the front cover and mother board.

    • Gently separate the front cover.

  9. Samsung TFT Color YP-T7J The Screen Replacement: 手順 9、 1の画像 1
    • After opening the front cover you will see and electric ribbon connecting the buttons to the mother board.

  10. Samsung TFT Color YP-T7J The Screen Replacement: 手順 10、 2の画像 1 Samsung TFT Color YP-T7J The Screen Replacement: 手順 10、 2の画像 2
    • CAUTION: Do not rip the electric ribbon from the mother board.

    • Carefully flip up the plastic lip that holds the electric ribbon to the board.

  11. Samsung TFT Color YP-T7J The Screen Replacement, The Screen: 手順 11、 2の画像 1 Samsung TFT Color YP-T7J The Screen Replacement, The Screen: 手順 11、 2の画像 2
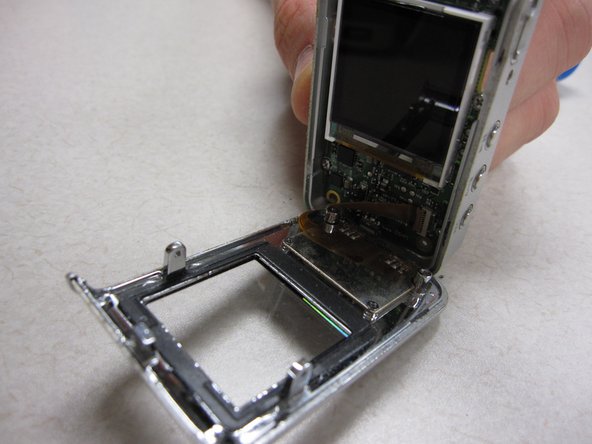
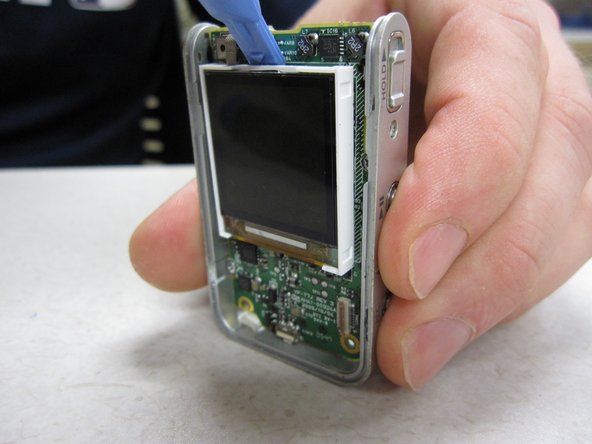
    • Place the pry tool between the plastic housing around the LCD screen, and the mother board.

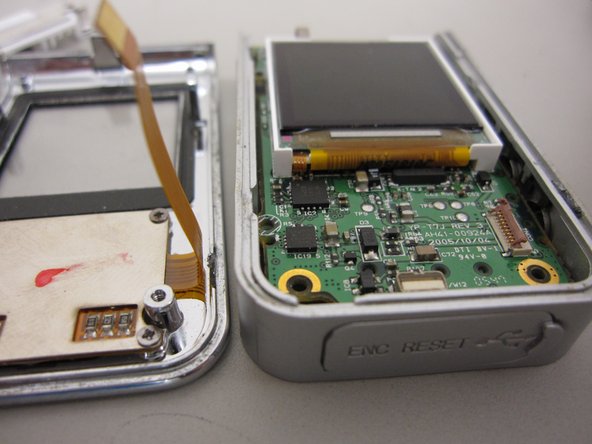
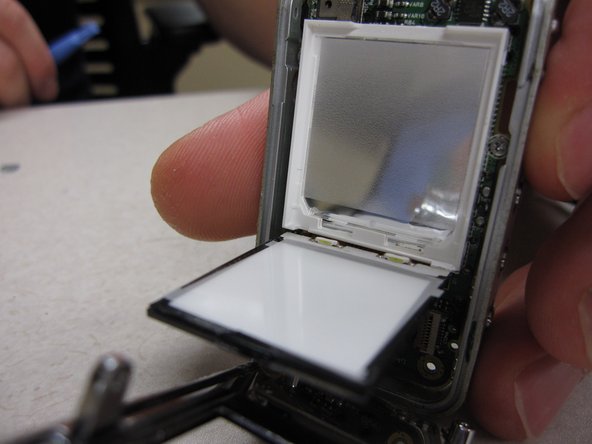
    • Gently separate the screen housing from the mother board

    • CAUTION: The screen is still attached to the mother board via another electric ribbon.

  12. Samsung TFT Color YP-T7J The Screen Replacement: 手順 12、 2の画像 1 Samsung TFT Color YP-T7J The Screen Replacement: 手順 12、 2の画像 2
    • Using a plastic pry tool to flip up the lip, which connects the electric ribbon to the mother board.

  13. Samsung TFT Color YP-T7J The Screen Replacement: 手順 13、 2の画像 1 Samsung TFT Color YP-T7J The Screen Replacement: 手順 13、 2の画像 2
    • Place the pry tool between the LCD screen and the white housing unit

    • Gently separate the two.

  14. Samsung TFT Color YP-T7J The Screen Replacement: 手順 14、 2の画像 1 Samsung TFT Color YP-T7J The Screen Replacement: 手順 14、 2の画像 2
    • Insert the new screen into the white unit.

    • Connect the LCD screen to the mother board by inserting the electric ribbon into its port, and closing the lip.

終わりに

To reassemble your device, follow these instructions in reverse order.

2 の人々がこのガイドを完成させました。

作成者

4人の作成者と共同で作成されました。

Jason Farr

メンバー登録日: 10/21/13

353 ポイント

3のガイドは作成済み

チーム

Clemson, Team 14-8, Benson Fall 2013 Clemson, Team 14-8, Benson Fall 2013人のメンバー

CLEM-BENSON-F13S14G8

3 メンバー

7のガイドは作成済み

0 件のコメント

コメントを追加

統計データ:

過去 24時間: 0

過去 7 日: 0

過去 30 日: 1

今までの合計 403