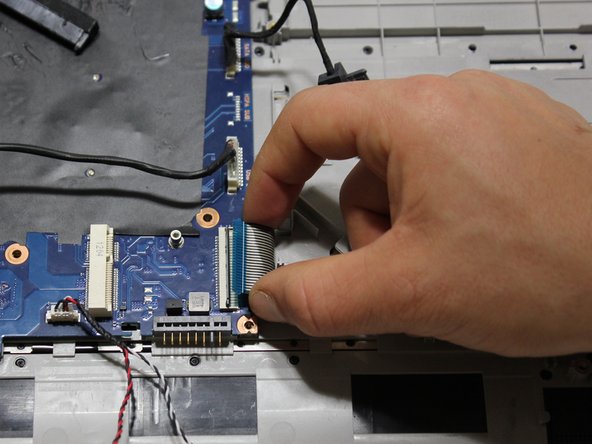
メインコンテンツにスキップ

Samsung Series 3 NP300E5A-A02UB Motherboard Replacement

必要な工具と部品

  1. Samsung Series 3 NP300E5A-A02UB Motherboard Replacement, Battery: 手順 1、 1の画像 1
    • Place the computer upside down, with the battery pack facing away from you.

  2. Samsung Series 3 NP300E5A-A02UB Motherboard Replacement: 手順 2、 2の画像 1 Samsung Series 3 NP300E5A-A02UB Motherboard Replacement: 手順 2、 2の画像 2
    • Remove the battery by pushing out the locks on either end then pushing the battery away from you.

  3. Samsung Series 3 NP300E5A-A02UB Motherboard Replacement, Panel: 手順 3、 1の画像 1
    • Using the J0 Japanese Industrial Standard screwdriver, remove the 4.5mm screw on the ODD/HDD Memory panel.

  4. Samsung Series 3 NP300E5A-A02UB Motherboard Replacement: 手順 4、 2の画像 1 Samsung Series 3 NP300E5A-A02UB Motherboard Replacement: 手順 4、 2の画像 2
    • Pull the panel towards you to release it, then lift it off the computer.

  5. Samsung Series 3 NP300E5A-A02UB Motherboard Replacement: 手順 5、 1の画像 1
    • Using the J0 Japanese Industrial Standard screwdriver, remove the 4.5mm screw next to the label “ODD."

    • Remove the three 4.5mm screws from around the memory drive nest.

  6. Samsung Series 3 NP300E5A-A02UB Motherboard Replacement: 手順 6、 1の画像 1
    • Using the J1 Japanese Industrial Standard screwdriver, remove the thirteen 9.5mm screws from the panel that cover the bottom of the computer.

  7. Samsung Series 3 NP300E5A-A02UB Motherboard Replacement: 手順 7、 3の画像 1 Samsung Series 3 NP300E5A-A02UB Motherboard Replacement: 手順 7、 3の画像 2 Samsung Series 3 NP300E5A-A02UB Motherboard Replacement: 手順 7、 3の画像 3
    • Begin removing the computer casing by prying beside the disk drive with the iFixit opening tool and the spudger, working counterclockwise.

    • Lift the panel from the computer.

  8. Samsung Series 3 NP300E5A-A02UB Motherboard Replacement, Disc Drive: 手順 8、 1の画像 1
    • Remove the disc drive by pulling it towards the outside of the computer.

  9. Samsung Series 3 NP300E5A-A02UB Motherboard Replacement, Motherboard: 手順 9、 2の画像 1 Samsung Series 3 NP300E5A-A02UB Motherboard Replacement, Motherboard: 手順 9、 2の画像 2
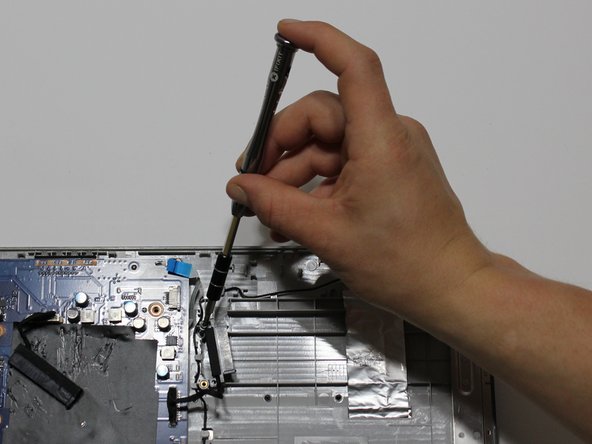
    • Using the J0 Japanese Industrial Standard screwdriver, remove the two 7mm screws that hold down the plug-in to the disc drive.

  10. Samsung Series 3 NP300E5A-A02UB Motherboard Replacement: 手順 10、 1の画像 1
    • Using the J0 Japanese Industrial Standard screwdriver, remove the 3.5mm screw from the chip connected to the USB ports.

  11. Samsung Series 3 NP300E5A-A02UB Motherboard Replacement: 手順 11、 2の画像 1 Samsung Series 3 NP300E5A-A02UB Motherboard Replacement: 手順 11、 2の画像 2
    • Using the tweezers, gently pry up the chip and ports, and unthread the wire from its holders, without crimping the wires.

  12. Samsung Series 3 NP300E5A-A02UB Motherboard Replacement: 手順 12、 2の画像 1 Samsung Series 3 NP300E5A-A02UB Motherboard Replacement: 手順 12、 2の画像 2
    • Using the J0 Japanese Industrial Standard screwdriver, remove the 4.5mm screw holding down the chip next to the power prongs where the battery connects.

    • Gently pull the chip from its connector.

  13. Samsung Series 3 NP300E5A-A02UB Motherboard Replacement: 手順 13、 2の画像 1 Samsung Series 3 NP300E5A-A02UB Motherboard Replacement: 手順 13、 2の画像 2
    • Gently pull up the aluminum strip from the top right corner of the computer and unthread the wire from the holders using the tweezers, without crimping the wire or tearing the aluminum.

  14. Samsung Series 3 NP300E5A-A02UB Motherboard Replacement: 手順 14、 1の画像 1
    • Disconnect the wire screen connection from its port by pulling upwards.

  15. Samsung Series 3 NP300E5A-A02UB Motherboard Replacement: 手順 15、 2の画像 1 Samsung Series 3 NP300E5A-A02UB Motherboard Replacement: 手順 15、 2の画像 2
    • Gently pull up the speaker towers from either end of the computer.

  16. Samsung Series 3 NP300E5A-A02UB Motherboard Replacement: 手順 16、 2の画像 1 Samsung Series 3 NP300E5A-A02UB Motherboard Replacement: 手順 16、 2の画像 2
    • Using the blunt tweezers, unthread the wires that connect the motherboard to the speakers from their holders, without crimping the wires.

  17. Samsung Series 3 NP300E5A-A02UB Motherboard Replacement: 手順 17、 2の画像 1 Samsung Series 3 NP300E5A-A02UB Motherboard Replacement: 手順 17、 2の画像 2
    • Using the iFixit opening tool, gently pry up the plastic clasp that holds the keyboard power circuit down, and pull out the strip from the connection.

  18. Samsung Series 3 NP300E5A-A02UB Motherboard Replacement: 手順 18、 1の画像 1
    • Pull out the plastic cover to release the Kotl strip, then pull out the strip.

  19. Samsung Series 3 NP300E5A-A02UB Motherboard Replacement: 手順 19、 2の画像 1 Samsung Series 3 NP300E5A-A02UB Motherboard Replacement: 手順 19、 2の画像 2
    • Using the J0 Japanese Industrial Standard screwdriver, remove the four 4.5mm screws from the corners of the motherboard.

    • Lift the motherboard from the computer.

終わりに

To reassemble your device, follow these instructions in reverse order.

ある他の人がこのガイドを完成しました。

作成者

2人の作成者と共同で作成されました。

Timothy Johnson

メンバー登録日: 02/14/19

726 ポイント

5のガイドは作成済み

チーム

Carson-Newman University, Team S1-G1, Sobiech Spring 2019 Carson-Newman University, Team S1-G1, Sobiech Spring 2019人のメンバー

CNU-SOBIECH-S19S1G1

5 メンバー

6のガイドは作成済み

2 件のコメント

I used this guide to put the laptop back together after a motherboard swap as I totally forgot to number the screws! Doh

Great website I never knew about!

Thanks :)

Mike Paterson - 返信

Hi, I'd like to know if I can replace the hhd for a SSD and a higher memory ram cause fabric is 2gb I'd like to change it for a 8gb. Will I get a funcional computer? Mostly to work on word or use it for zoom and such

Orne - 返信

コメントを追加

統計データ:

過去 24時間: 1

過去 7 日: 4

過去 30 日: 16

今までの合計 1,012